Download and Install the Agent
To execute a case, an Agent must be downloaded and installed. Follow these steps to complete the process:
To Download the Agent
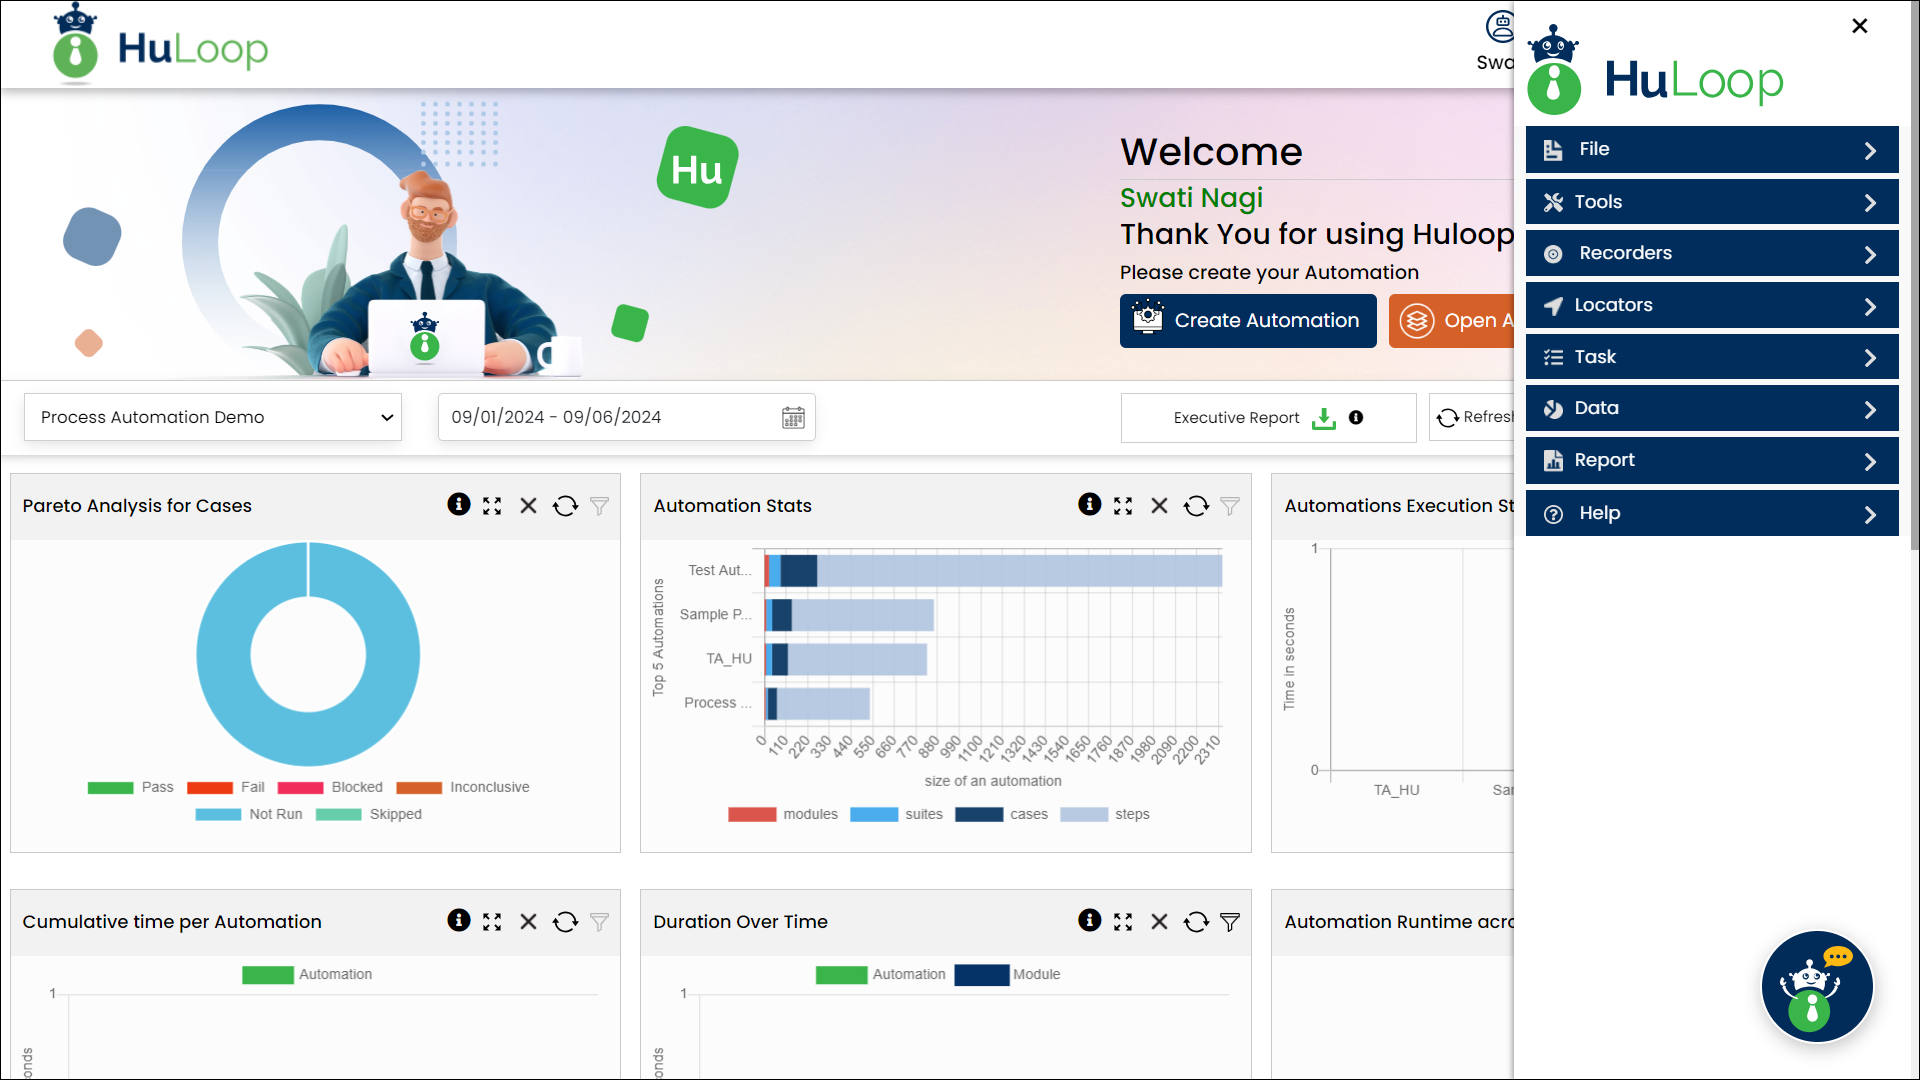
- Click the Menu
 available on the top right of the screen and you will get the following options:
![]()
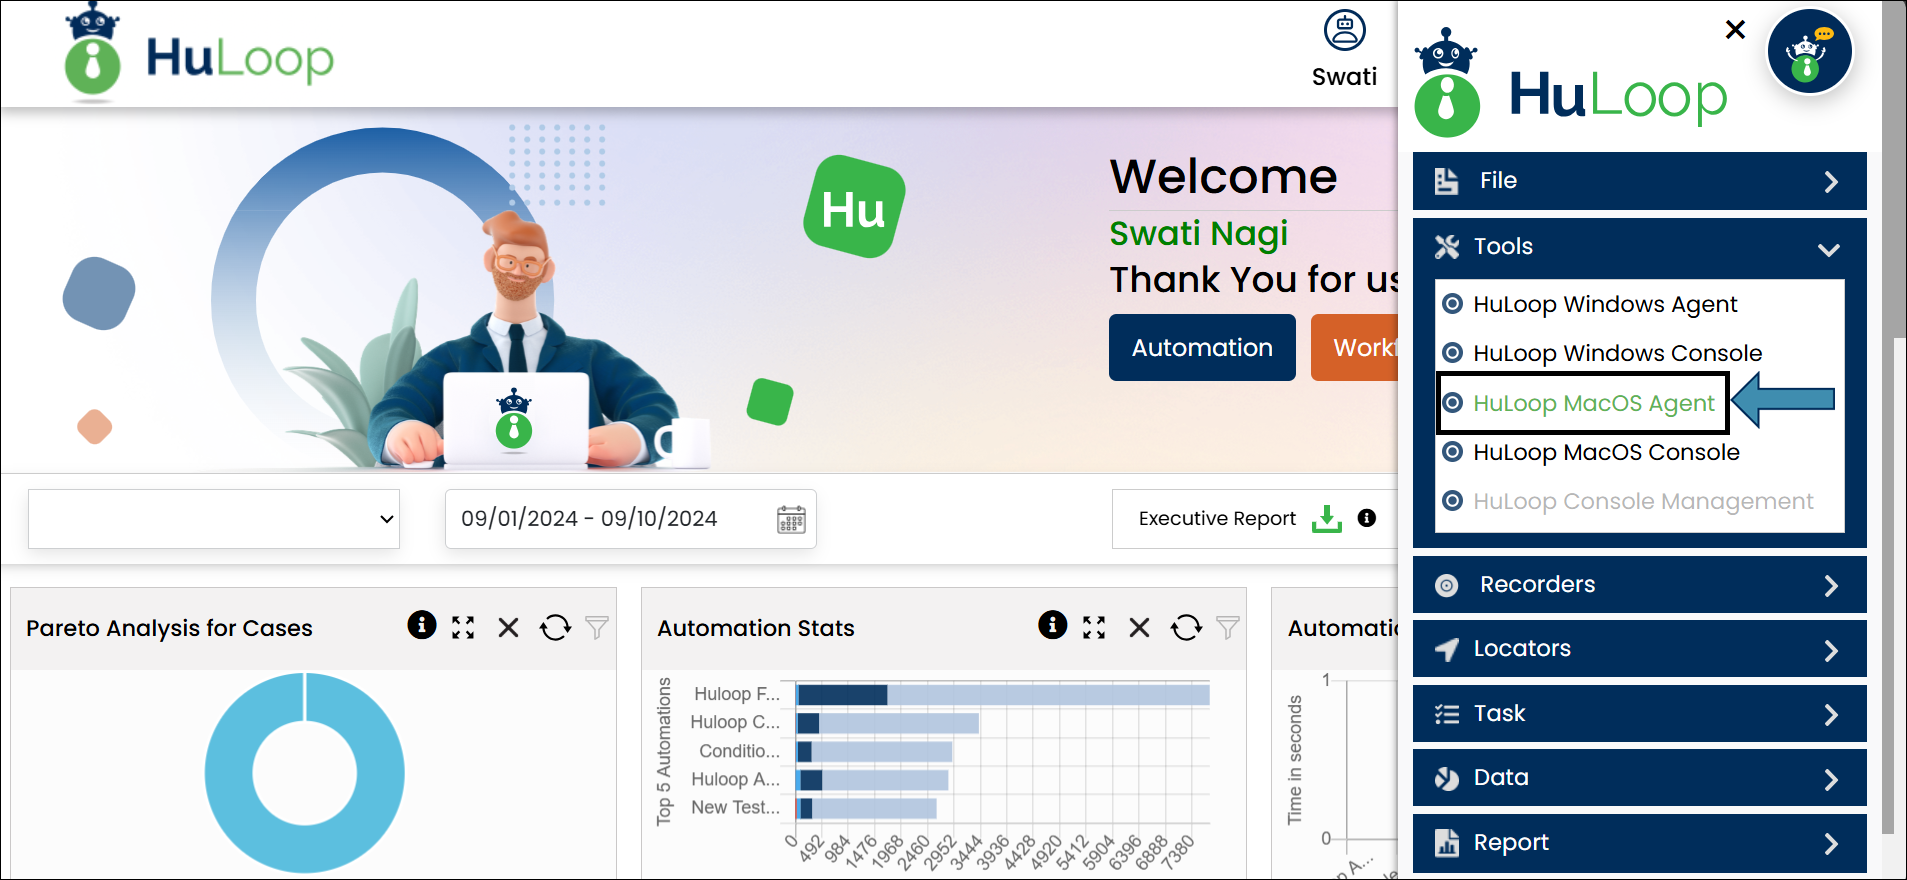
- Expand the Tools option and select the HuLoop MacOS Agent:
The agent will be downloaded as a Zip file (e.g., HuLoop-MAC.zip).
Important: Make sure there are no spaces in the ZIP file or folder name.
To Install the Agent
- Move the downloaded ZIP file to a desired location on your system.
Note: You can also keep the downloaded ZIP file in the Downloads folder and proceed with the installation from there.

- Double-click the ZIP file to extract its contents.

- Open the extracted folder.

- To launch the Agent:
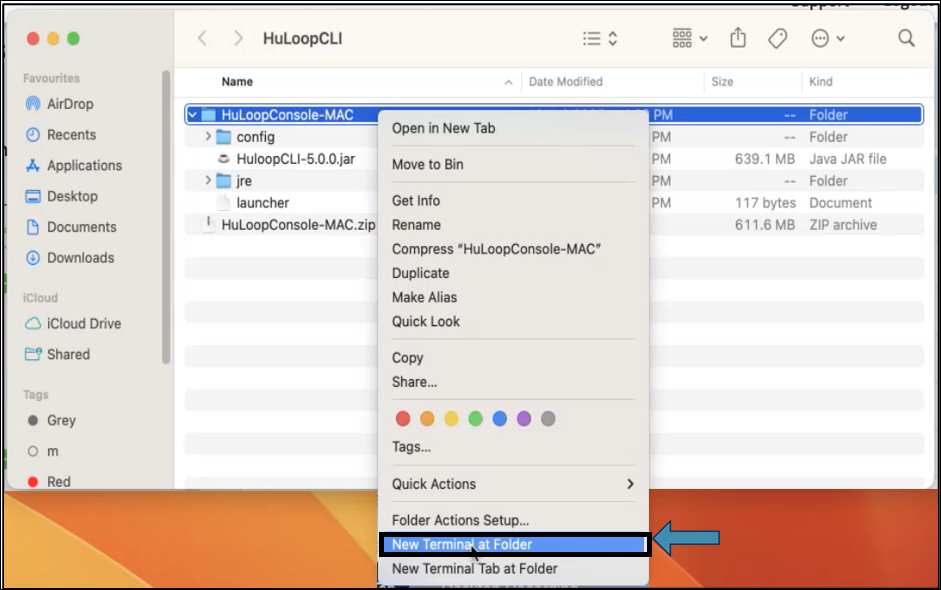
- Right-click the extracted folder.
- Select New Terminal at Folder.
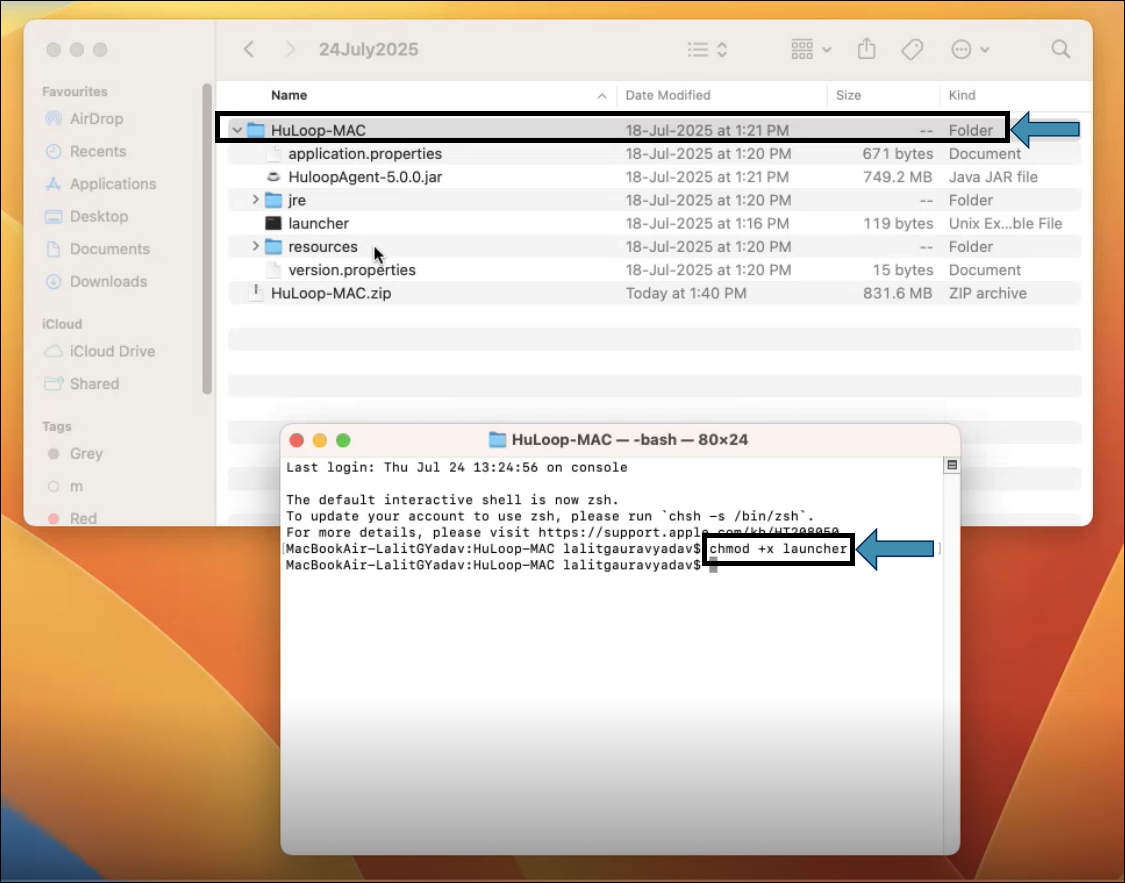
- In the Terminal window, type the following command:
chmod +x launcher
Note: Ensure there’s a space after chmod and before launcher. Commands are case-sensitive.
- Press Enter. This will update the file permissions to allow execution.
Ensure your Google Chrome browser is up to date.
- Now run the launcher by typing:
./launcher - Press Enter.
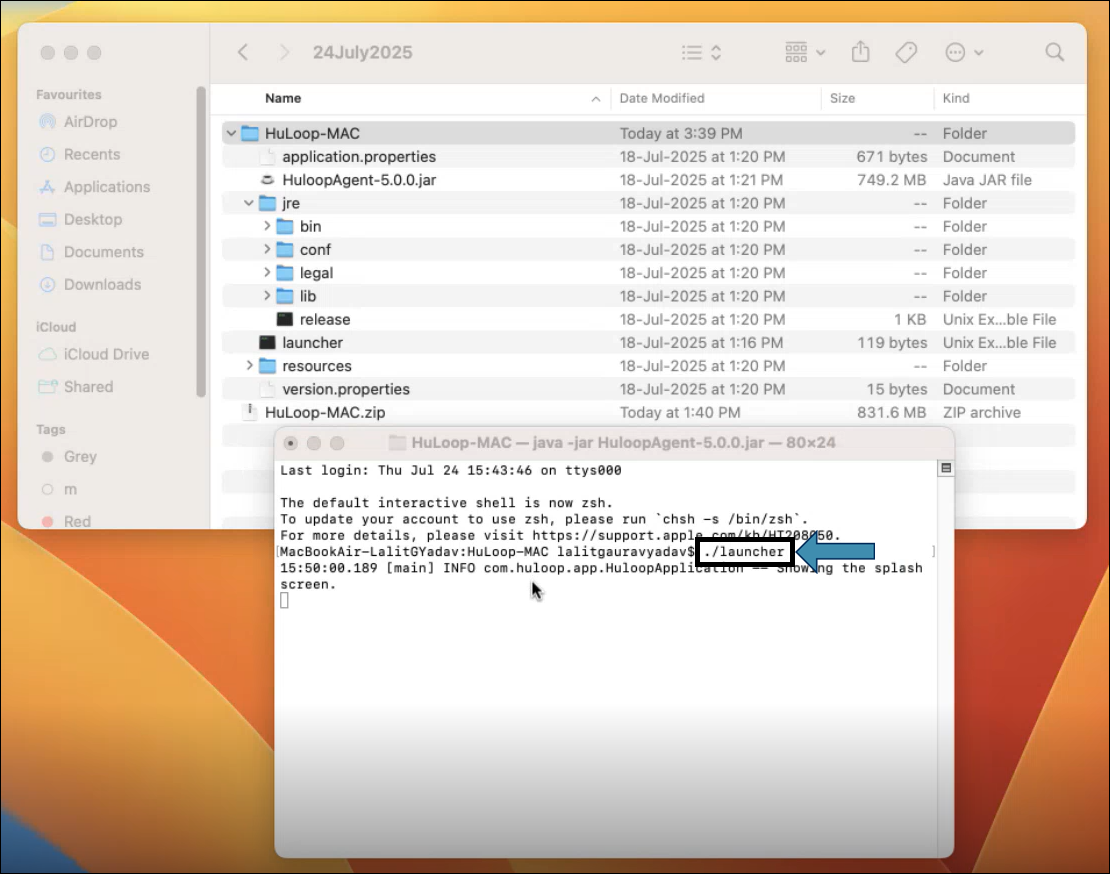
- This will start the HuLoop Desktop Agent:

Note: macOS may prompt you with a security warning. If you encounter a “Java error” or an “unverified developer” warning, go to System Settings > Privacy & Security, then click Allow Anyway. Enter your password if prompted.
- On successful installation, the following screen will appear where you should enter your HuLoop server URL to be used in the Agent and click Continue.
Note: You can find the HuLoop server URL in the following ways:
Option 1: In the browser where you are logged into HuLoop, copy the URL till HuLoop as shown: https://demo.huloop.ai:451/HuLoop (this URL could appear different depending on your specific server URL) and append Rest. The final URL will look like: https://demo.huloop.ai:451/HuLoopRest
Option 2: You can also find the HuLoop server URL to be used in the Agent in the email shared by the HuLoop support team.
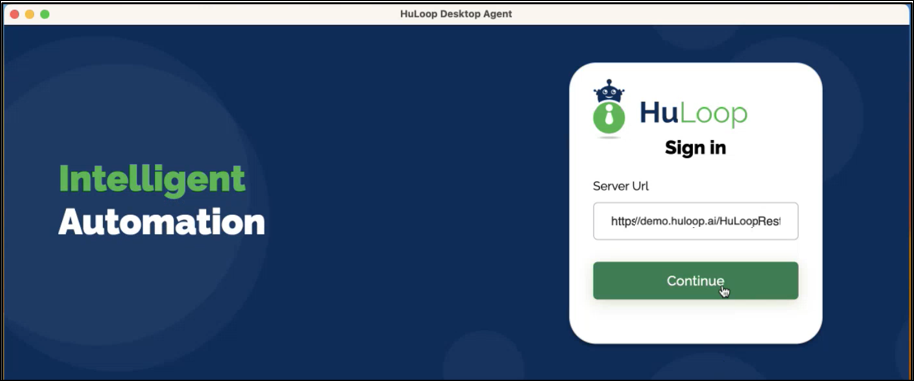
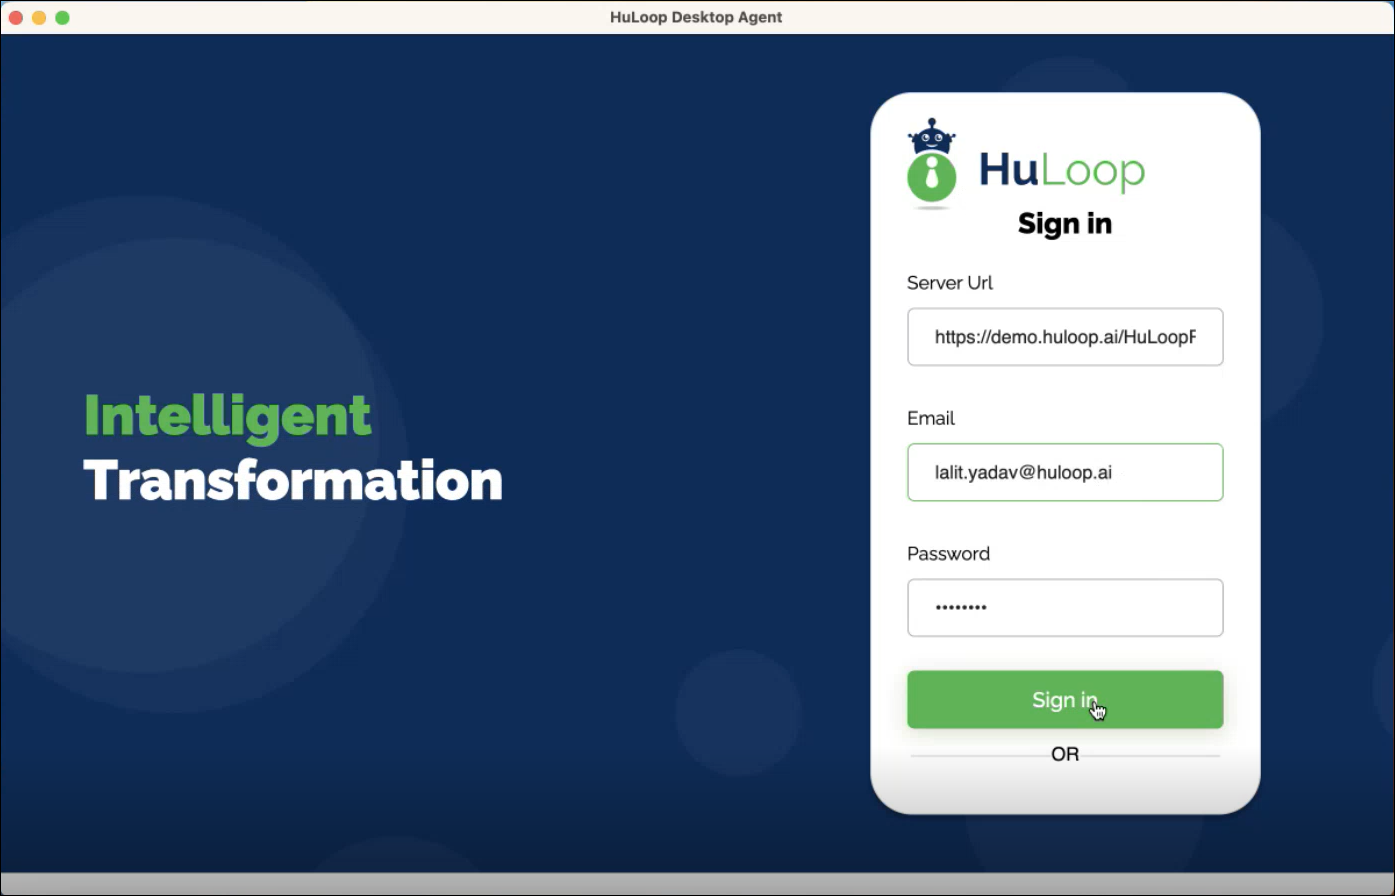
- Sign in using your HuLoop credentials.