Account Management Guide for HuLoop Admin Users
The Account Management section in HuLoop allows you to manage users within your account. You can add new users, update user details, assign permissions, and control access to automations and features.
Access Account Management
Follow these steps to access the Account Management page:
- Sign in to your HuLoop account.
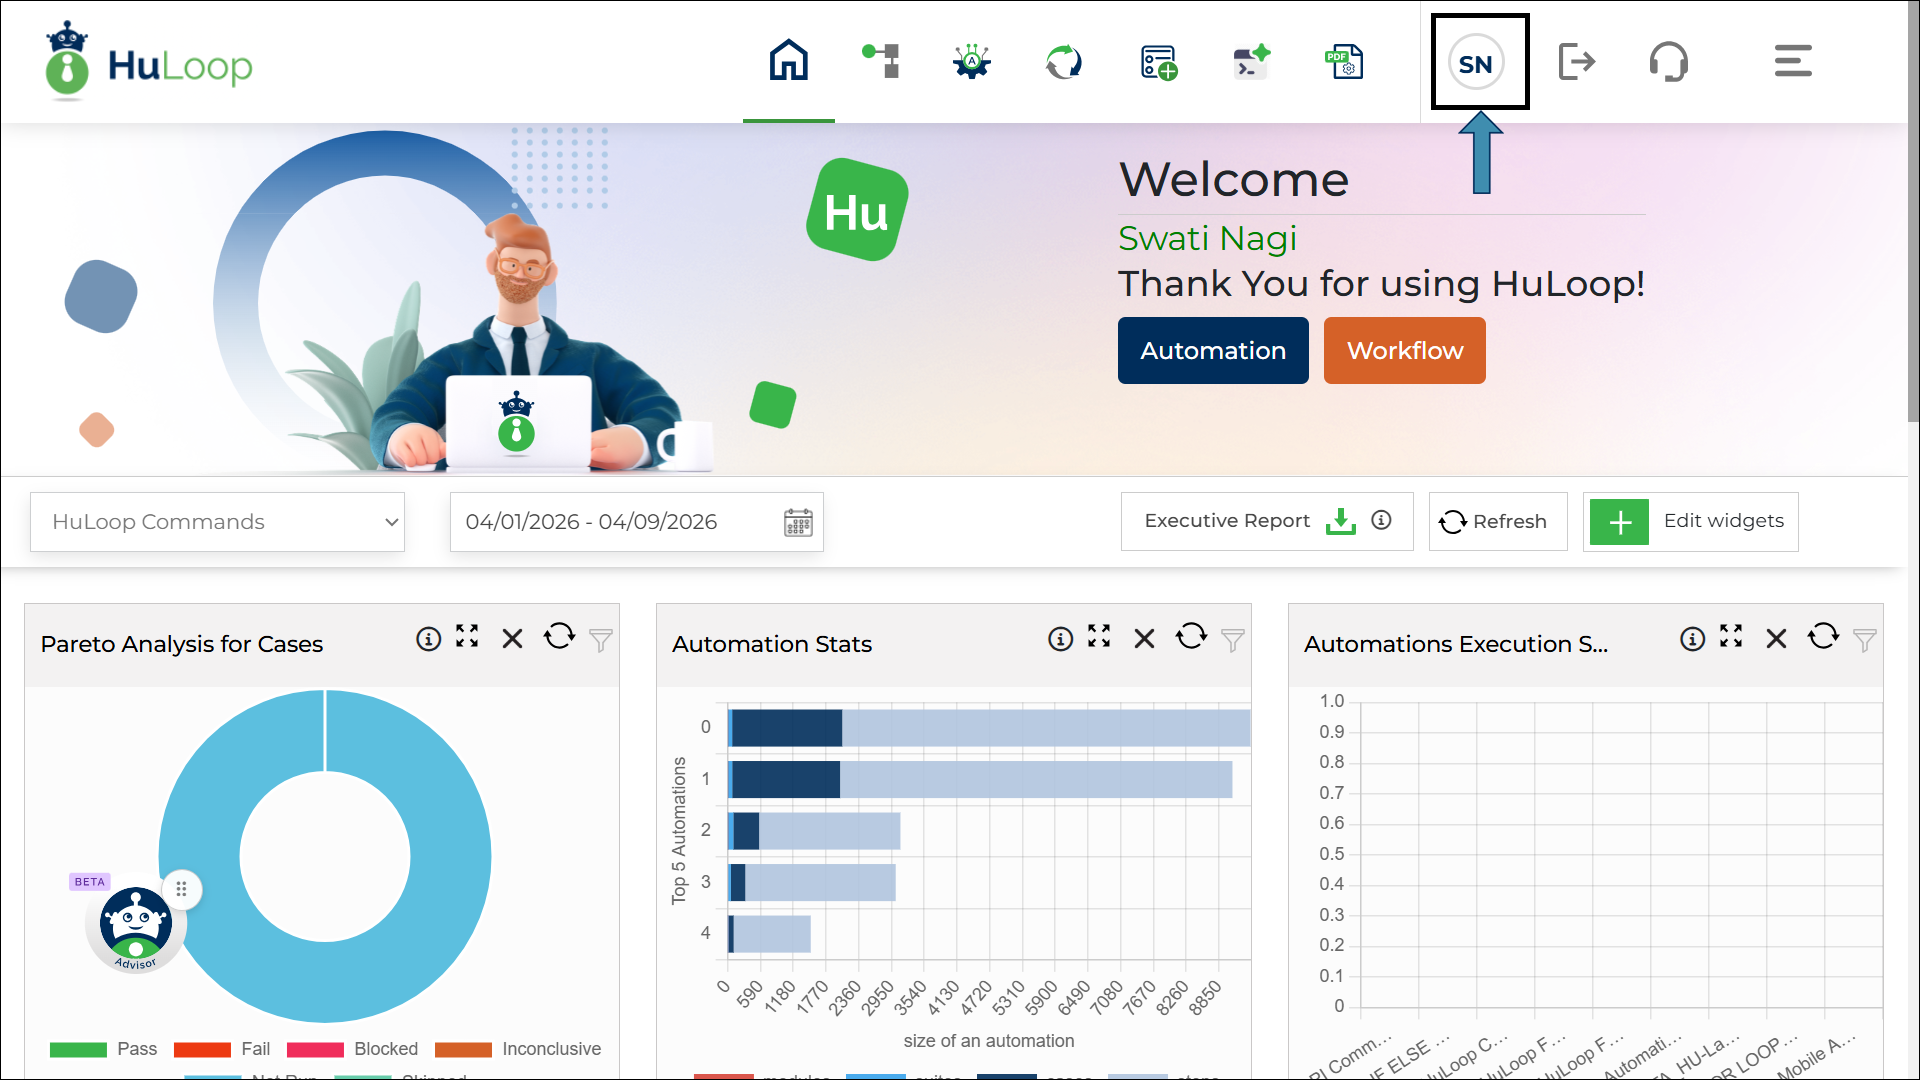
- Click the Profile icon in the top-right corner of the screen.
- From the menu, select Account Management.
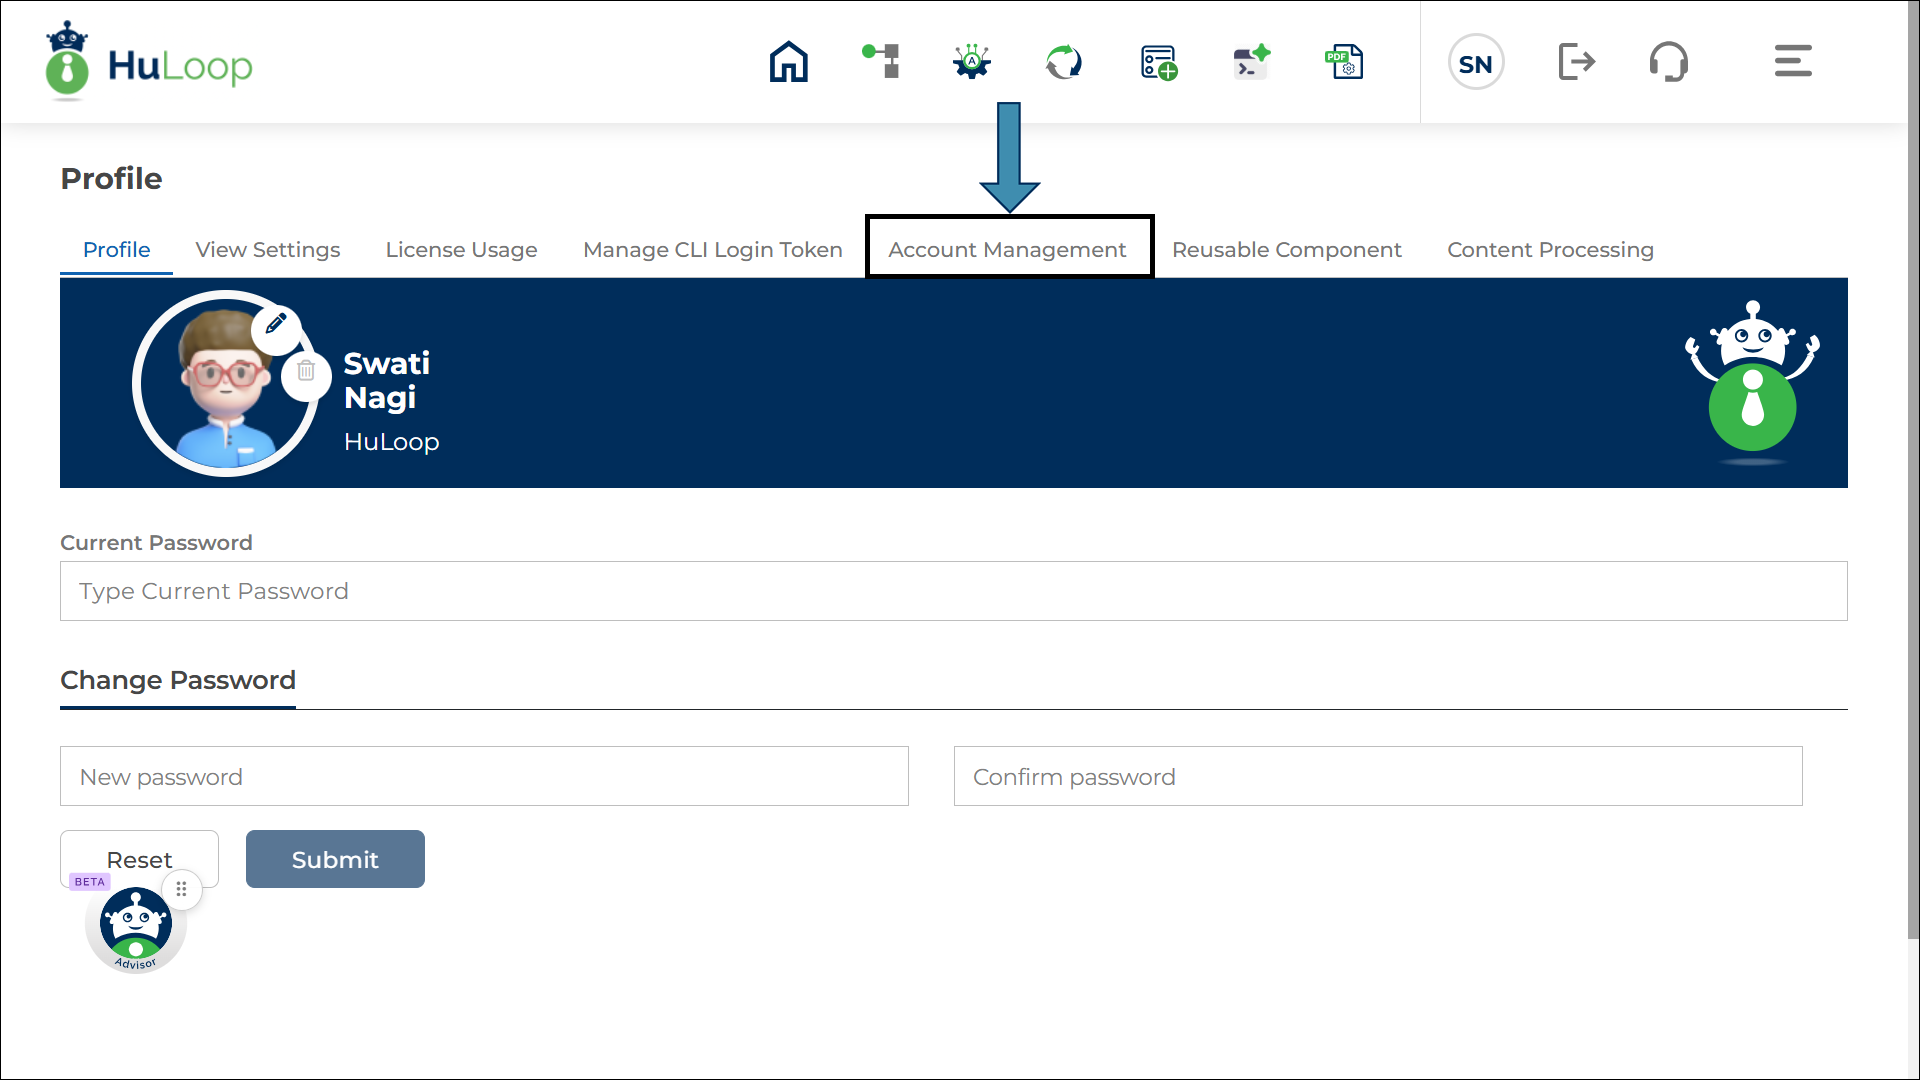
- You will be redirected to the Account Management page.
Understand the Account Management Page
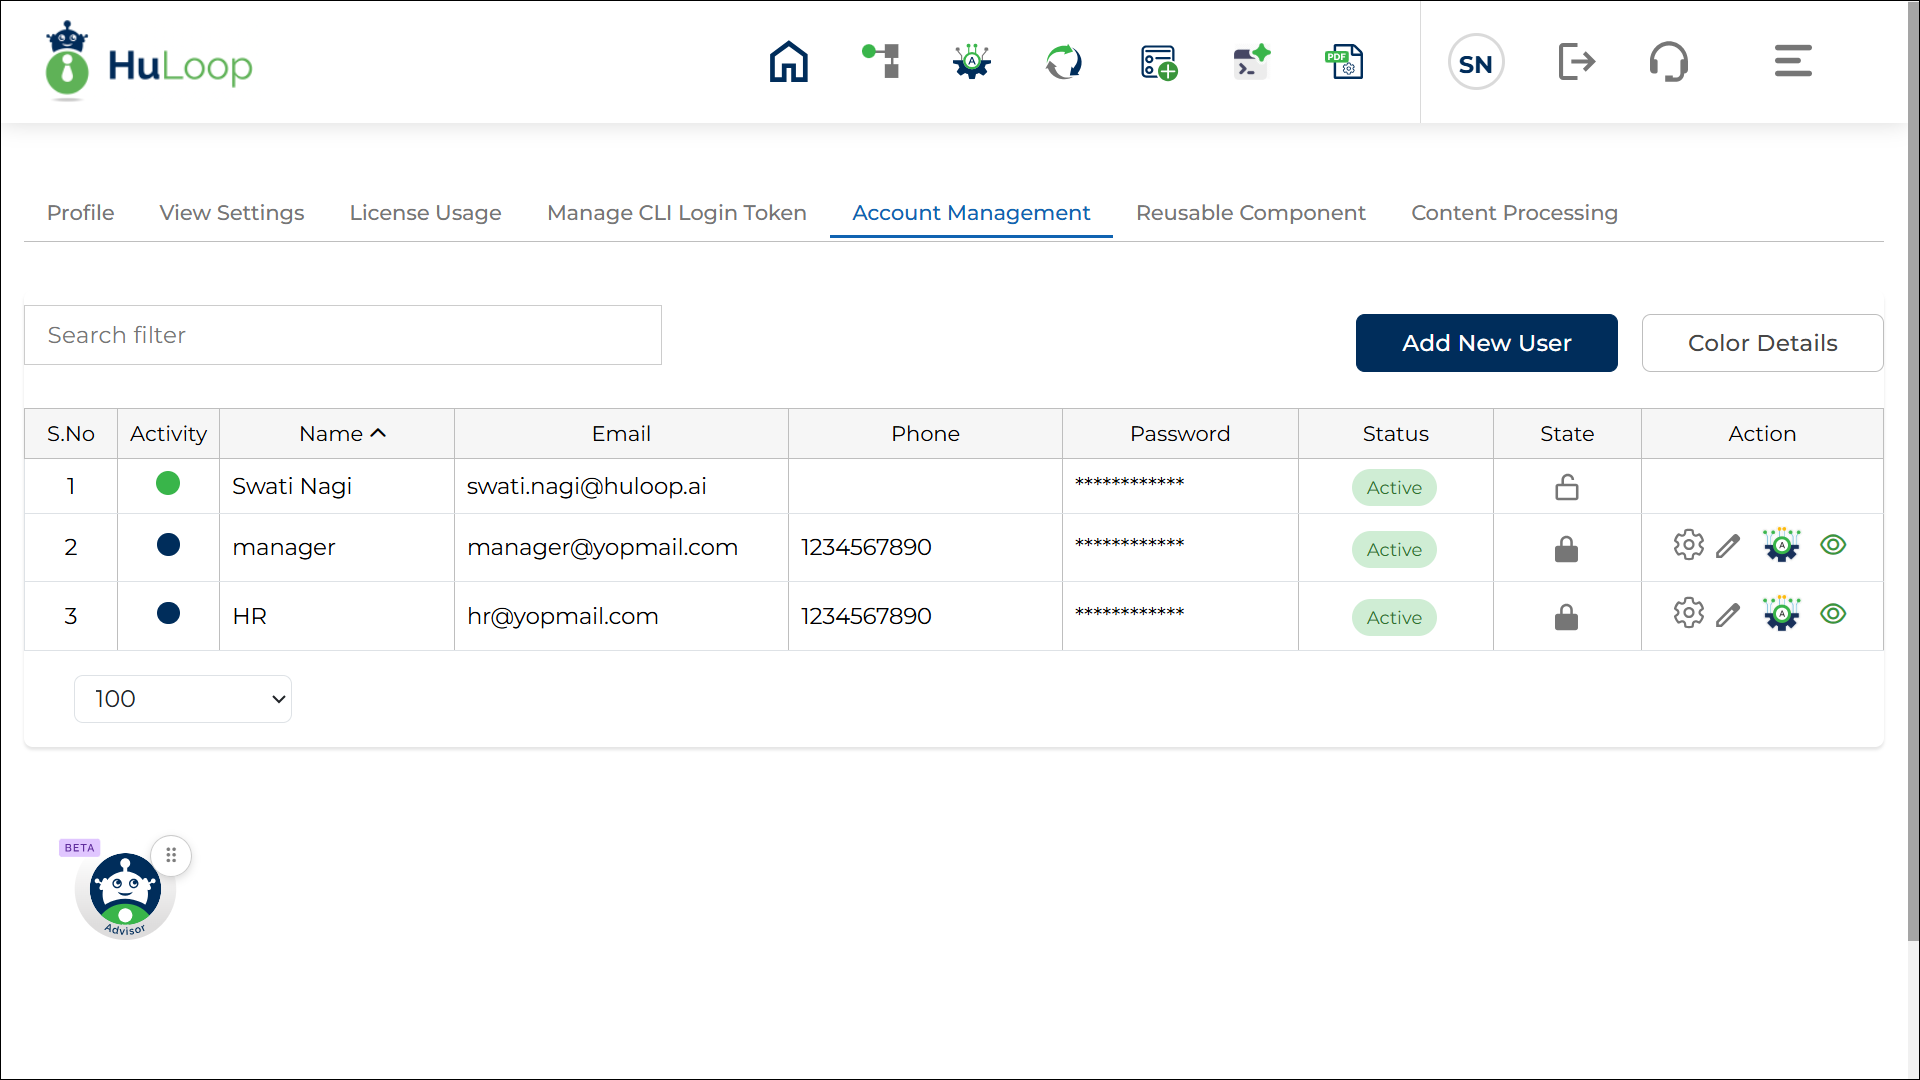
On the Account Management page, you can view and manage all users associated with your account.
Key Components
- User List: Displays all users in your account along with their details.
- Search Filter: Use this to search for users by name or email address.
- Add New User Button: Allows you to create a new user.
- Color Legend Button: Helps you understand user activity status based on color indicators.
Add a New User
Follow these steps to add a new user:
- Click Add New User.
- In the pop-up window, enter the following details:
- Name
- Phone Number
- Status (Active/Inactive)
- Password
- Click Save.

Understand User Activity Status (Color Indicators)
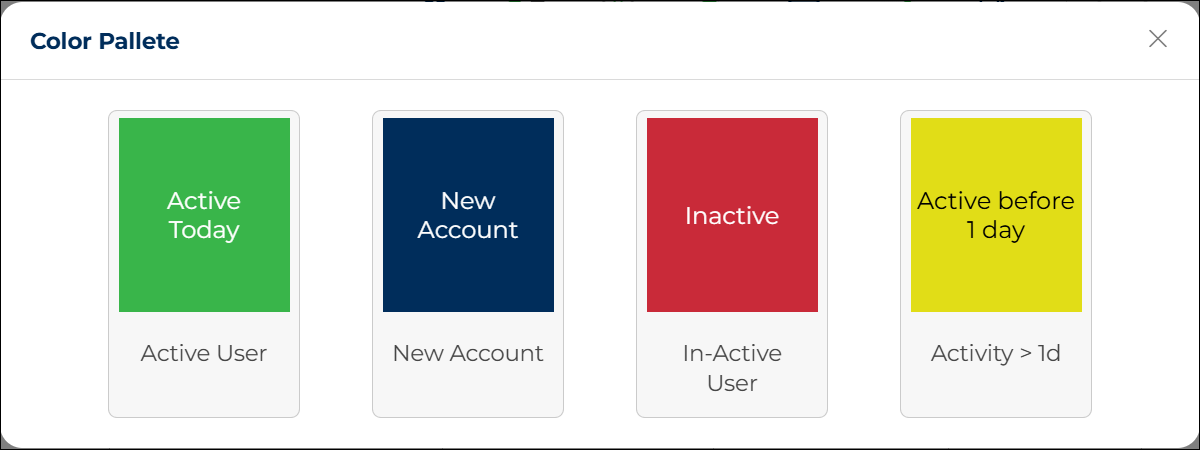
Click the Color Legend button to view activity status meanings.
- Green: User was active today
- Yellow: User was active at least one day ago
- Blue: Newly created account
- Red: Inactive user
Understand the User List Table
The user table provides detailed information about each user:
- Activity: Represented using color indicators
- Name: User’s name
- Email: User’s email address
- Phone Number: Contact number
- Password: Masked for security
- Status: Active or Inactive
- State: Locked or Unlocked (shown using lock/unlock icon)
- Actions: Manage user settings and permissions

Manage User Actions
Each user has multiple action options available in the Actions column.
Manage User Permissions (Settings Icon)
Use this option to control what a user can access.
- Click the Settings icon
 for a user.
 - Select or clear permissions using checkboxes:
- Create Users
- Edit Users
- Create Automations
- Create Workflows
- Access Transparency Sandbox
- Manage Forms
- Click Save.
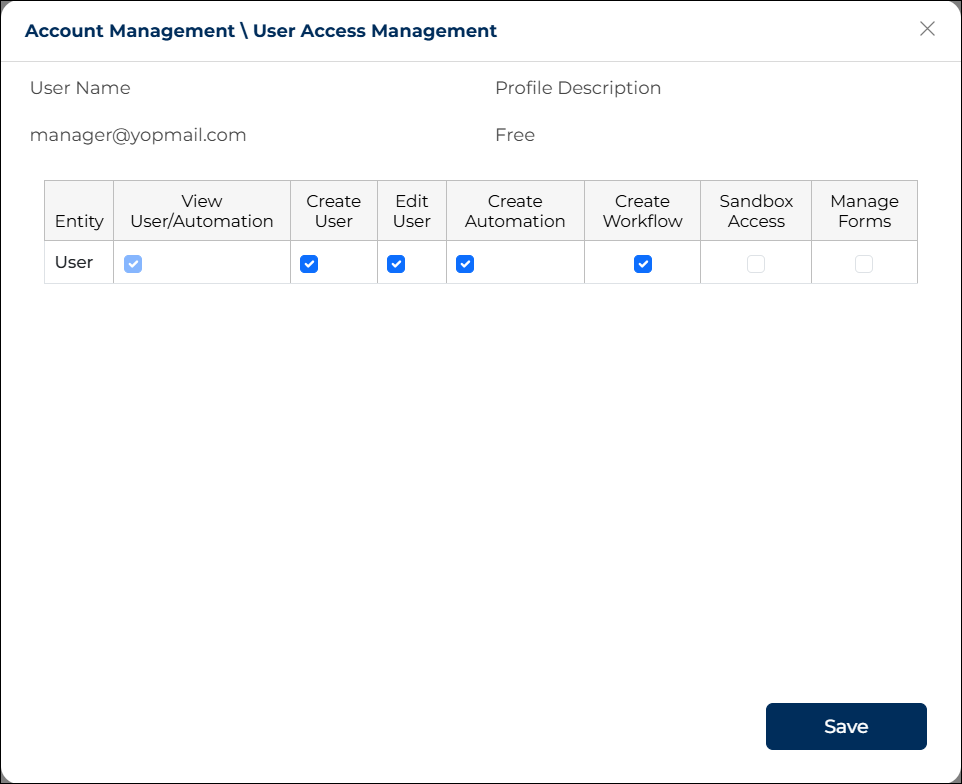
Only grant permissions required for the user’s role to maintain security.
Edit User Details
- Click the Edit (pencil) icon
 .
. - Update any of the following, as required:
- Name
- Phone Number
- Password
- Status (Active/Inactive)
- State (Locked/Unlocked)
- Click Save.

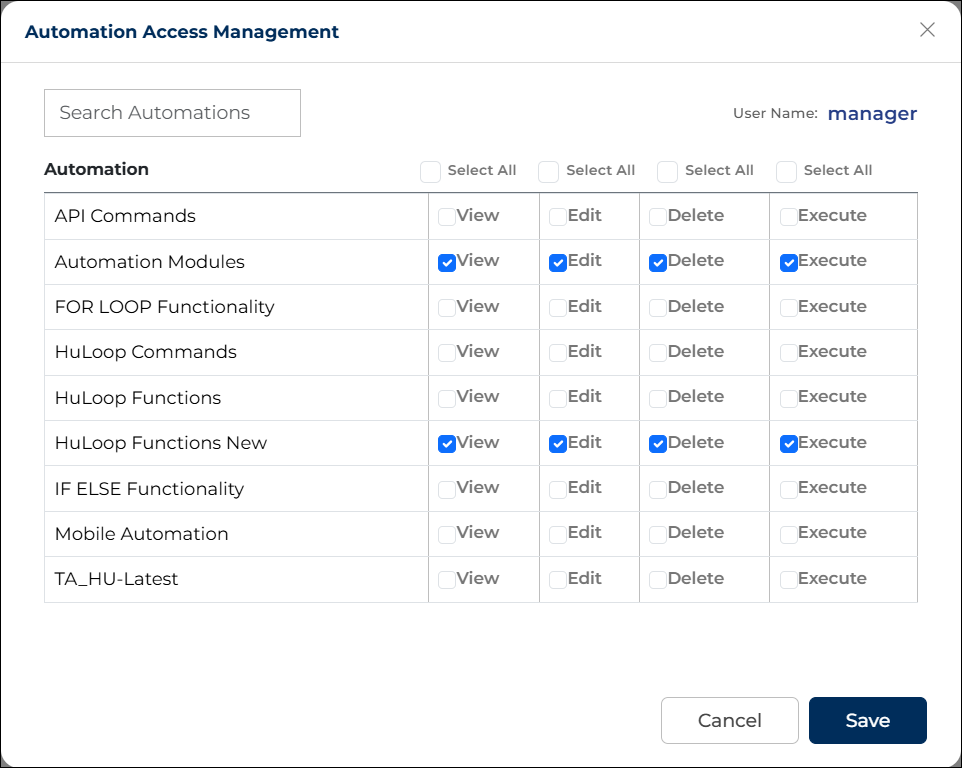
Manage Automation Access
This option allows you to control access to specific automations.
- Click the Automation Access icon
 for the user you want to control the automation permissions.
 - In the pop-up, you will see a list of all automations.
- Assign permissions for each automation:
- View
- Edit
- Delete
- Execute
- Use checkboxes to assign permissions.
You can use the Select All option to assign a specific permission across all automations at once.
- Click Save.
Manage Reusable Component Access
This option allows you to control a user’s access to reusable components (RCs) in your account.
- Click the Reusable Access (eye) icon in the Actions column.
- In the Reusable Access Management pop-up, you will see:
- A list of all reusable components under the RC Name column
- Permission options for each component:
- View
- Edit
- Delete
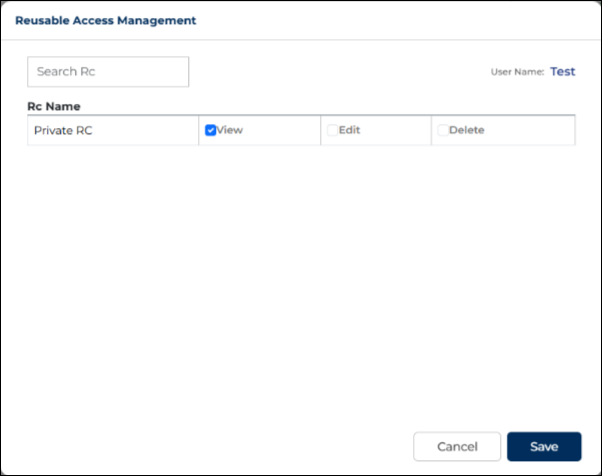
- Use the checkboxes to assign the required permissions for each reusable component.
- To quickly find a specific component:
- Use the RC Search bar to search by name.
- After making the required changes, click Save.
Grant only the necessary permissions to maintain better control and security over reusable components.
Best Practices
- Regularly review user access to ensure security.
- Assign only necessary permissions based on user roles.
- Lock inactive users instead of deleting them when possible.
- Use the search feature to quickly locate users in large accounts.
Troubleshooting Tips
- If a user cannot access features, verify their permissions in Settings.
- If login issues occur, ensure the user status is set to Active.
- If actions are restricted, check whether the user is Locked.