HuLoop Scheduler Configuration Guide
1. Overview
The HuLoop Scheduler enables scheduled execution of different trigger types, including:
- Workflow
- Automation
- IAB
The Scheduler uses a single executable file to manage all supported trigger types. It identifies the request type automatically and executes it based on the defined schedule.
The Scheduler is configured as part of the HuLoop Agent setup. This guide focuses specifically on configuring and managing scheduled execution.
Intended Audience
This guide is intended for:
- Administrator Users: Responsible for configuring, running, and managing the Scheduler as a Windows service.
- Other Users: Responsible for updating scheduling values such as HostApiUrl and RunSchedule.
Some sections of this guide are specific to Administrator users. These sections are clearly marked as Administrator Only.
2. How the Scheduler Works
The Scheduler reads settings from a configuration file located inside the Scheduler folder.
For each trigger type, the configuration file defines:
- When the trigger runs (RunSchedule)
- Which environment it connects to (HostApiUrl)
- Which CLI executable to use (ExePath)
- Where execution logs are stored (LogFilePath)
Each trigger type can have its own schedule and log location within the same file.
Download and Extract the HuLoop Agent
When you download the HuLoop Agent, you will receive a compressed file like: HuLoop.zip
Extract the contents of this ZIP file to a local folder. After extraction, open the main HuLoop folder.
Locate the Scheduler IPA Triggers Folder
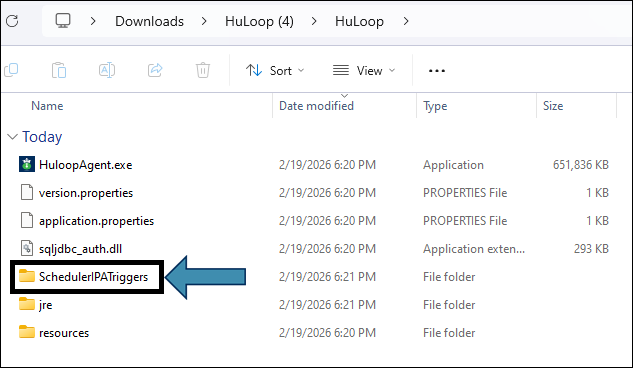
Inside the extracted HuLoop folder, you will see:
- HuLoopAgent.exe
- Supporting files
- Multiple subfolders
Locate and open the folder named:
SchedulerIPATriggers
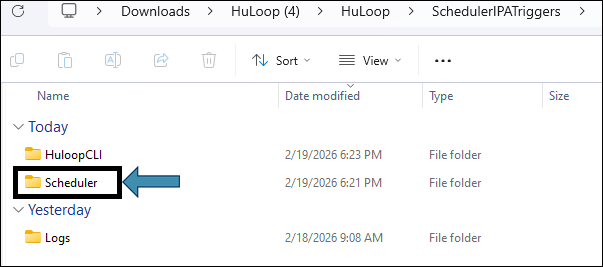
Open the Scheduler Folder
Inside the SchedulerIPATriggers folder, you will see three folders:
- HuLoopCLI
- Scheduler
- Logs
Open the Scheduler folder.
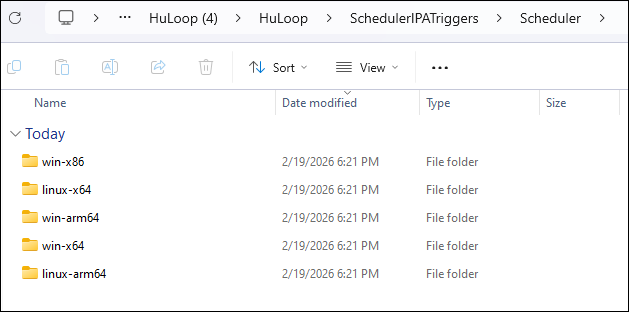
Select Your System-Specific Folder
Inside the Scheduler folder, you will see a system-specific folder.
For example: win-x64
Open the Scheduler Configuration Files
Inside the system-specific folder (for example, win-x64), you will see the following files:
- appsettings.json
- HuLoop.Schedulers.IPATriggers.exe
- HuLoop.Schedulers.IPATriggers.pbd
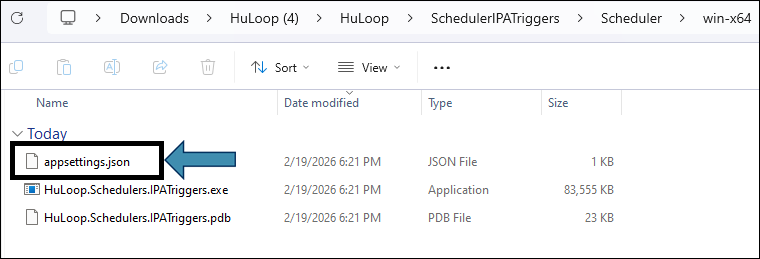
The file appsettings.json is the configuration file where scheduling settings are defined.
Open appsettings.json in a text editor to configure scheduling.
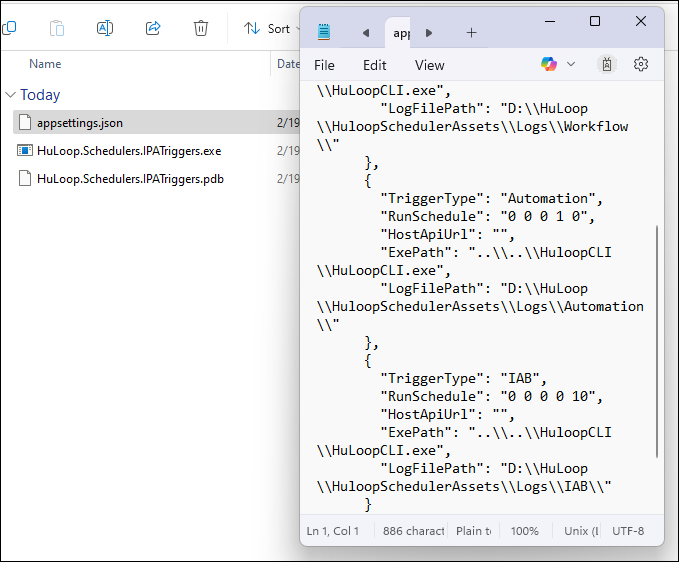
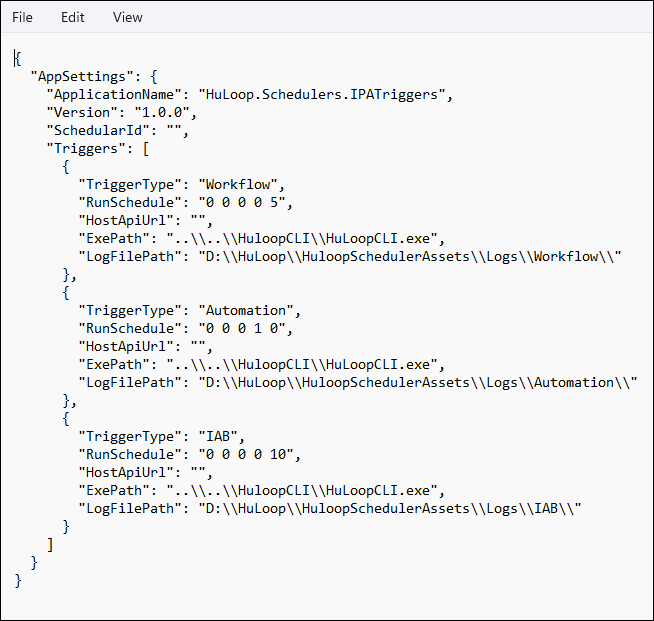
The file contains structured settings similar to the following:
{
“AppSettings”: {
“ApplicationName”: “HuLoop.Schedulers.IPATriggers”,
“Version”: “1.0.0”,
“SchedularId”: “”,
“Triggers”: [
{
“TriggerType”: “Workflow”,
“RunSchedule”: “0 0 0 0 5”,
“HostApiUrl”: “”,
“ExePath”: “..\\..\\HuloopCLI\\HuLoopCLI.exe”,
“LogFilePath”: “D:\\HuLoop\\HuloopSchedulerAssets\\Logs\\Workflow\\”
}
]
}
}
The configuration includes separate sections for:
- Workflow
- Automation
- IAB
Each section can be configured independently.
Default Run Schedule Values
The Scheduler includes default RunSchedule values for each trigger type.
| Trigger Type | Default RunSchedule |
|---|---|
| Workflow | 0 0 0 0 5 |
| Automation | 0 0 0 1 0 |
| IAB | 0 0 0 0 10 |
The RunSchedule field defines when the trigger executes.
You can modify this value based on your scheduling requirements. Define the schedule frequency using the format “Month Week Day Hour Minute”.
Example: “RunSchedule”: “0 0 0 0 5” runs every 5 minutes.
3. Configure the Scheduler
Follow the steps below to configure scheduled execution.
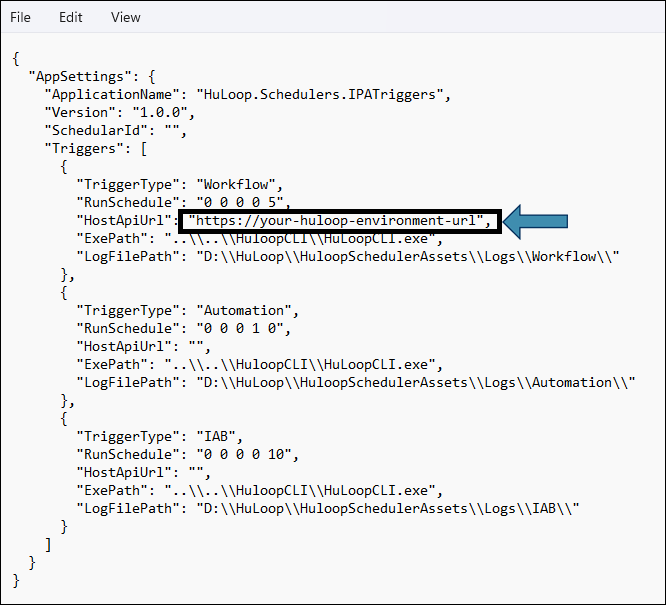
Step 1: Update HostApiUrl
Locate the HostApiUrl field under each trigger type.
Provide the correct environment URL.
Example: “HostApiUrl”: “https://your-huloop-environment-url”
This ensures the Scheduler connects to the correct HuLoop environment.
Step 2: Modify RunSchedule (If Required)
Locate the RunSchedule field.
Update the value if you need to change when the trigger runs.
Each trigger type can have its own schedule.
Make sure the format is entered correctly. Incorrect formatting may prevent scheduled execution.
Example: “RunSchedule”: “0 0 0 0 5” runs every 5 minutes.
Step 3: Verify ExePath
Ensure that the ExePath correctly points to the HuLoop CLI executable:
..\\..\\HuloopCLI\\HuLoopCLI.exe
This path must correctly reference the location where HuLoopCLI.exe is installed.
If the path is incorrect, scheduled execution will fail.
Step 4: Verify LogFilePath
Locate the LogFilePath for each trigger type and ensure the specified folder exists.
Example: D:\\HuLoop\\HuloopSchedulerAssets\\Logs\\Workflow\\
Step 5: Save the Configuration
After completing all updates:
- Save the configuration file.
- Close the text editor.
- Restart the Scheduler if it is already running.
Your scheduled configuration is now active.
3A. Running the Scheduler
After configuring the Scheduler, the executable must be run to activate scheduled execution.
The execution method differs for Administrator users and normal users, as explained below:
3A.1 Administrator Only: Run as a Windows Service (Recommended)
When run as an Administrator, the Scheduler registers itself as a Windows service named:
HuLoop Scheduler Service
This allows the Scheduler to:
- Run in the background
- Start automatically after system restart
- Continue execution without manual intervention
Important: Absolute Path RequirementWhen running as a Windows service:
- ExePath must use a full absolute path
- LogFilePath must use a full absolute path
Relative paths may not work in service mode.
Example: Absolute Path Configuration
“ExePath”: “C:\\HuLoop\\HuLoopCLI\\HuLoopCLI.exe”,
“LogFilePath”: “C:\\HuLoop\\Logs\\Workflow\\”
Note: The actual path may vary depending on where HuLoop is installed in your environment.
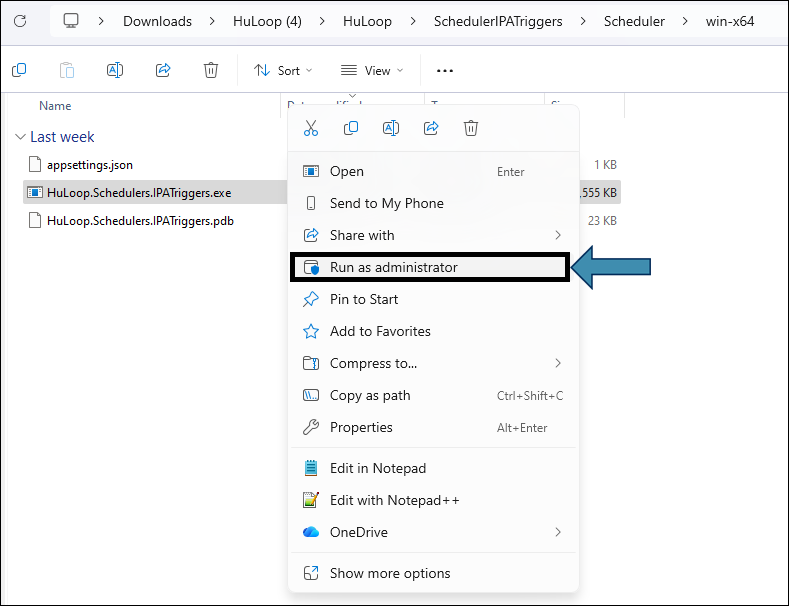
Step 1: Run the Executable as Administrator
- Navigate to the system-specific Scheduler folder.
- Right-click: HuLoop.Schedulers.IPATriggers.exe
- Select Run as administrator.
- Follow the on-screen instructions.
Step 2: Verify Service Registration
- Open Windows Services.
- Locate: HuLoop Scheduler Service
Step 3: Start the Service
- Right Click on HuLoop Scheduler Service.
- Click on Start. Wait till the service got Started
Step 4: Set Startup Type to Automatic
- Right-click the service
- Select Properties
- Set Startup Type to Automatic
- Click Apply → OK
This ensures the Scheduler starts automatically whenever the machine restarts.
3A.2 For Normal Users (Session-Based Execution)
If the executable is run without Administrator privileges:
- The Scheduler runs only for the current session.
- It does not register as a Windows service.
- It stops when the user logs out or the machine restarts.
4. Verifying Scheduled Execution
To confirm that the Scheduler is working correctly:
- Check the log folder for new log entries.
- Verify execution status in the HuLoop dashboard.
- Confirm that execution time aligns with the configured RunSchedule value.
If execution does not occur as expected, review the configuration values for accuracy.
5. Best Practices
- Use separate log folders for each trigger type.
- Always verify the CLI executable path after installation or upgrade.
- Keep a backup of the configuration file before making changes.
- Test scheduling in a non-production environment before deploying to production.