Step 1 – Enter IPA Information
This is the first step in creating a new IPA. The screen includes several sections, each capturing specific details about your automation setup.

IPA Details
- Automation Project – Displays the name of the project you opened in HuLoop. It is selected by default, but you can use the drop-down list to choose another project if needed.
- IPA Name – Enter a name for your new IPA (e.g., Daily_Data_Refresh_IPA). This is a mandatory field.
- IPA Description – Optionally, enter a short description that helps identify the purpose of the IPA.
- Run Setting – Here you can choose how to associate a run setting with your IPA.
Run settings define which automation components (modules, suites, and test cases) will execute when the IPA runs. Select whether you want to create a New run setting or use an Existing one.You have two options:- New:
- Host URL – Enter the URL where the automation will connect. By default, the current portal host URL appears (for example, https://qa.huloop.ai). The system automatically appends /HuLoopRest when saving.
- Is Workflow Enabled – This toggle is set to Yes by default. IPAs with Workflow Enablement turned on are designed exclusively for workflow integration and do not appear under the HuLoop Console Management
- Enable Pre-Execution Sync – Keep this toggle set to Yes to ensure your IPA automatically syncs with the latest updates made in your automation before execution. This helps make sure that your workflow always runs using the most recent version of your automation.
- Existing:
- Select this if you already have a suitable run setting for your automation project.
- When you choose Existing, an additional Select Run Setting drop-down appears. It lists all available active run settings for the selected project.
- Select the one you want to link to this IPA.
- New:

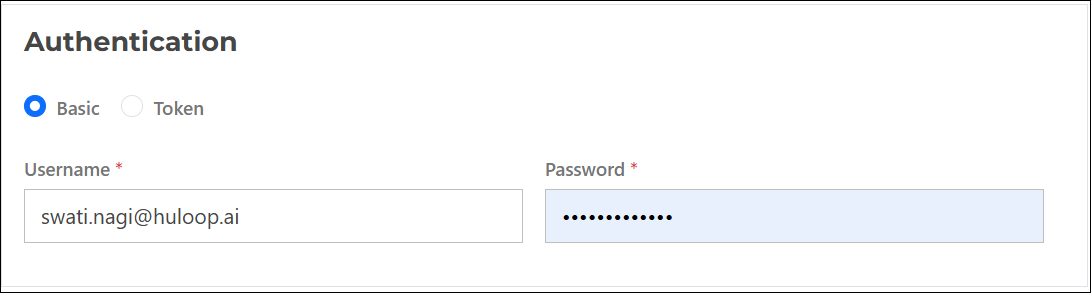
Authentication
Choose how you want HuLoop to authenticate your IPA execution:
- Basic – Select this option to use username and password authentication.
- Username – Auto-populated with your HuLoop username.
- Password – Enter your HuLoop account password.
- Token – Select this option to authenticate using a token.
- If a token already exists, it is auto-filled here.
- If no token exists, a message appears prompting you to generate one from User Profile > Manage CLI Token. See here: Learn how to create and use an access token.
Reports
Configure how you want HuLoop to generate and share execution reports.
- Show Detailed Report – Toggle to Yes to include Includes step-level details.

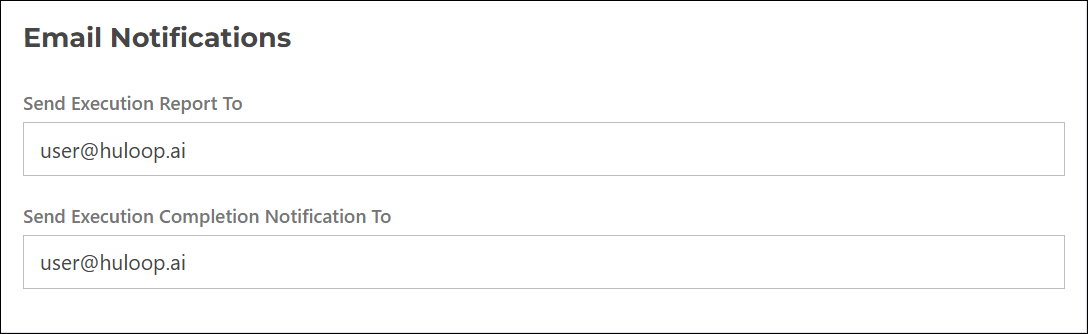
Email Notifications
Define who should receive the IPA execution results.
- Send Execution Reports To – Enter one or more email addresses (comma-separated) to receive the full execution report.
- Send Execution Completion Notification To – Enter one or more email addresses (comma-separated) to notify recipients when the execution is complete.
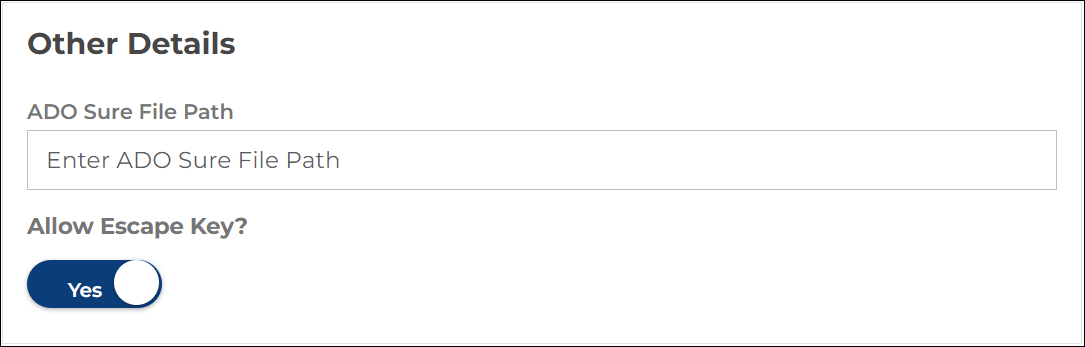
Other Details
This section includes additional configuration fields.
- ADO Sure File Path – Specifies the file path for storing the ADO (Azure DevOps) report file generated during execution.
- Allow Escape Key – Toggle between Yes and No to control whether the execution can be stopped manually using the Escape key.
Once all required details are entered, click Next to proceed or Cancel to exit without saving.