Add or Remove Trigger
You can configure a trigger for a published app from the Apps page.
A trigger is used to start an automation or workflow when the app is submitted.
If the trigger was not configured while setting up the Submit button, you can configure it from the Apps page.
If a trigger is already configured, you can remove it from here.
Add Trigger
- On the Apps page, locate the published app.
- In the Trigger column, click the trigger icon
 .
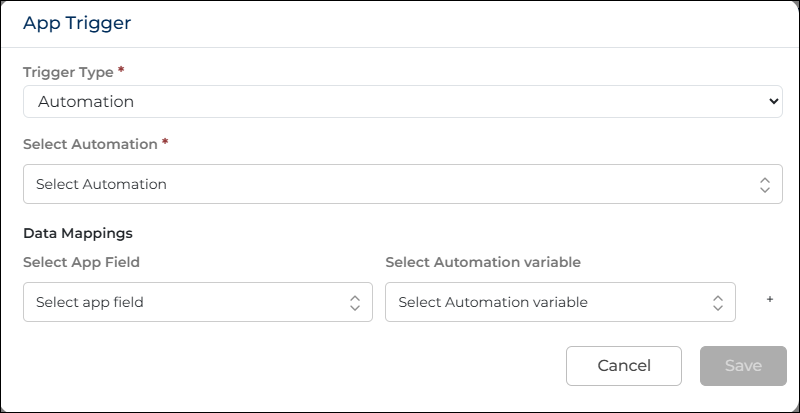
. - The Add Trigger window appears.
- Select the Trigger Type. You can select Automation or Workflow.
- Automation is selected by default.
- Select the required automation or workflow from the list.
- After selecting the automation or workflow, configure the data mapping.
- In the App Field drop-down, select the app field.
- In the Automation Variable or Workflow Variable drop-down, select the corresponding variable.
- Data mapping connects the app fields with the automation or workflow variables so that the entered values can be passed during execution.
- Click Save to apply the trigger.
- Click Cancel to close the window without saving.
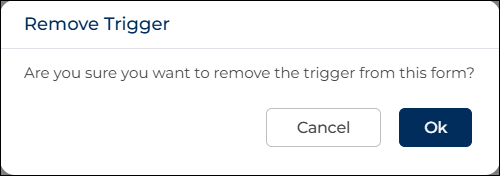
Remove Trigger
- If a trigger is already configured, the remove trigger icon can be used to remove it.
- The Remove Trigger window appears. Click Ok to remove the trigger icon .
- After the trigger is removed, the automation or workflow will not run when the app is submitted.
- You can configure the trigger again at any time if required.