How to Create a Case in an Automation Project?
A Case is an individual automation or scenario within a Suite. It includes the steps needed to perform a specific task or validate a particular functionality.
To create a Case within a Suite, follow these steps:
- Sign in to your HuLoop account.
- Click Automation.

- Open the automation project where you want to create the Case by clicking anywhere on its card.

- This will navigate you to the Module page. Select the corresponding module title (e.g., API TESTING MODULE).


Note: HuLoop has two views: List View and Grid View. The default view is List, but you can switch to Grid View by selecting the corresponding tab. For a clearer understanding, screenshots of both views are included in this guide.
You can customize the number of items displayed on the screen using the Pagination dropdown, located at the bottom left. Simply select from the options to view 20, 25, 50, or 100 items at a time.
- Select the Suite by clicking the corresponding suite title (e.g., API TESTING SUITE). The Suite groups related Cases together, making them easier to manage.


- You will see a list of existing Cases. Click Add Case to create a new case.


- You’ll see the Add New Case pop-up:

- Fill in the following details:
- Case Title: Enter the title of the Case (required).
- Execution Iteration: Choose the iteration for this case (1 is the default value).
The execution iteration is set to 1 by default. You can delete it and enter a new value or use the ![]() ( upward and downward arrows) to increase or decrease the execution iteration values, respectively.
( upward and downward arrows) to increase or decrease the execution iteration values, respectively.
- Case ID: Enter the Case ID if applicable.
- Case Tag: Select a tag from the following options:
- IMPORTANT
- VERY_IMPORTANT
- GOOD_TO_HAVE
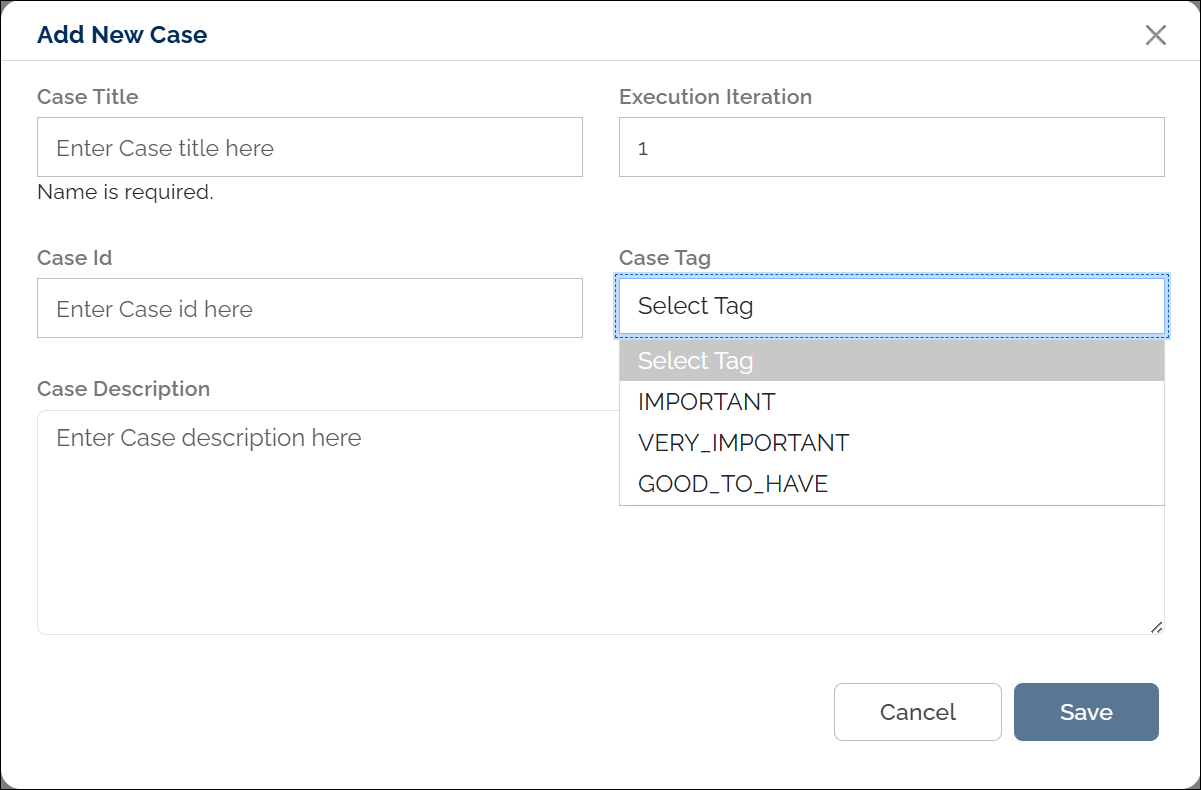
- Case Description: Provide a brief description of the Case.
Note: Case Title is a required field.
- Click Save.