Wait Until Element Is Displayed: WAITFORSHOW
The Wait Until Element Is Displayed command pauses the automation until a specified element becomes visible on the page. With a default timeout of 65 seconds, this command is particularly useful when you need to wait for elements like confirmation messages or content sections to appear before continuing.
Example: Suppose you’re testing a login process, where a welcome message should appear after successful login. You want the test to proceed only after this message is visible.
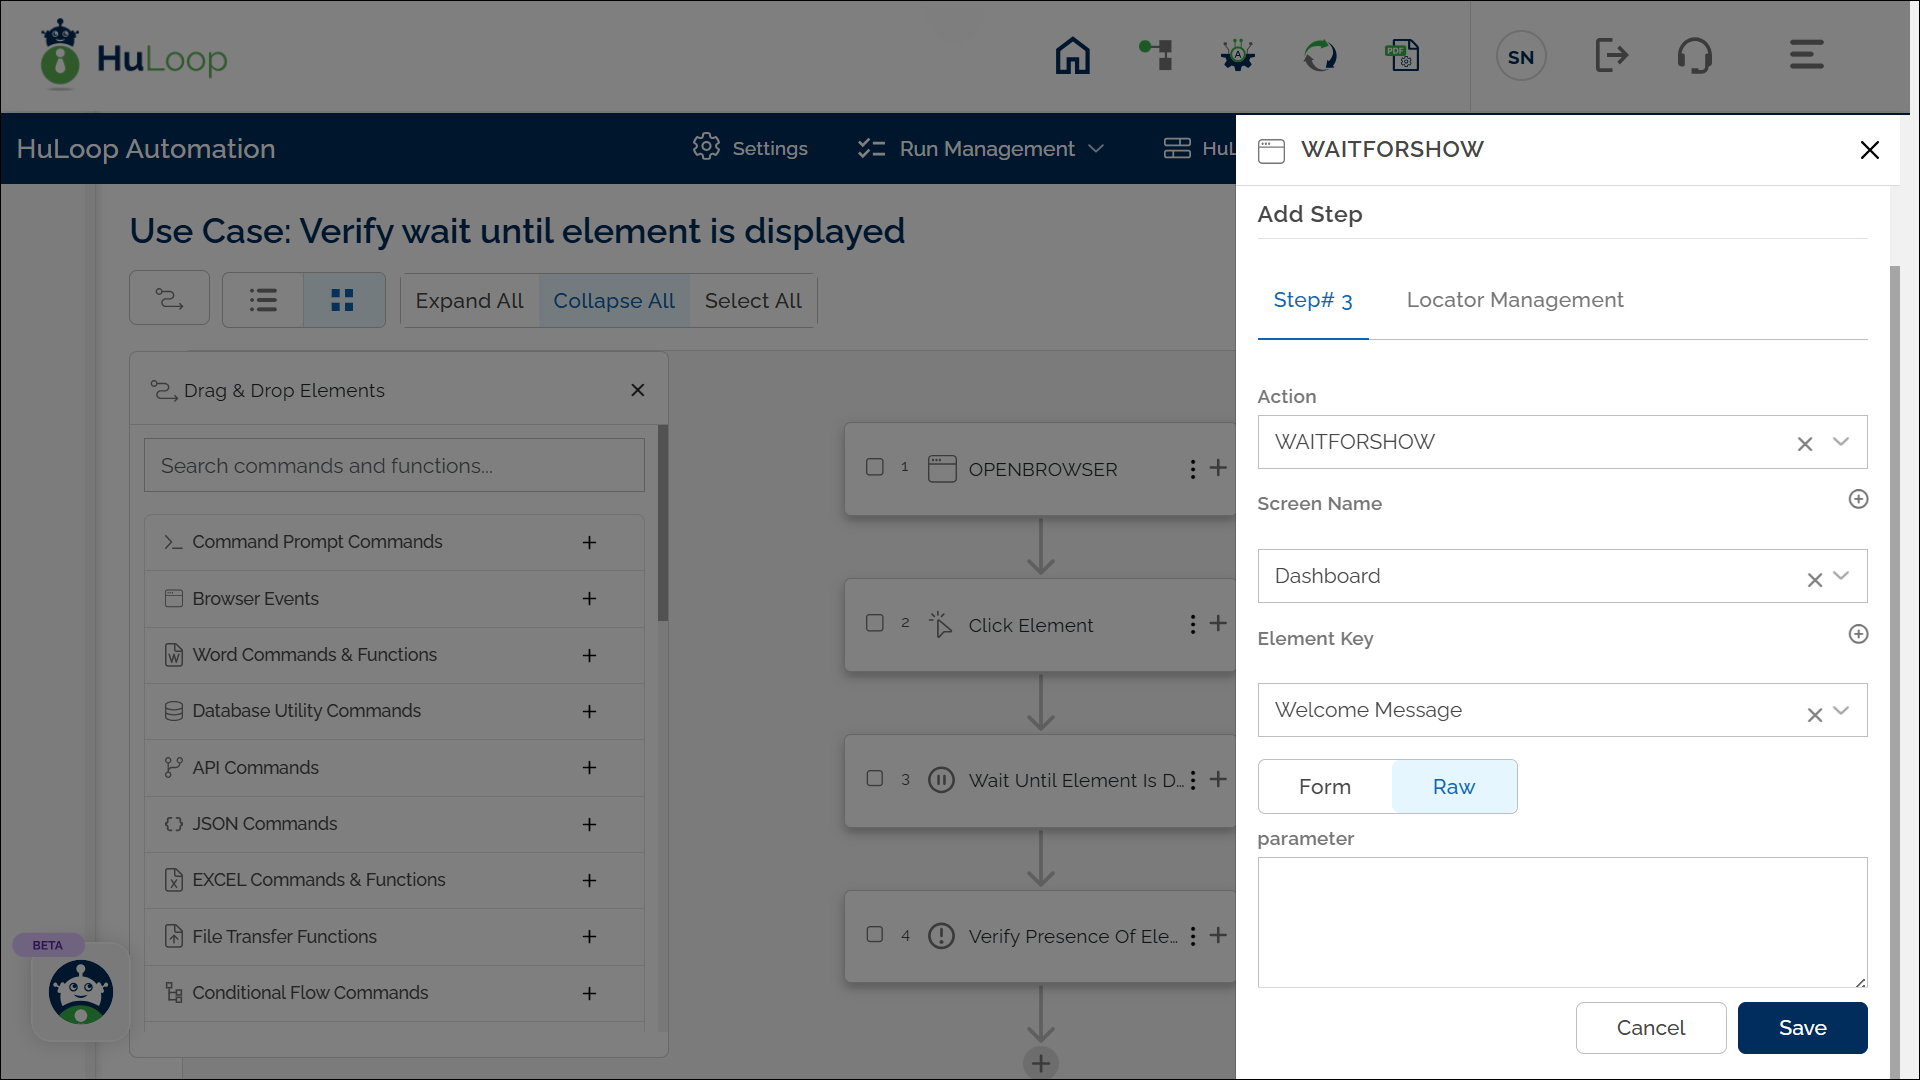
Steps to configure:
- Select WAITFORSHOW from the Action drop-down.
- In the Screen Name field, enter the screen where the element should appear (e.g., “Dashboard”).
- In the Element Key field, select the element to wait for (e.g., “Welcome Message”).
- Leave the Parameters section blank, unless you want to set a step-specific timeout.
- Click Save.
Note: The steps for adding this command are the same across views, though the layout may vary:

Timeout Settings:
- Automation-Level Timeout: Although the default wait time is set to 65 seconds, this can be modified to apply to the entire automation project. Follow these steps to adjust this generic timeout:
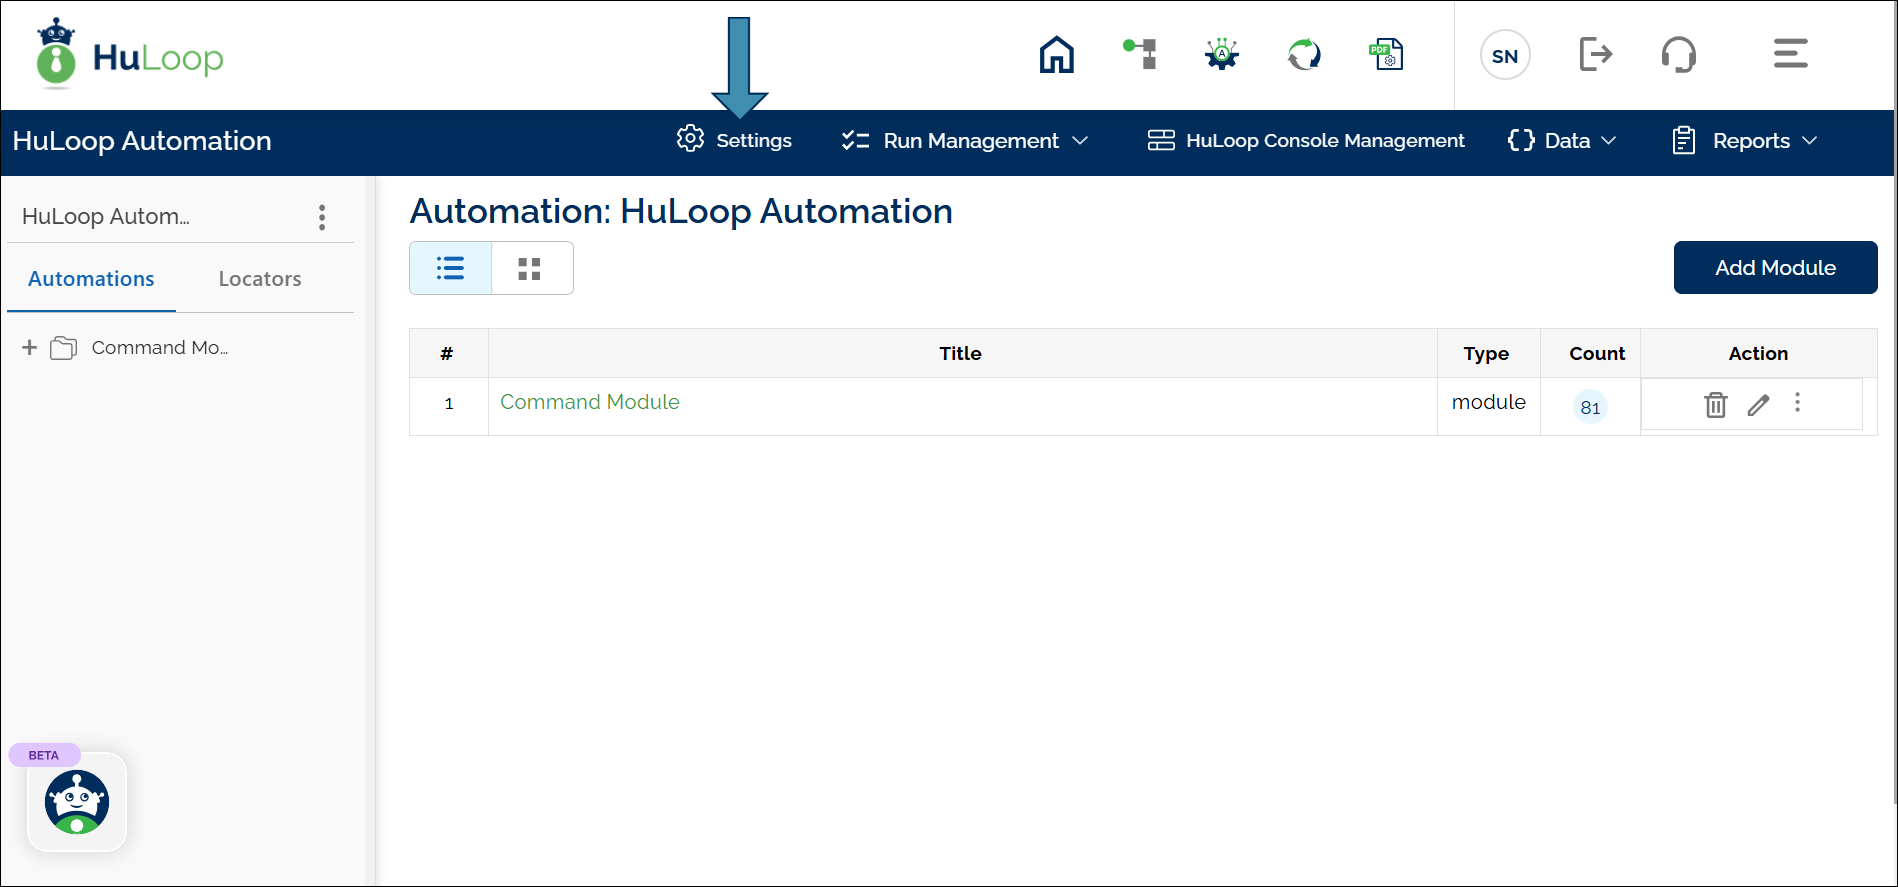
- Go to the project you are working on.
- Click Settings as shown:
- You will land on the Automation Settings page. Scroll to find the locator_timeout setting.
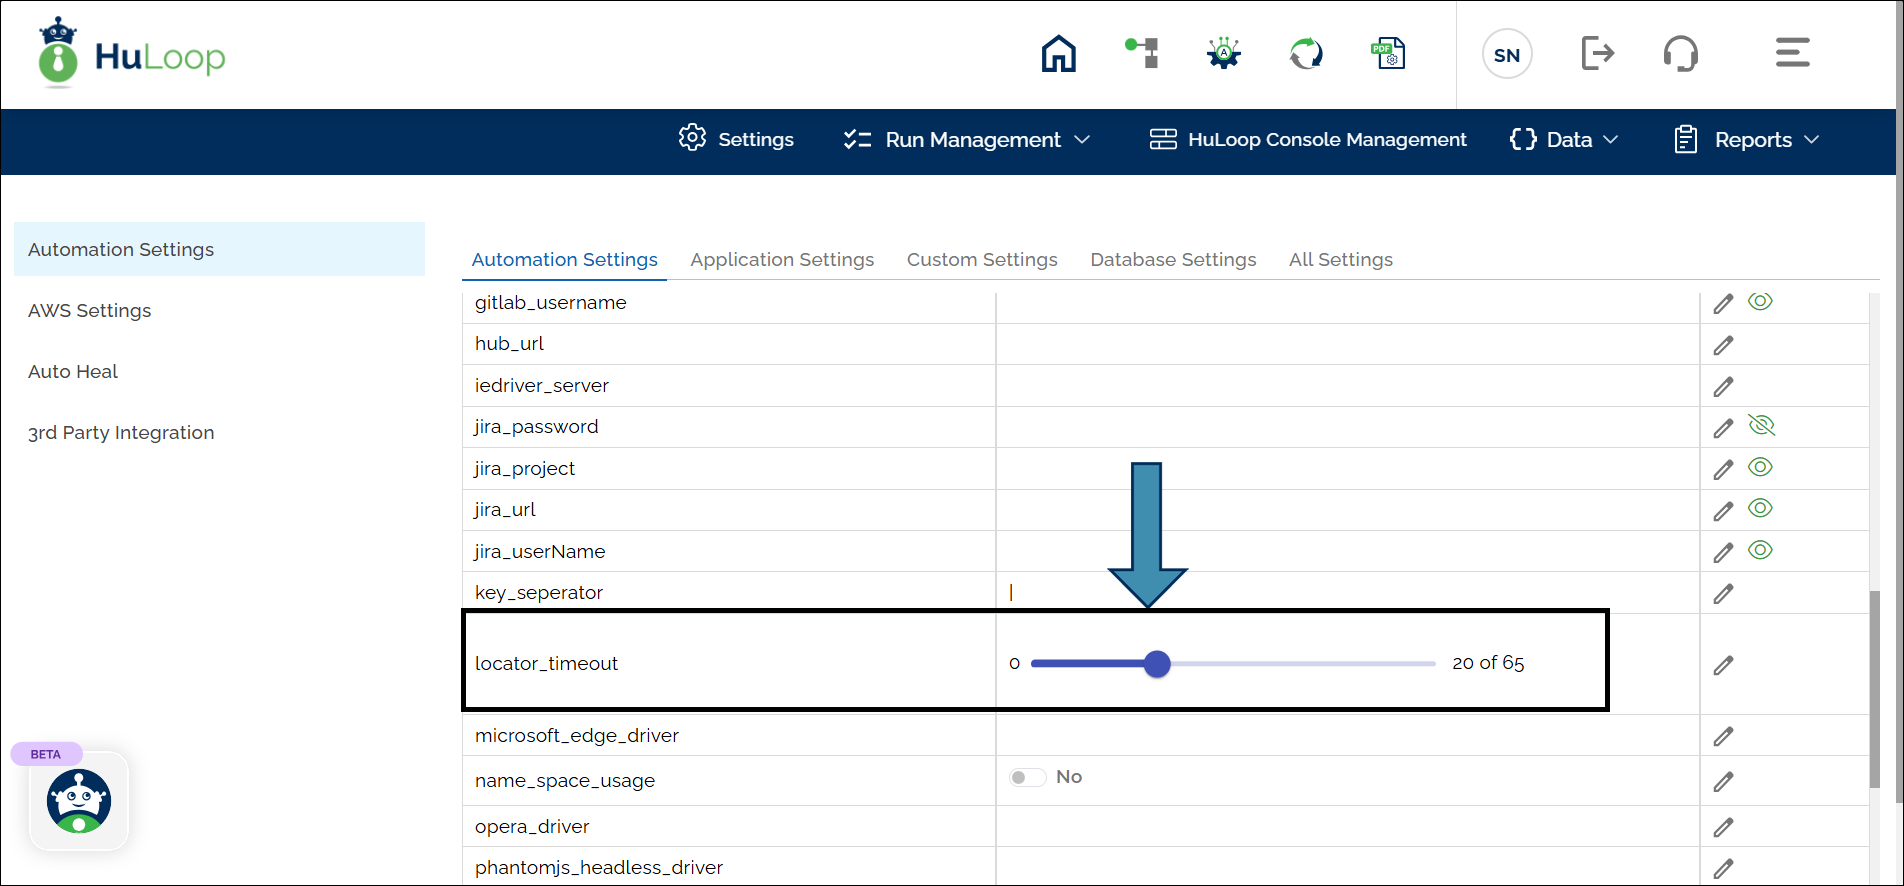
- Use the slide bar to adjust the wait time from 0 to a maximum of 65 seconds. (Here we have set the adjustable timeout to 20 seconds.)
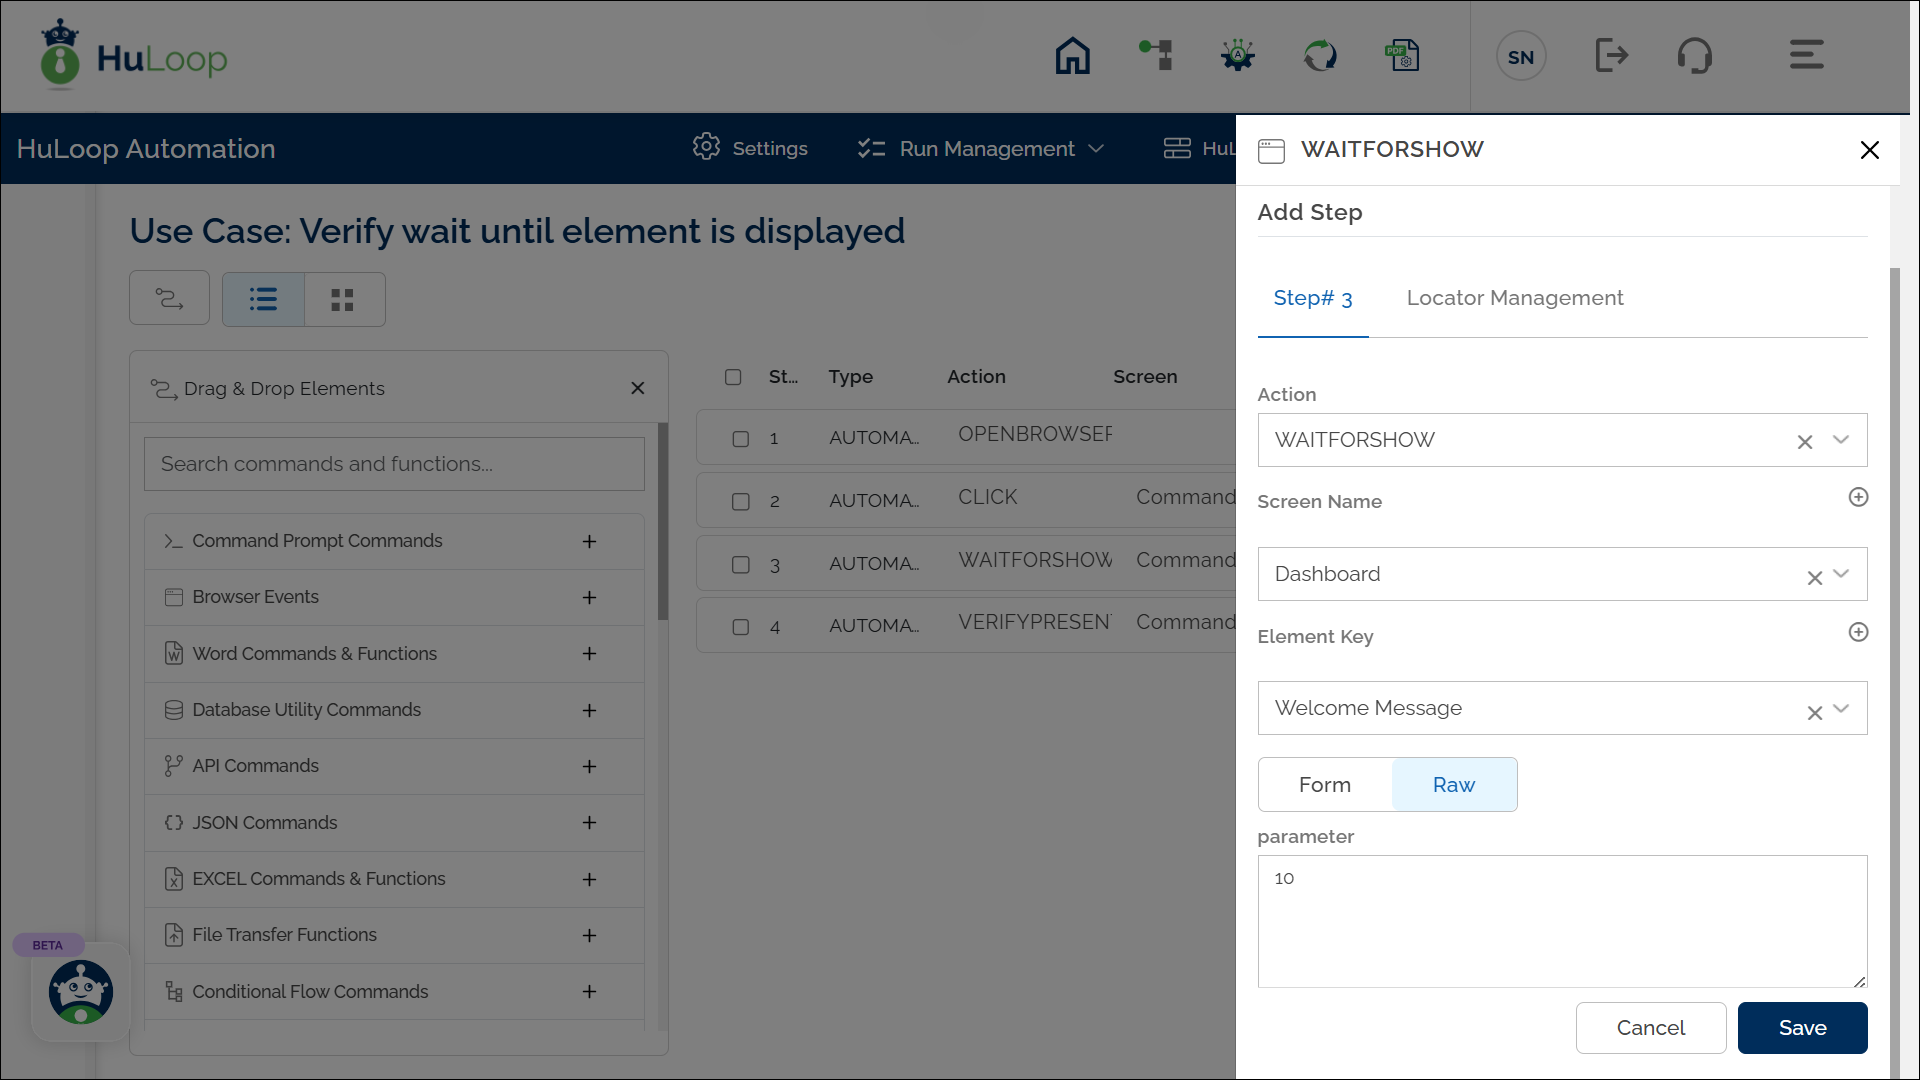
- Step-Level Timeout:
- If you want to set a timeout specific to this step only, provide the value (in seconds) in the Parameters field for the command. For example, enter 10 for 10 seconds.
- This timeout will override the automation-level timeout for this particular step.

Note: Ensure the Screen Name and Element Key are defined before using this command.
Expected Outcome on execution: The Wait Until Element Is Displayed command will pause until the specified element, like a welcome message, appears on the screen, allowing the automation to continue without errors from premature execution.
Last updated: Sep 10, 2025