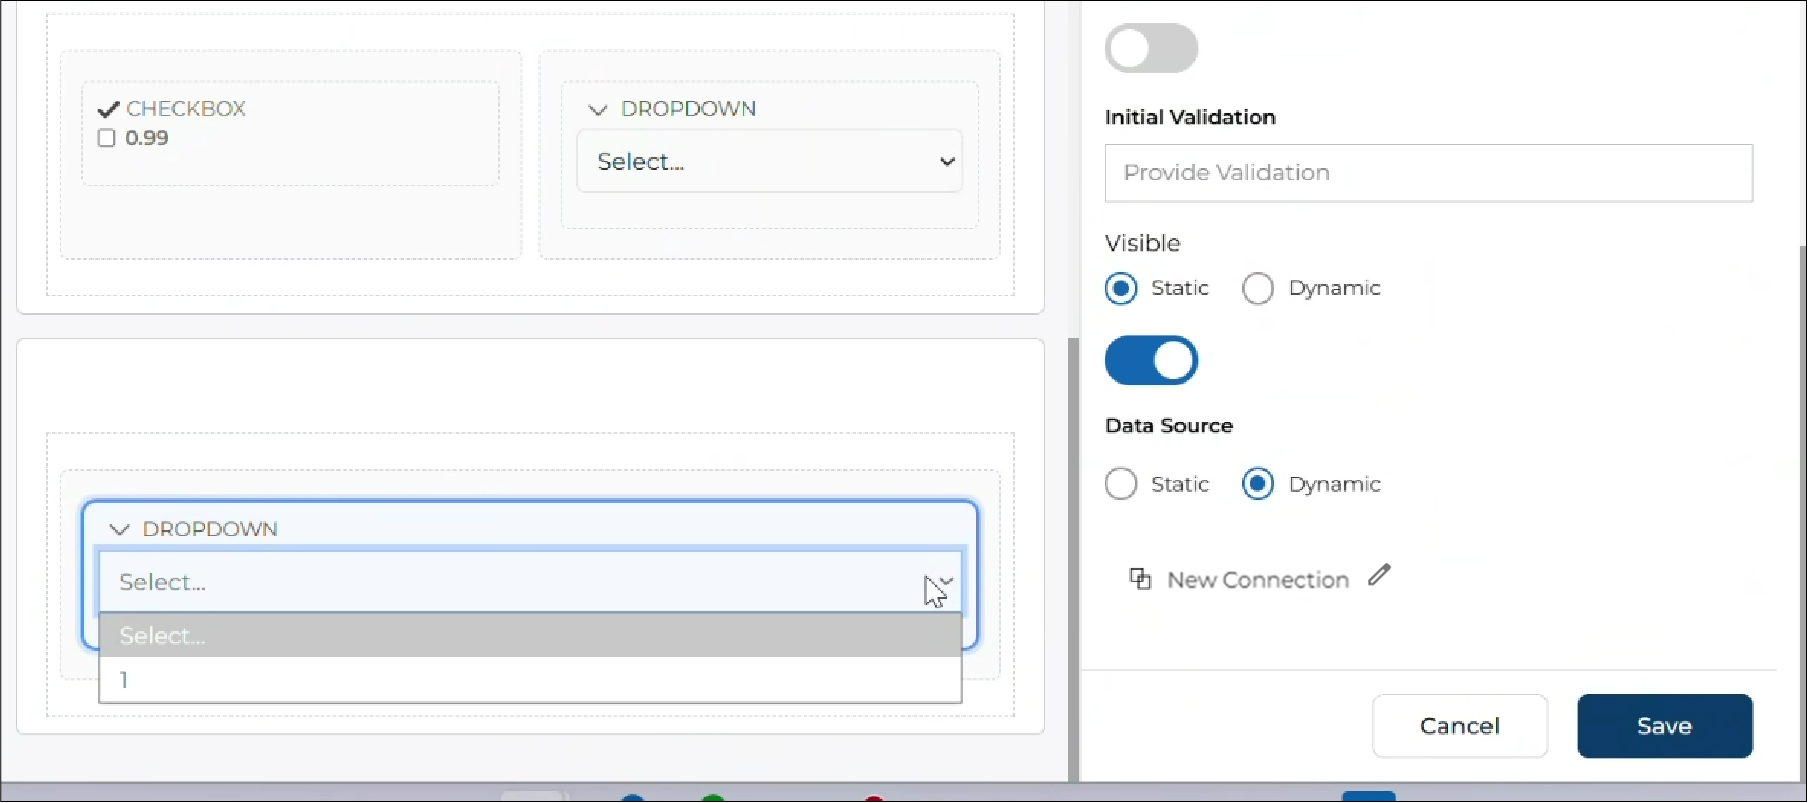
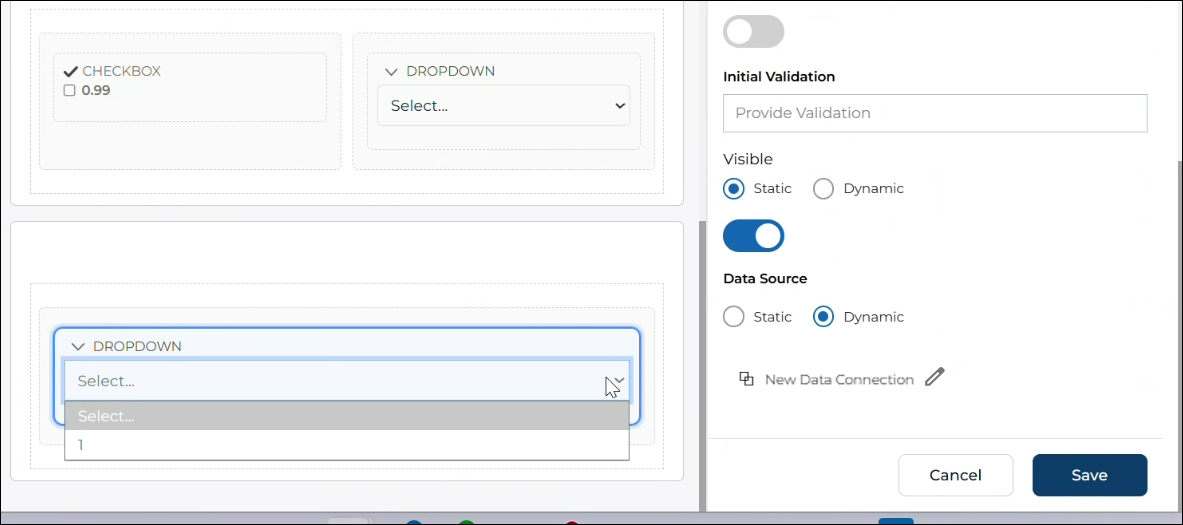
Configure Data Source for Controls
After adding controls to the app, you can configure their properties from the Properties pane.
Some controls allow you to define the list of values that will be displayed to the user.
For controls such as Dropdown, Radio, Checkbox, and Table, you can configure a data source to provide values either manually or from an external system.
The data source can be configured as Static or Dynamic based on the requirement.
Data Source configuration is available only for the following control types:
- Dropdown
- Radio
- Checkbox
- Table
These controls allow you to define the values either manually (Static) or from an external source (Dynamic).
To configure the data source:
- Select the control in the App Builder.
- In the Properties pane, locate the Data Source section.
- Select the Data Source Type. You can select:
- Static
- Dynamic
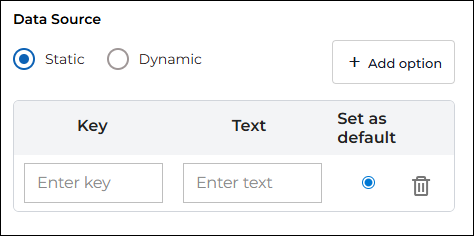
Static Data Source: Static data source allows you to manually define the values that will appear in the control.
When Static is selected, a list of options is displayed. Each option contains the following fields
- Key: Internal value of the option
- Text: Display text shown to the user
- Default: Radio button to set the default value
- The first option is added by default.
- To add more values, click +Add Option.
- Enter the required Key and Text for each option.
- Select Set as Default if the option should be selected automatically.
Static data source is useful when the values are fixed and do not change.
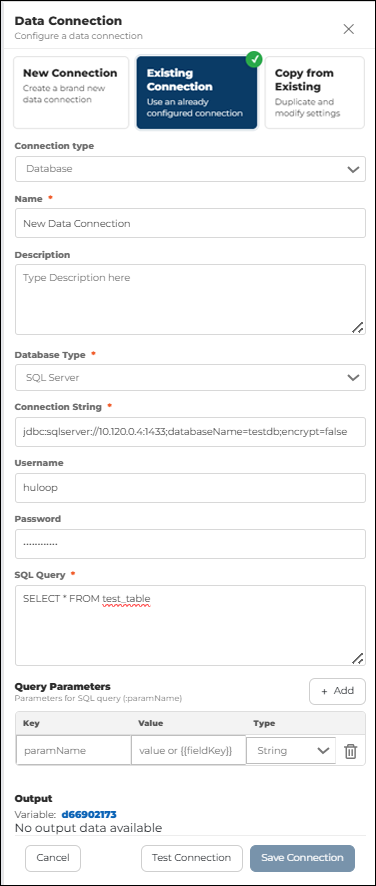
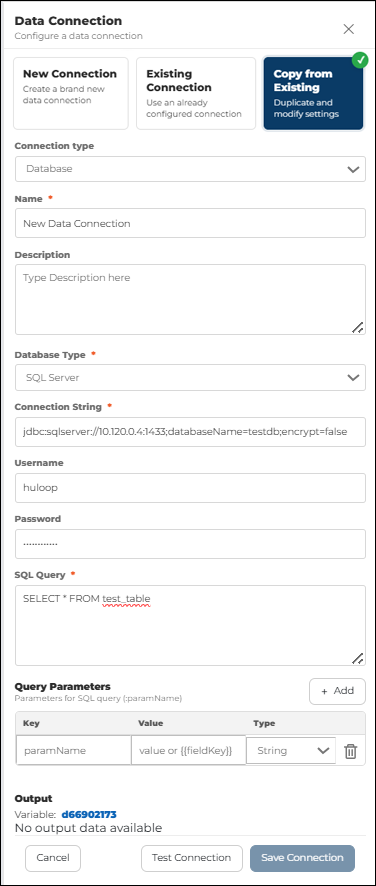
Dynamic Data Source: Dynamic data source allows you to fetch values from an external connection such as an API or Database.
When Dynamic is selected:
- Click +Add New Data Source.
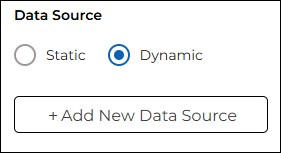
- You will see the following options:
- New Connection (Default selection)
- Existing Connection
- Copy from Existing
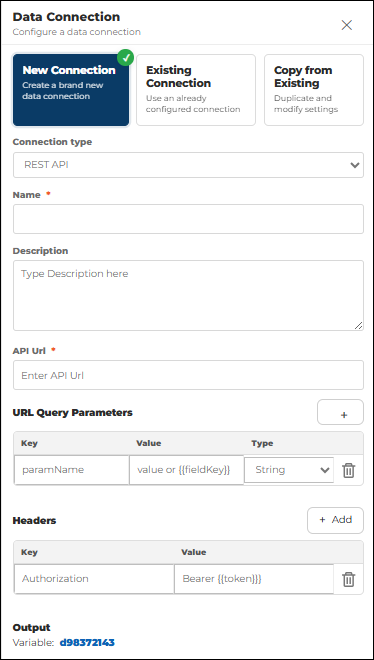
New Connection
Use this option to create a new data connection.
- Select New Connection.
- Select Connection Type. Available connection types:
- REST API
- Database
- Enter the Connection Name (mandatory).
- Enter Description (optional).
REST API Connection
If REST API is selected:
- Enter API URL (mandatory).
- Configure URL Query Parameters if required:
- Key
- Value
- Type (String / Integer / Boolean / Number)
- Click +Add to add more parameters.
- Configure Headers if required:
- Authorization Key
- Bearer Token {{Value}}
- Click +Add to add more headers.
- Output Variable is auto-generated and cannot be edited.

- Click Test Connection to verify the API connection.
Map Dropdown Fields
- You will see available columns from the query Output
- Select:
- Key: The value stored internally
- Text: The value displayed in the dropdown
- Select the columns for Key and Text that define the value and the label displayed in the dropdown.
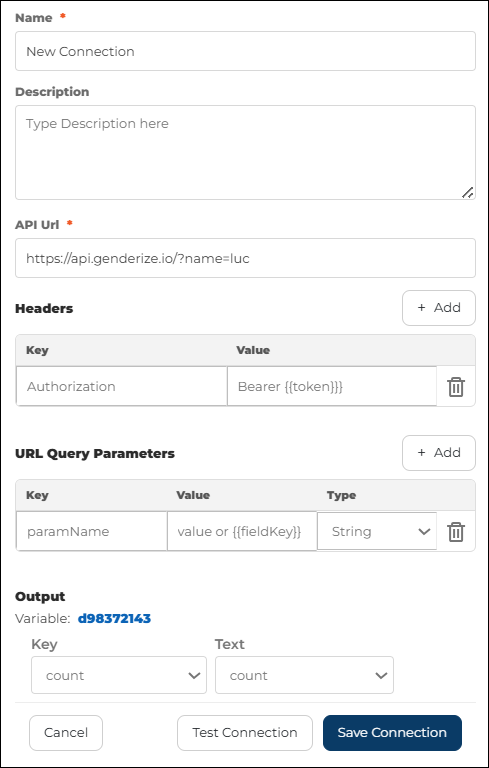
- Click Save Connection
- The dropdown will now display data from your database in the form editor
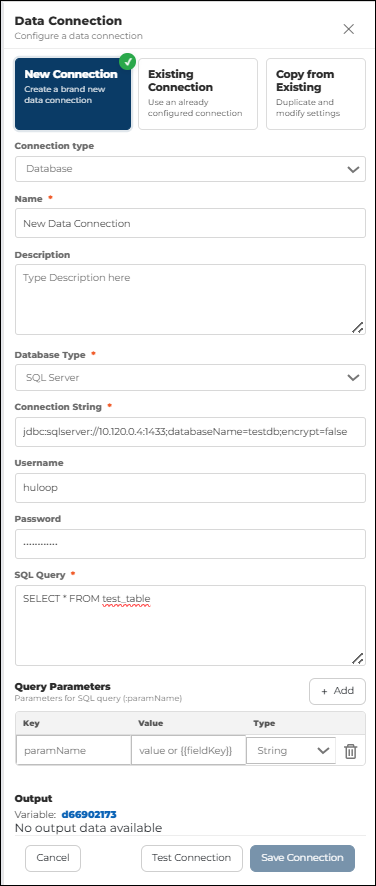
Database Connection
If Database is selected:
- Enter Connection Name.
- Enter Description (optional).
- Select Database Type. Supported database types include:
- SQL Server (default)
- MongoDB
- Connection String: required field used to define how the system connects to your database. The format depends on the selected database type.
- Connection String Format:
jdbc:sqlserver://<IP>:<PORT>;databaseName=<DB_NAME>;encrypt=false - Example: jdbc:sqlserver://10.120.0.4:1433;databaseName=testdb;encrypt=false
- Connection String Format:
- Username: Enter the Database Username.
- Password: Enter the Database Password.
- Enter SQL Query (mandatory).
- Configure Query Parameters to pass dynamic values into your SQL query:
- Key: Parameter name used in the query
- Value / Field Key: Value or reference field from the app
- Type (String / Integer / Boolean / Number): Data type
- Click +Add to add more parameters.
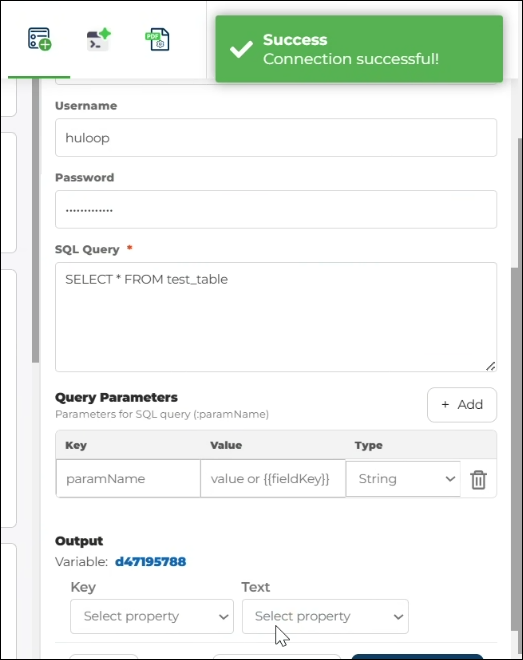
- Click Test Connection to verify the database connection.
Map Dropdown Fields
- You will see available columns from the query Output
- Select:
- Key: The value stored internally
- Text: The value displayed in the dropdown
- Select the columns for Key and Text that define the value and the label displayed in the dropdown.
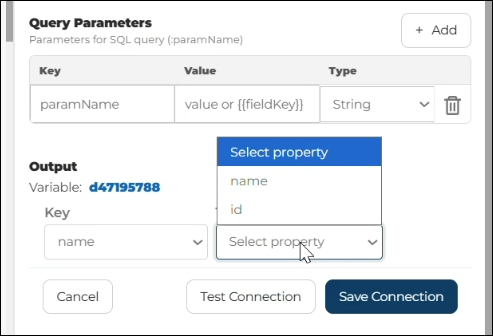
- Click Save Connection
- The dropdown will now display data from your database in the form editor
Existing Connection
Use this option to use a previously configured connection.
- Select Existing Connection.
- Select the connection from the dropdown list.
- The connection settings are loaded automatically.
- Save the data source.
This option is useful when the same connection is used in multiple controls.
Copy from Existing
Use this option to duplicate an existing connection and modify it.
- Select Copy from Existing.
- Select the existing connection.
- The connection details are populated automatically.
- Modify the fields if required.
- Click Save Connection.
This option is useful when you want to create a similar connection with small changes.
Notes:
- Data Source configuration is available only for Dropdown, Radio, Checkbox, and Table controls.
- Static values are stored inside the app.
- Dynamic values are fetched during runtime.
- You should Test Connection is before saving it.
- Connection must be saved before it can be used.