Using Process Automation in Workflows
Automation node allows you to trigger automation projects as part of a workflow. By using Automation in workflows, you can combine human-driven tasks with system-driven automation to create complete, end-to-end business processes.
When Should You Use an Automation Node?
Use an Automation node in a workflow when you want to:
- Run an automation project automatically at a specific point in the workflow
- Eliminate manual steps by triggering unattended automation
- Reuse existing automation logic within a business process
- Perform background actions such as data processing, validations, or integrations
How Automation Fits into a Workflow
When a workflow reaches an Automation node during execution:
- The workflow triggers the linked automation automatically.
- The automation runs through the HuLoop Windows Agent Scheduler.
- The workflow waits until the automation completes.
- Based on the execution outcome, the workflow either:
- Continues to the next step, or
- Stops or retries, depending on the configured failure rules.
This ensures controlled execution and predictable workflow behavior.
Example Use Case: Invoice Processing Workflow
An Automation node can be used to automate repetitive system tasks as part of a workflow.
For example, in an invoice processing workflow:
- An employee submits an invoice request form.
- A manager reviews and approves the request.
- The workflow reaches the Automation Node.
- The linked Process Automation automatically:
- Extracts invoice information.
- Validates the data.
- Updates the finance system.
- Stores the processed records.
- Once the automation completes successfully, the workflow continues to the next step automatically.
This allows organizations to combine user approvals and automated system execution within a single workflow.
Prerequisites for Using Automation in Workflows
Before adding an Automation node to a workflow, ensure the following prerequisites are met:
- A valid HuLoop account
- At least one automation project created
- A workflow-enabled IPA created and marked as Active
- The HuLoop Windows Agent installed on the machine where the automation will run
- Scheduler configuration completed (one-time setup per machine)
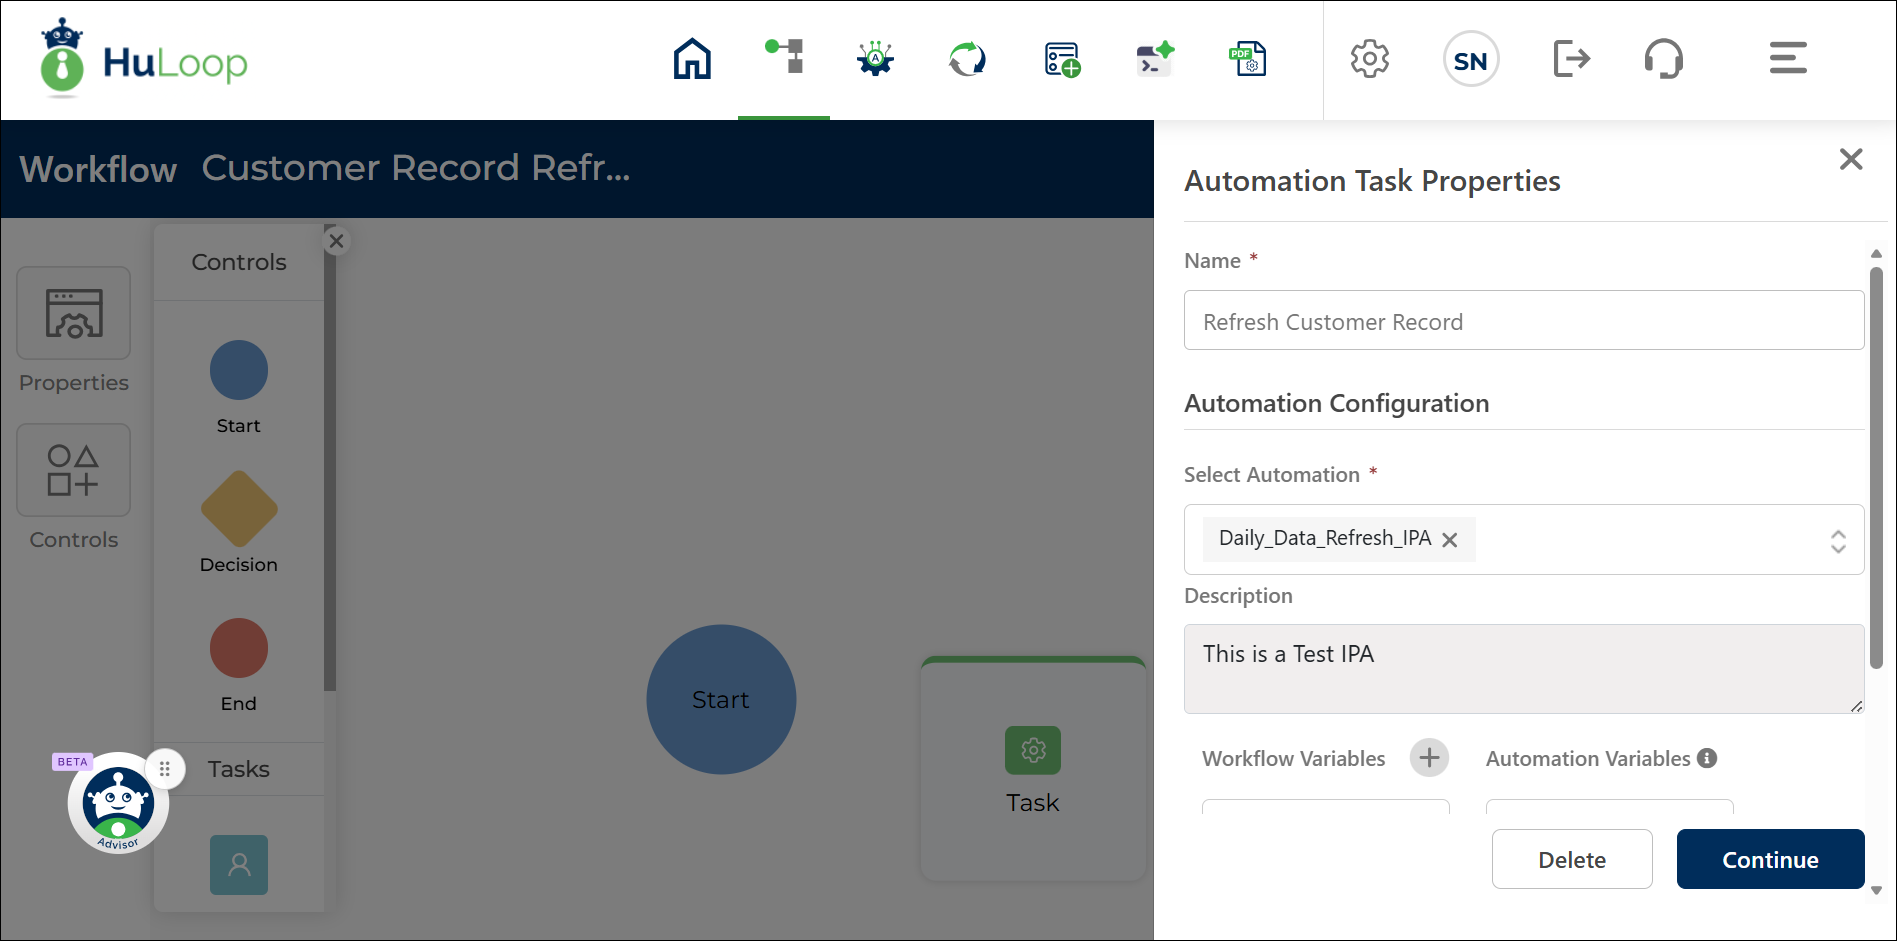
Adding an Automation Node to a Workflow
You can add an Automation node at any point in your workflow where automation execution is required.
To add an Automation node:
- Open the Workflow Designer.
- Drag and drop the Automation Node onto the workflow canvas.
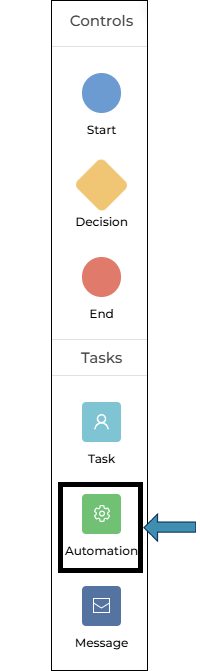
- When placed, the Automation configuration panel opens on the right.
- Enter a name for the Automation node.
- From the Select Automation dropdown, choose an Automation.
Only Automations that meet the following criteria appear in the list:
- The Automation is Active
- Workflow Enablement is set to Yes
Once selected, the Automation description is auto-populated.
Connect the Automation node to the preceding and following nodes to define the execution sequence.
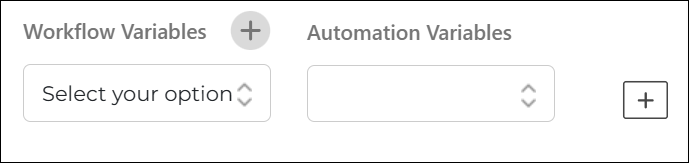
Mapping Workflow and Automation Variables
You can map workflow variables with automation variables so that the values used in your workflow are passed seamlessly into the automation during execution.
HuLoop supports mapping across multiple levels of automation variables, enabling accurate data transfer to the specific suite, module, or use case being executed.
- Workflow Variable: Displays all the existing variables defined in your workflow. Select a variable you want to map with the automation variable. You can also create a new one by clicking the
 icon.
icon. - Automation Variable:Displays all the existing variables defined in your automation. You can map the selected workflow variable with the automation variable you select here and pass data into the automation flow.
- You can map workflow variables with:
- Suite-level variables
- Use Case-level local variables
- Variables defined in Pre-Conditions
- After selecting the automation variable, click the
 icon to map it with the chosen workflow variable.
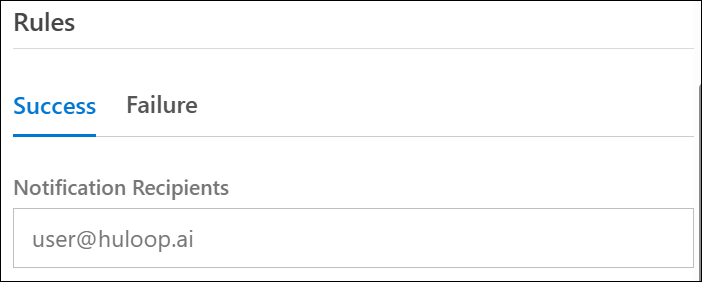
Configuring Execution Rules
You can define how the workflow should behave based on the success or failure of the IPA execution.
On Success:
- Provide the notification recipient’s email address to notify users when the IPA runs successfully.
- Click Continue.
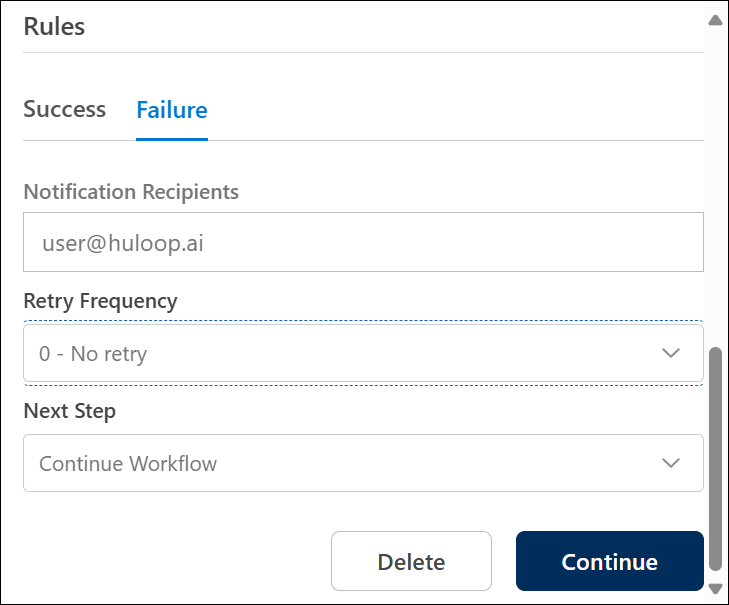
On Failure:
Click Failure Rules to configure what happens if the IPA fails during execution:
- Provide the notification recipient’s email address to notify users when the IPA fails to run.
- Retry Frequency: Select the number of retry attempts (0 to 5).
- 0 = no retry; 5 = retry up to five times.
- Next Steps: Choose what the workflow should do if the IPA fails:
- Continue Workflow – Proceed to the next step in the workflow.
- Stop Workflow – Halt the workflow execution.
- Notify Admin – Send a failure alert to the system administrator.
Executing the Workflow
When you run the workflow:
- The system executes each node in sequence.
- When the workflow reaches the IPA Node, the linked IPA runs automatically through the Scheduler.
- After successful execution, the workflow continues to the next step.
For detailed steps on creating, managing, and monitoring Intelligent Process Automations, see the HuLoop Intelligent Process Automation (IPA) Management Guide.
Last updated: June 10, 2026