Windows Agent Deployment Methods
HuLoop supports two enterprise-grade deployment methods for rolling out the Discovery Agent to multiple Windows desktops:
You can also install the agent manually or use CLI options, which are covered in the next section.
Deploying the Agent via SCCM
For detailed instructions on creating an application package in Software Center, refer to Microsoft’s official guide:
Create Applications in Configuration Manager
Use this method if your organization manages software distribution using Microsoft SCCM.
Before You Begin:
Make sure you have:
- The HuLoop Agent .msi installer file
- Required installation parameters (like server and admin URLs)
- SCCM admin privileges
Step-by-Step Instructions
- Create a New Application Package
In the SCCM console, go to:
Software Library → Application Management → Applications → Create Application
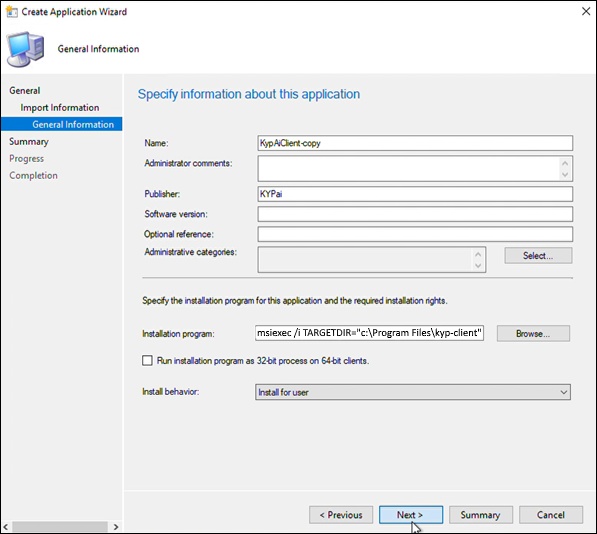
- Choose Installer Type
- Select Windows Installer (*.msi file)
- Browse and upload the HuLoop Agent MSI file
- Add Installation Parameters
In the command line, add parameters to pass installation values:
msiexec /i “KypMsi_Discovery.msi” /quiet /log “C:KypInstall.log” SERVERURL=”https://ipd.customer.com/engine” ADMINURL=https://ipd.customer.com/admin
| Parameter | Purpose |
|---|---|
| SERVERURL | IPD engine endpoint |
| ADMINURL | Admin portal endpoint |
| /quiet | Silent installation (no user interaction) |
| /log | Optional log file location |
- Distribute the Application
Assign the application to the software distribution group or collection. - Test and Monitor Deployment
- Open Software Center on a client machine.
- The agent should appear in the application list.
- Click Install and wait for completion.

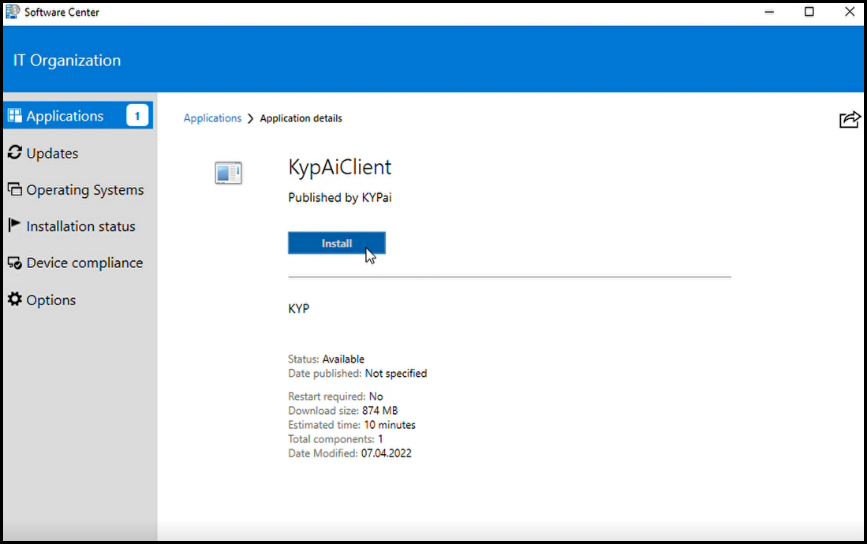
Installing the Agent from Software Center
If your IT department has deployed the HuLoop IPD Agent via Microsoft System Center Configuration Manager (SCCM), end users can install the agent directly from the Software Center using the following steps:
- Click Start, and open Software Center.
- Go to the Applications tab.
- Click on KypAiClient (or the name assigned to the HuLoop Agent package).
- Click Install.
Installation will run silently using the parameters pre-configured by your IT department.
Once you click Install, the agent installation will begin automatically.
After successful installation, you will see a confirmation message. The agent will launch automatically within a few minutes.
Deploying the Agent via Microsoft Intune
Use this method if your organization manages devices with Microsoft Endpoint Manager.
Before You Begin:
You’ll need:
- The HuLoop Agent .msi file
- A .intunewin package (convert using Microsoft’s packaging tool)
- Access to Microsoft Endpoint Manager portal
Step-by-Step Instructions
- Convert MSI to .intunewin
If needed, convert the MSI using Microsoft’s Intune Win32 Content Prep Tool. - Open Microsoft Endpoint Manager
- Navigate to: Apps → Windows → Add
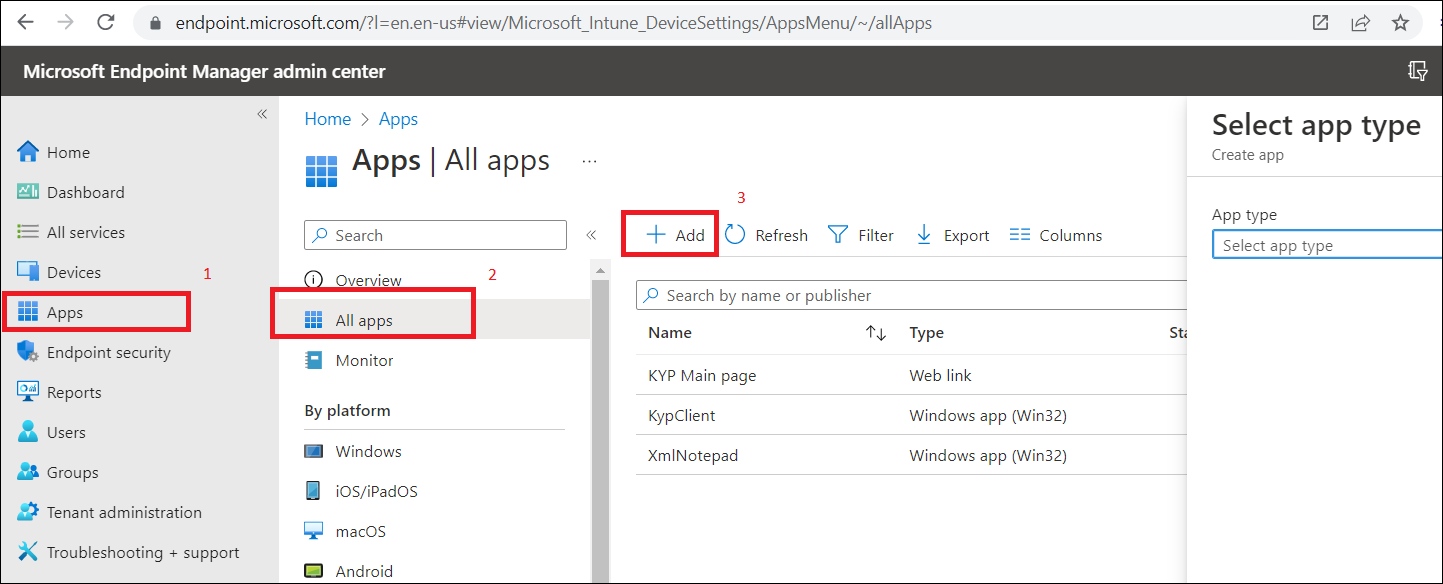
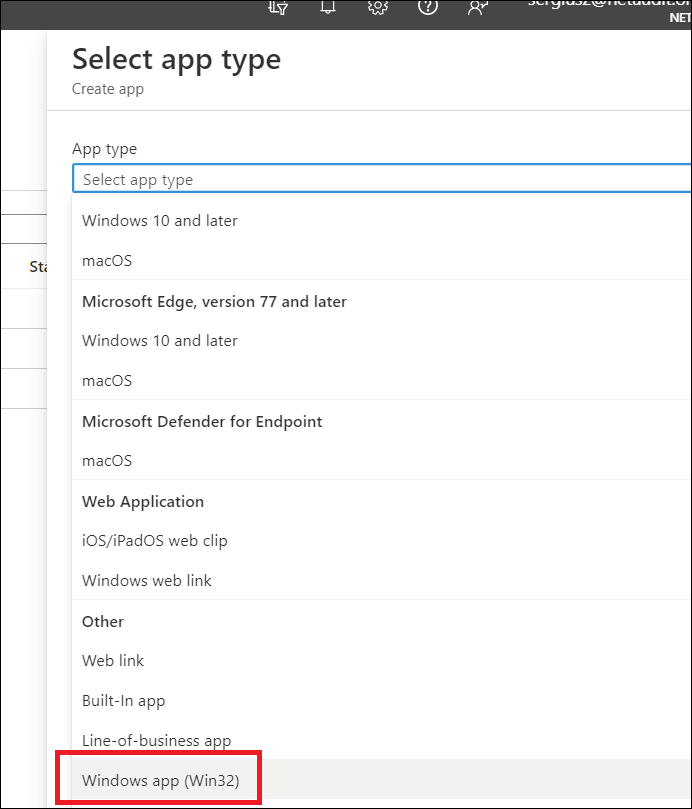
- Choose App Type
- Select Windows app (Win32)
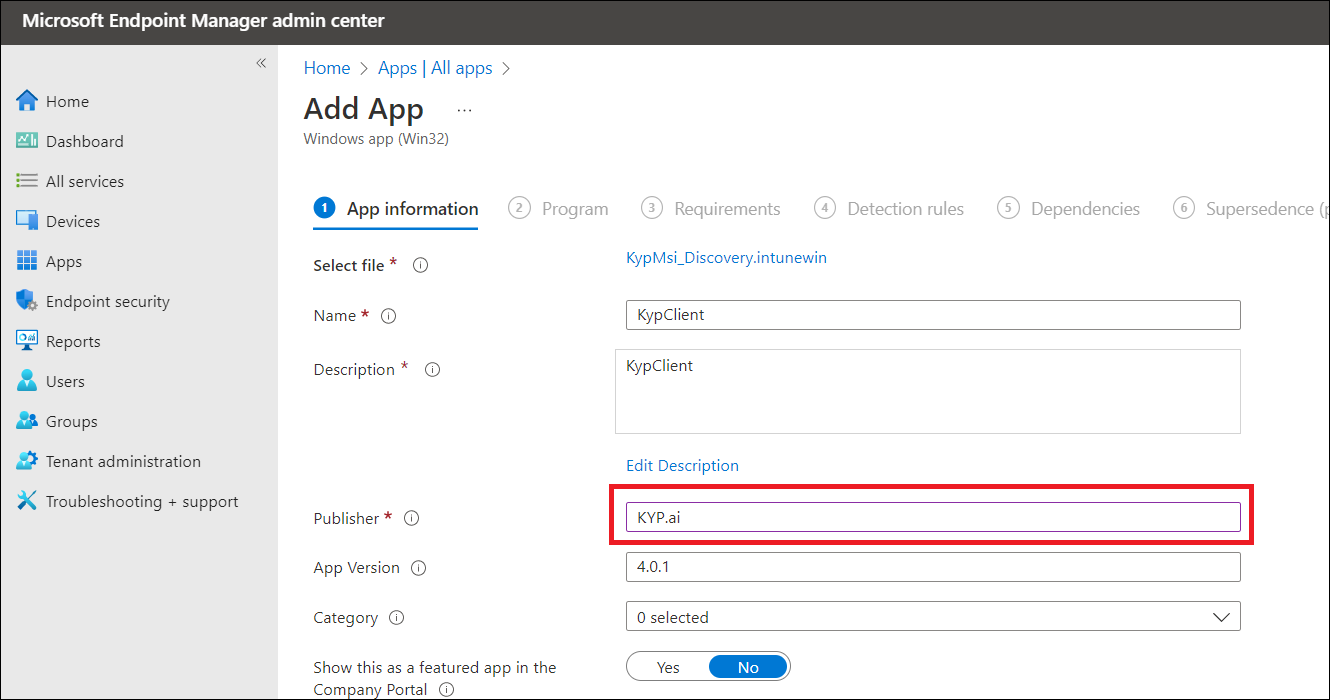
- Upload the .intunewin File
- Upload the converted package
- Add basic app details: name, description, publisher
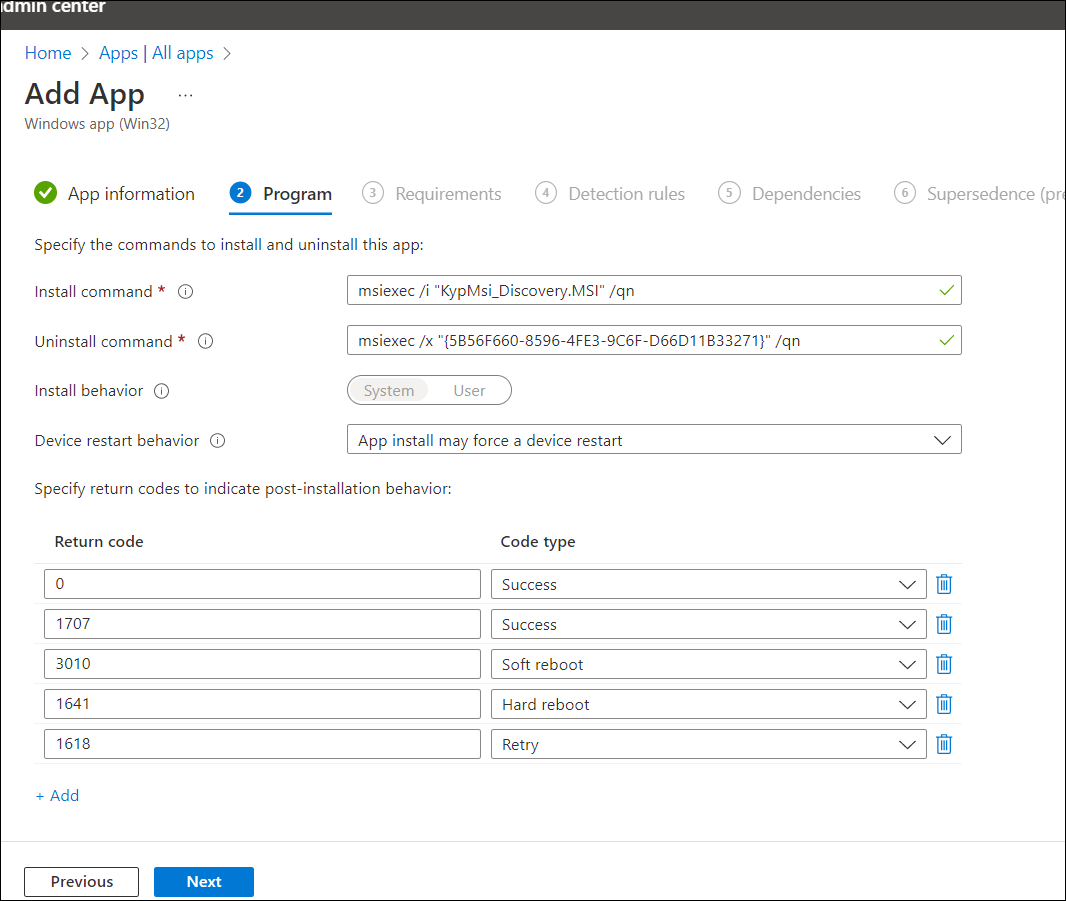
- Set Installation Commands
Use the same silent command as with SCCM:
msiexec /i “KypMsi_Discovery.msi” /quiet
SERVERURL=”https://ipd.customer.com/engine”
ADMINURL=”https://ipd.customer.com/admin”
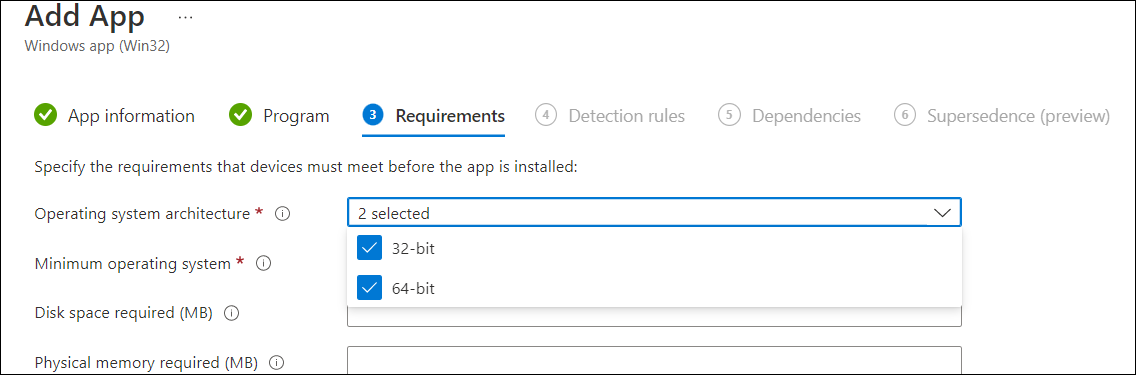
- Define OS architecture and minimum supported Windows version.
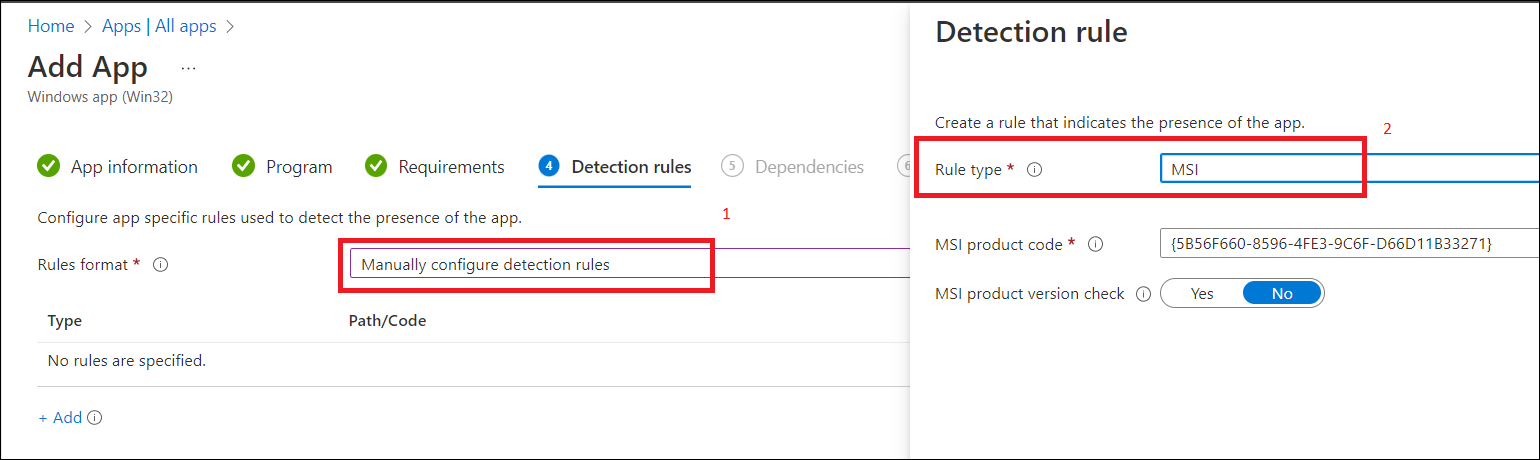
- Define Detection Rules
- Use MSI Product Code detection
- Intune will auto-populate the MSI code
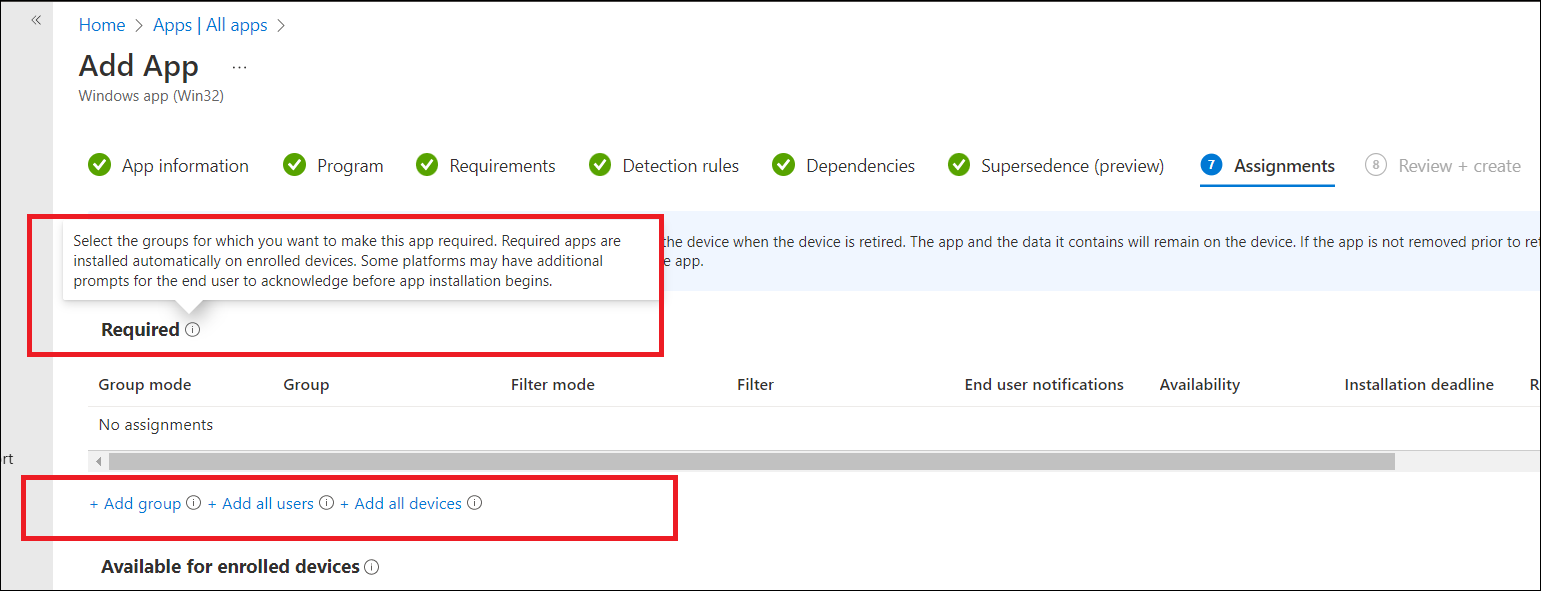
- Assign Deployment
- Choose “Required” to enforce installation on all selected devices
- Assign to a device or user group
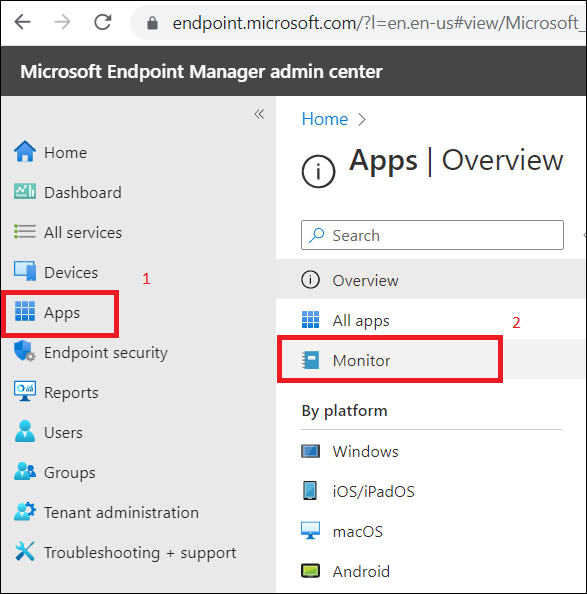
- Monitor Progress
- Go to Apps → Monitor to track deployment status
Use manual detection rules only if MSI detection is unavailable. Avoid using scripts unless necessary.