



Example: A Web-Search Agent
This chapter presents a hands-on example that demonstrates how to build an agent that opens Google, searches for “Java,” waits for the results, and returns a response. In the process, you will use core HuLoop capabilities, including prompts, tools, execution, and result review.
The solution can be implemented in three different ways, each of which is covered in this chapter.
Branch A — AI Generate: describe the task in plain English and let HuLoop write the agent for you.

- Branch B — Manual: fill in every field yourself for full control.

- Branch C — Task Flow: split the job into three visible steps.
Read the shared Setup, Browser tools, and Troubleshooting sections once, then choose the branch you want to try.
This example uses screen automation to control a browser in a demo environment. It is intended for learning and demonstration purposes, not large-scale web scraping. See Screen Automation for complete tool documentation.
What the Agent Does
At run time the agent makes a short, ordered set of browser tool calls:
- Open https://www.google.com (the homepage — not a /search?q= URL).
- Wait for the search box to appear.
- Type Java into the search box.
- Click Google Search.
- Wait for the results to load.
- Take a screenshot as proof, then reply with a short confirmation.
Setup & Prerequisites
This setup is required only once. If browser tools are already configured and functional in your environment, proceed to the next section.
| Requirement | Notes |
|---|---|
| HuLoop is running and you’re signed in | See What is HuLoop and Getting Around. |
| Your role is Developer or Admin | Needed to create and save agents. A 403 error on save means your role is too low. |
| A working AI model | An admin picks the model; AI Generate also needs a model to write the agent. |
| Browser tools are installed | Screen automation runs a real browser behind the scenes. If browser_open fails at run time, it’s an environment setup issue — ask your admin or see Screen Automation. |
A note on speed and limits. Configure appropriate execution limits to prevent stalled interactions from extending the run unnecessarily. Browser-based searches typically require only a small number of turns, so set a low Max Turns value and define a Timeout limit. Recommended settings are provided in each example.
The Browser Tools Used
All three approaches use the same five tools. Disabling unnecessary browser tools helps keep execution focused and reduces the risk of unintended interactions or retry loops.
| Tool | What it does | Example value |
|---|---|---|
| browser_open | Open a web page | url: https://www.google.com, wait_until: domcontentloaded |
| browser_wait_for | Wait for an element to appear | selector: textarea[name=’q’], state: visible |
| browser_fill | Type into a field | selector: textarea[name=’q’], value: Java |
| browser_click | Click an element | selector: input[name=’btnK’] |
| browser_screenshot | Save a picture of the page | label: google-java-results — always the last tool call |
Why the screenshot is last. The platform does not capture screenshots automatically after each step. Instead, the prompt instructs the agent to call browser_screenshot once at the end of the workflow, immediately before generating its response.
Why open the homepage, not a search URL. Navigating directly to google.com/search?q=Java may trigger automated traffic detection. Opening the Google homepage and submitting the search through the interface more closely resembles normal user behavior.
Branch A — Build It With AI Generate
The fastest approach. Provide a description of the agent, and HuLoop automatically generates the name, prompt, goals, and recommended tools, then creates the agent.
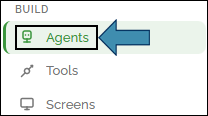
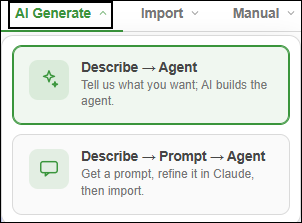
- Open the wizard. Go to BUILD → Agents → + New Agent, then the AI Generate tab (the default for new agents).

- Describe the task (Step 1). In “What should this agent do?” paste this (the box needs at least 10 characters to enable Generate):
Create an agent that opens www.google.com in the browser and searches for Java.

Use browser automation tools:
1) Open https://www.google.com
2) Wait for the search box to appear
3) Type "Java" into the search field
4) Submit the search (click the search button or press Enter)
5) Wait until search results are visible
6) Take a screenshot, then return a short confirmation with the page title

Only use browser tools (browser_open, browser_fill, browser_click,
browser_wait_for, browser_screenshot) and handle Google selectors like
textarea[name='q'] and input[name='btnK'].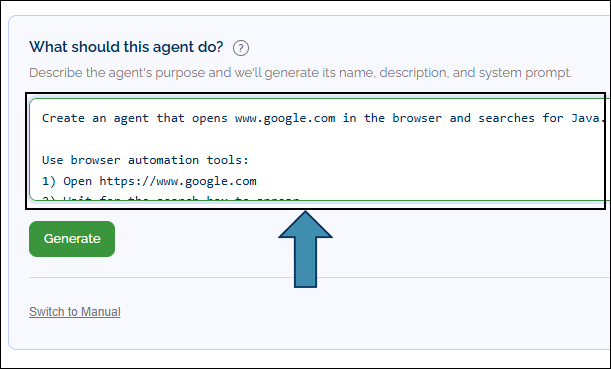
Click Generate. HuLoop shows progress (“Generating name and system prompt…”, then “Saving agent…”) and previews the generated Name, Description, and System Prompt.
Step 1 auto-saves. The agent exists in the database as soon as Generate succeeds — you get an agent before you reach Step 2. If generation fails (usually a missing model key), use Retry, or Switch to Manual and follow Branch B.
Click Next →.
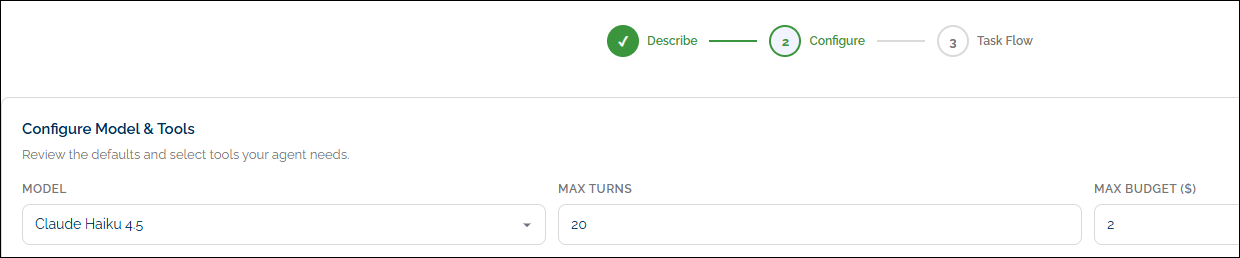
- Configure model & tools (Step 2). Review the defaults, then:
| Field | Set To |
|---|---|
| Model | Use the default model configuration, or select a lower-cost model for demonstration purposes. |
| Max Turns | 20 |
| Max Budget ($) | 2.00 |
In the tool selector, expand Screen Automation and verify that the five required tools listed in Browser Tools Used are enabled. Some tools may be selected automatically, but all five should be enabled before proceeding.

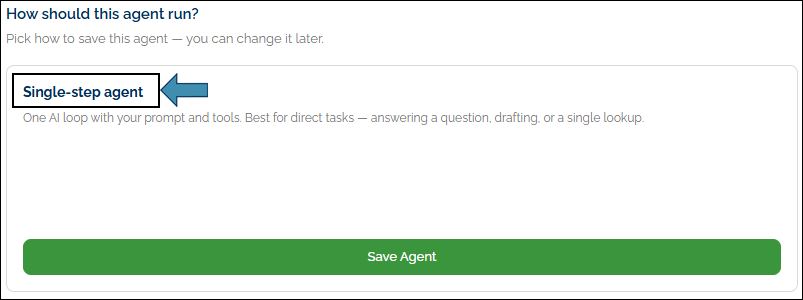
- Save. On the “How should this agent run?” card, pick Single-step agent and click Save Agent. (The Multi-step task flow card is Branch C.)
- Run it. See Running the Agent below.
The wizard only covers Describe and Configure. Guardrails, approvals, schemas, and triggers stay at their defaults — open the Edit tab if you want to adjust them.
Branch B — Build it by hand (Manually)
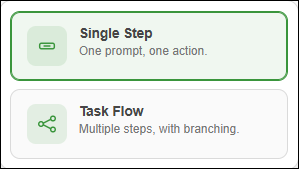
Full control over every field. Go to BUILD → Agents → + New Agent, then the Manual tab. Fill in the sections below and click Create Agent at the end.
Basics
| Field | Value |
|---|---|
| Name | Google Java Search Agent |
| Description | Opens Google in a browser and searches for Java |

Behavior — System Prompt. The following prompt defines the agent’s core behavior. Copy and paste it exactly as shown:
You are a browser automation agent that searches Google.

Parse input for:
- url — host (default: www.google.com)
- search_key — term to search (default: Java)

Execute in order — do NOT skip steps or use a direct search URL:
1. browser_open with url "https://www.google.com" (homepage only, not /search?q=), wait_until "domcontentloaded".
2. browser_wait_for selector "textarea[name='q']" state "visible" timeout 10000.
3. browser_fill selector "textarea[name='q']" value <search_key> (use "Java" for the demo).
4. browser_click selector "input[name='btnK']" click_type "single".
5. browser_wait_for selector "#search" state "visible" timeout 15000.
6. LAST TOOL CALL (mandatory): browser_screenshot label "google-java-results".
7. Only after the screenshot: reply with a short summary (success, CAPTCHA block, or error).

Rules:
- Use only browser_open, browser_wait_for, browser_fill, browser_click, browser_screenshot.
- Never open https://www.google.com/search?q=... — always use the homepage.
- Never send your final reply until browser_screenshot has been called.
- If a step fails, screenshot the current page, report the error, and stop. Do not retry more than once.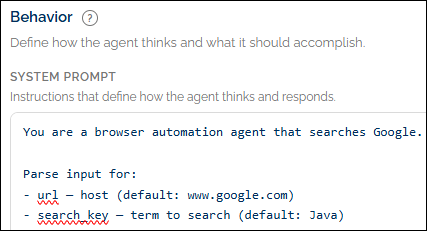
Model & Limits
| Field | Value | Why |
|---|---|---|
| Model | Your tenant default. | — |
| Max Turns | 10 | A search needs ~3–6 turns; a high number causes long retry loops. |
| Max Budget ($) | 2.00 | Stops runaway spend. |

Reliability
| Field | Value |
|---|---|
| Timeout (Seconds) | 120 — stops a stuck run after two minutes. |

Tools & Knowledge. Enable only the five tools from the browser tools used. Turn off browser_discover, browser_save_screen, browser_select, browser_get_text, and browser_check. Set Knowledge Base to None.

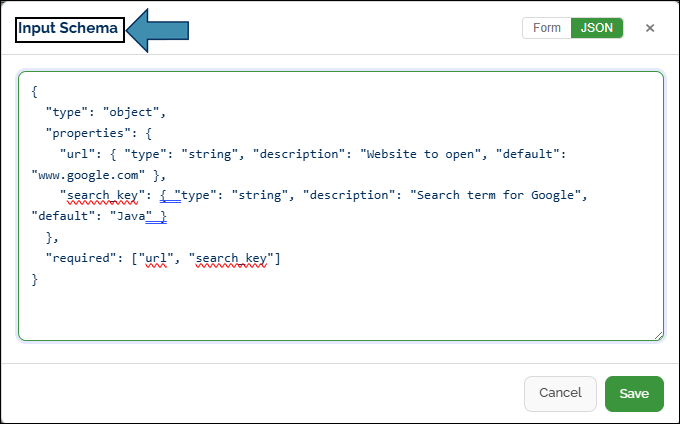
Input schema (recommended). Adding an input schema gives the Run tab a form with url and search_key fields. Under Input & Output Schemas → Input Schema, use Manage fields or paste:
{
  "type": "object",
  "properties": {
    "url": { "type": "string", "description": "Website to open", "default": "www.google.com" },
    "search_key": { "type": "string", "description": "Search term for Google", "default": "Java" }
  },
  "required": ["url", "search_key"]
}
If you skip the schema, the Run tab will request a text prompt instead (see below). Leave Triggers on the default manual trigger, then Create Agent.
Branch C — Build it as a Task Flow (Three Steps)
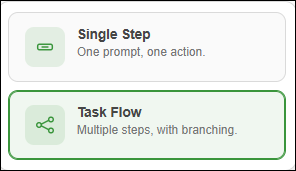
A Task Flow divides the same job into three boxes on a canvas. Each step shows up separately in the run graph and audit trail, and later steps can read what the earlier ones reported. This is the multi-step version of the example.
flowchart TD
  S[Start] --> A[step_open<br/>Open Google] --> B[step_search<br/>Search for Java] --> C[step_finalize<br/>Screenshot + summary] --> O[Output]
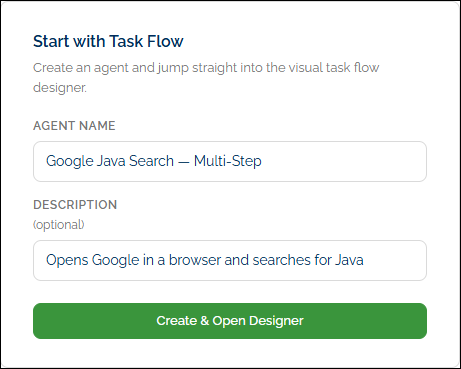
Part 1 — Create the Parent Agent. Follow Branch B, with three changes:
| Field | Value |
|---|---|
| Name | Google Java Search — Multi-Step |
| Max Turns | 8 (per step) |
| Timeout | 180 seconds (three steps) |

Use this parent system prompt instead — it explains how to run one step.
You are a browser automation agent executing ONE step of a multi-step Google search pipeline.

Follow ONLY the instructions in the current step prompt. Do not do other steps' work.

Allowed tools (use only what the step asks for):
browser_open, browser_wait_for, browser_fill, browser_click, browser_screenshot

Rules:
- Never open https://www.google.com/search?q=... — always use the homepage.
- When a step says to call browser_screenshot, that MUST be the last tool call.
- Reply briefly with what you accomplished; later steps read your output via ${step_id.output}.
- If a step fails, report the error and stop — do not retry more than once.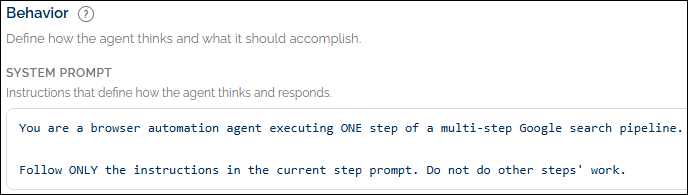

Keep the same five tools, the same input schema, and Update Agent.

Part 2 — Build the flow. Open the agent’s Task Flow tab. If a default step_1 node exists, delete it. Drag Agent Call onto the canvas three times and connect them:

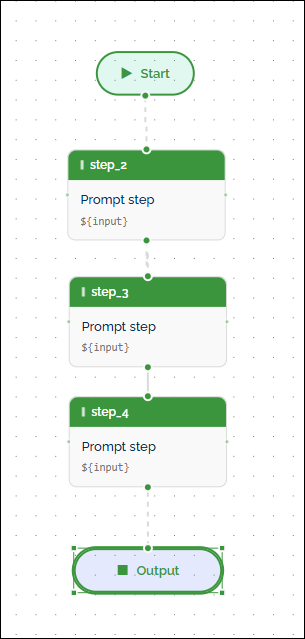
Start → step_open → step_search → step_finalize → OutputFor every node, set Step Type = Prompt and leave Agent empty (it uses this agent). Then give each node its Step ID and prompt:
step_open — Open Google:
Step 1 of 3 — Open homepage only.
Workflow input: ${input}
Actions: 1) browser_open url "https://www.google.com" wait_until "domcontentloaded".
2) browser_wait_for selector "textarea[name='q']" state "visible" timeout 10000.
Do NOT type or click Search yet. Reply briefly and mention search_key.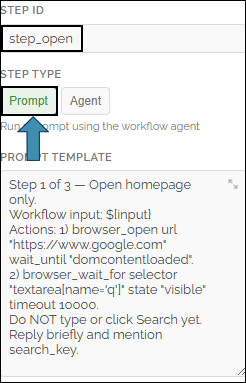
step_search — Search for Java:
Step 2 of 3 — Enter the search term and submit.
Workflow input: ${input}
Previous step: ${step_open.output}
Actions: 1) browser_fill selector "textarea[name='q']" value <search_key>.
2) browser_click selector "input[name='btnK']" click_type "single".
3) browser_wait_for selector "#search" state "visible" timeout 15000.
Do NOT screenshot in this step. Reply with the page title and whether results loaded.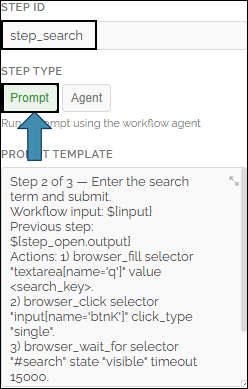
step_finalize — Screenshot & summary:
Step 3 of 3 — Capture proof and return the result.
step_search output: ${step_search.output}
Actions: 1) browser_screenshot label "google-java-multistep-results" — MUST be the last tool call.
2) Then reply with ONLY valid JSON: url, search_key, page_title, results_visible, summary.
Set results_visible to false if a CAPTCHA blocked the search.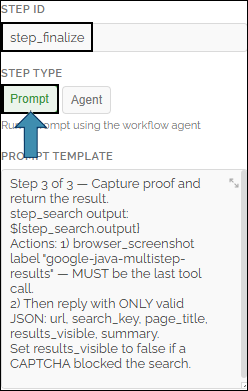
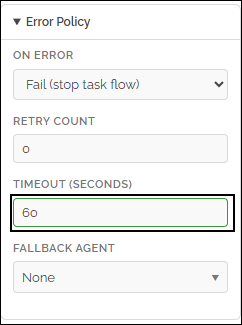
Give each step a 60-second timeout in its Error Policy, then Save the flow.
Part 3 — Run it using the steps below. In the graph you’ll see three completed steps in sequence rather than one loop.
For node types, variable syntax like ${step_open.output}, and adding a human approval or a branch, see Task Flows.
Running the Agent
The same for all three branches.
- Open the agent’s Run tab.
- Give it input:
- If you added the input schema: Use the Form tab — url = www.google.com, search_key = Java.
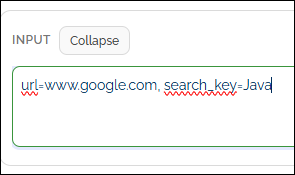
- If you didn’t: Type this into the prompt box — url=www.google.com, search_key=Java
- Click Start. (Dry Run checks the setup without opening a browser.)

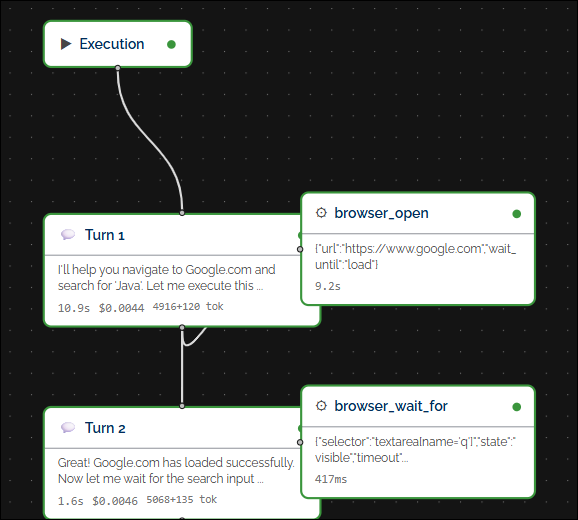
- Watch the Graph or Stream view. Expect the browser tool calls to run in order, with the screenshot last, finishing in under two minutes.
Verify success:
| Check | Where |
|---|---|
| Status is completed | Run tab header. |
| The tool calls ran in order, screenshot last | Graph or Stream. |
| A short confirmation mentions Google / Java / results | Final output. |
| A screenshot was saved | Stream event / output files. |
| The run is listed | Executions page (under OBSERVE). |
For more on interpreting a run, see Running and Results.
Troubleshooting
| Problem | Fix |
|---|---|
| Generate is disabled (Branch A) | The description is under 10 characters. |
| Run takes many minutes, then you stop it | Lower Max Turns (10, or 8 per step) and set a Timeout; remove the extra browser tools. |
| Redirected to google.com/sorry/ (a CAPTCHA) | Google blocked the automation. Wait and retry later, or use a different network. The agent should still screenshot before replying. |
| Agent opens /search?q=Java instead of the homepage | The system prompt must forbid direct search URLs — paste it exactly. |
| No screenshot appears | The prompt must require browser_screenshot as the last tool, and the tool must be enabled (blue chip). |
| Agent doesn’t call any tools | Confirm the five browser tools are on, and that the prompt names them. |
| browser_open fails / browser environment not set up | An environment issue, not an agent issue — ask your admin. See Screen Automation. |
| Run tab asks for input | Expected — fill the form or type the text prompt. |
| Start is disabled | Enter a prompt or fill both form fields. |
| budget_exceeded | Raise Max Budget or lower turns. |
| 403 error on save | You need the Developer or Admin role. |
