Prerequisites
Before you begin:
- Access to a HuLoop account.
- A Console Run ID for the automation you want to schedule.
- HuLoop CLI installed and configured on your Windows machine.
- Batch file containing the CLI command for your automation.
See how to create a batch file. - Windows Task Scheduler available on your system.
Creating a Batch File for CLI Execution
You can create a batch file to run your automation directly from a saved script. This simplifies repeated executions.
- Open Notepad.
- Add the following lines to create the batch script:
cd /d<space><path to the folder containing HuLoopCLI.exe>
HuLoopCLI.exe<space>-open<space>”<Console Run ID>”
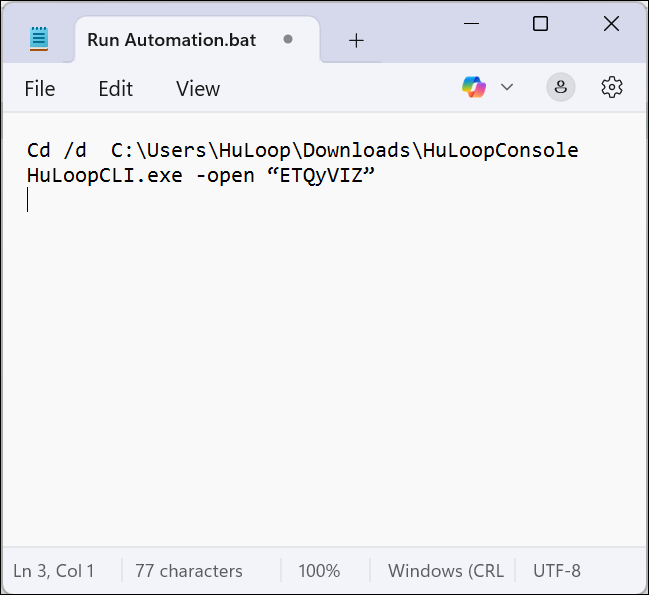
Replace <path to the folder> with the actual file path and <Console Run ID> with the value created earlier. For example:
Cd /d C:UsersHuLoopDownloadsHuLoopConsole
HuLoopCLI.exe -open “ETQyVIZ”
- Save the file with a .bat extension. For example: Run Automation.bat
- You can now double-click this file anytime to trigger the automation without opening the command line manually.