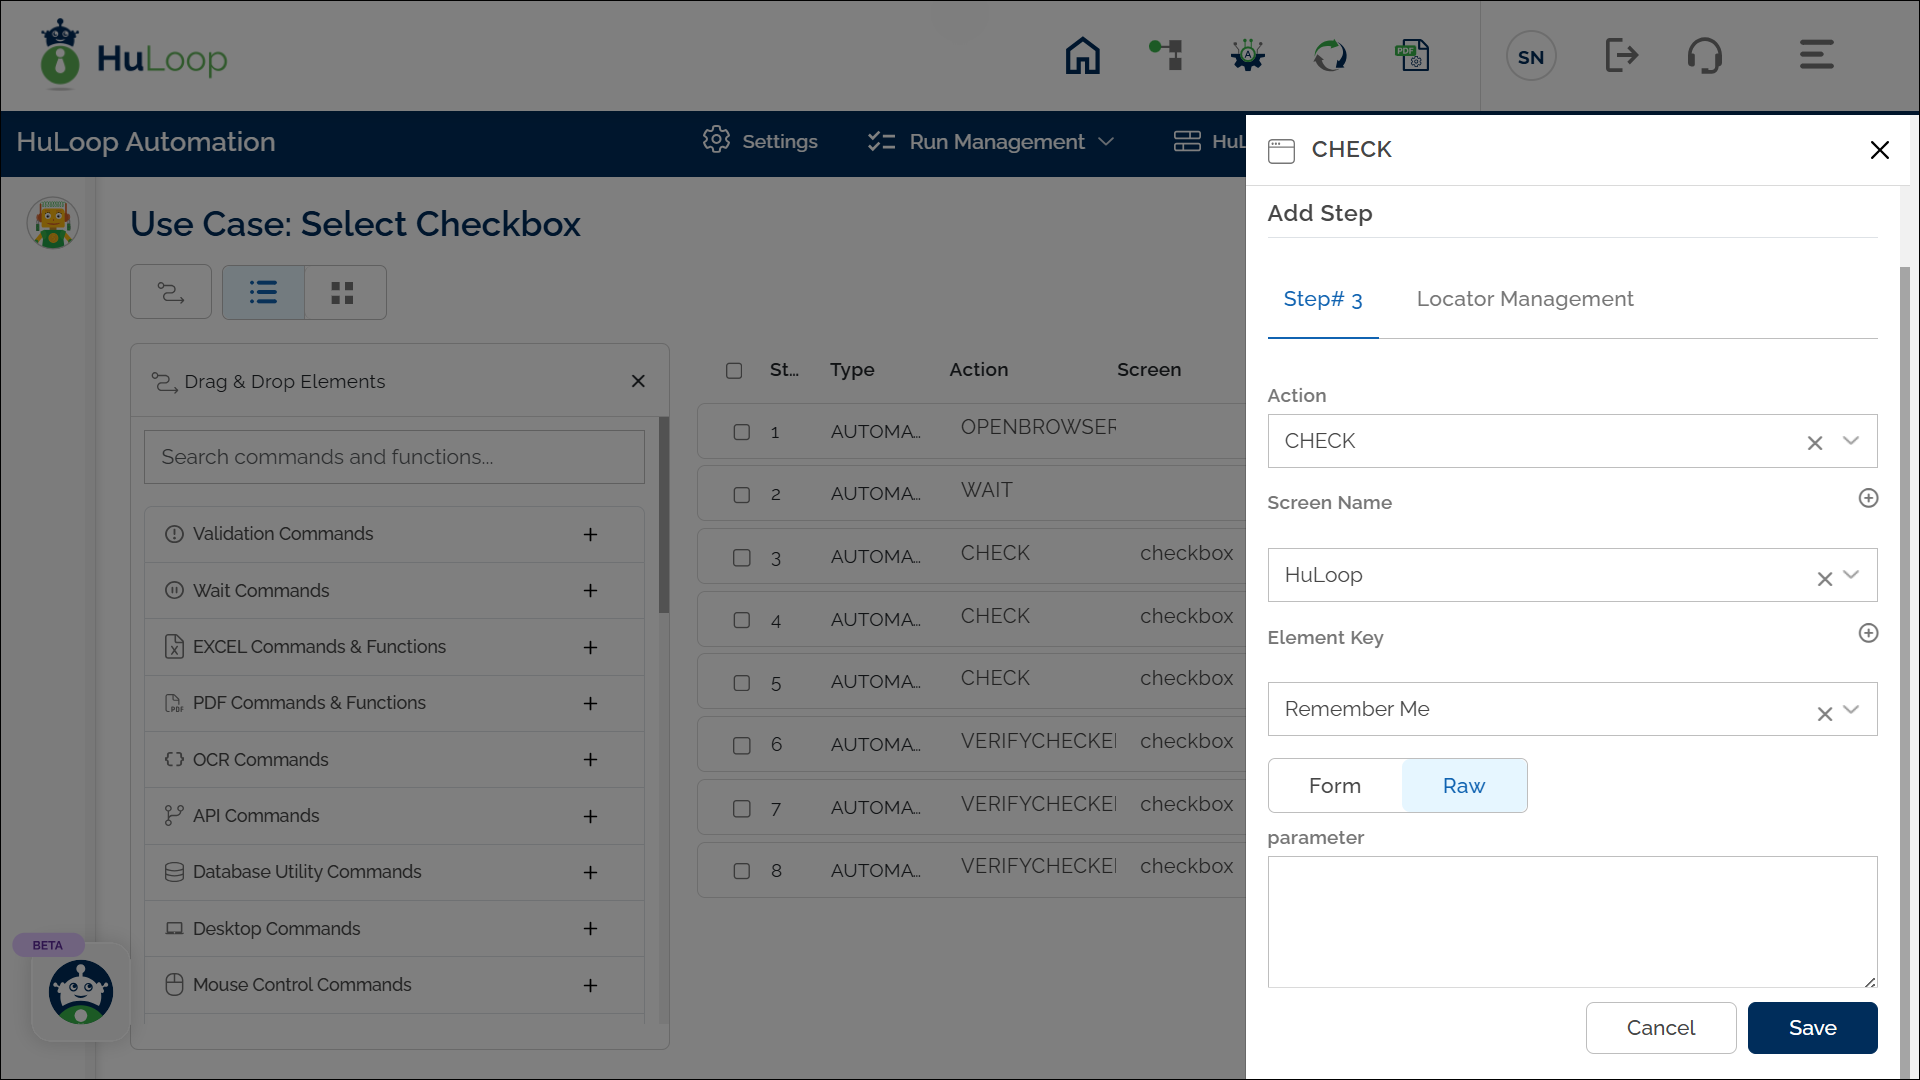
Click to Check Box: CHECK
The Click to Check Box action is used to select or “check” a checkbox in web applications and desktop applications. This action automates marking a checkbox as selected, ensuring that certain options or settings are enabled during process automation or test execution.
Examples of usage:
- Example 1: Use the Check action to select a “Remember Me” checkbox on a login page.
Steps to configure:
- Select CHECK from the Action drop-down.
- In the Screen Name field, enter the screen where the checkbox is located.
- In the Element Key field, select the checkbox element you want to check.
- The Parameters section is not needed for this action.
- Click Save.
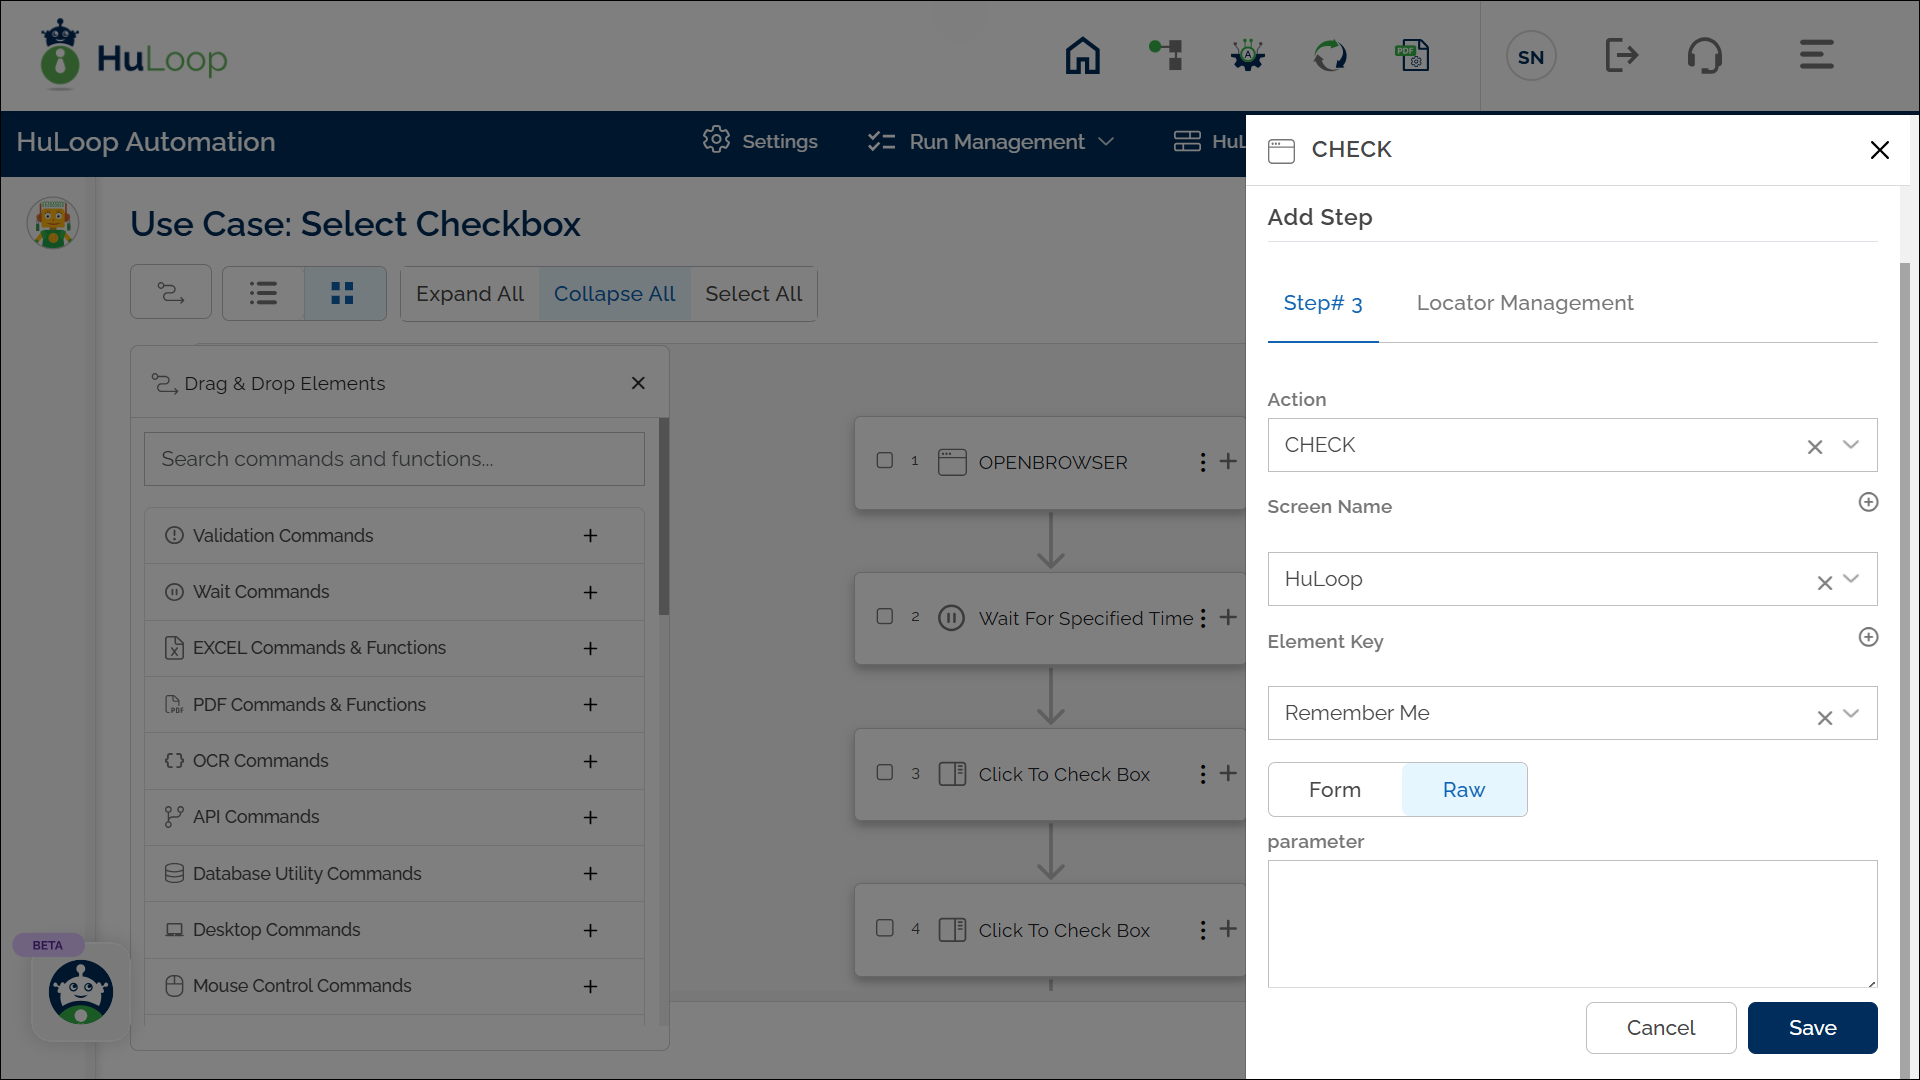
Note: While the steps for adding an Action are identical in both views, the display of the steps changes:
Note: Ensure that the Screen Name and Element Key are already defined before using this action.
Expected Outcome on Execution: The specified checkbox will be checked or selected on the page.