Move To Element and Click: MOVEANDCLICK
The Move To Element and Click action moves the mouse over a specified element and performs a click. If a locator cannot be created for the target element, we can provide the locator of another nearby element and specify the x and y coordinates for the element we want to click.
- Example 1: Let’s click the Request a Demo button on the ai website.
Steps to configure:
- Select MOVEANDCLICK from the Action drop-down.
- Enter HuLoop in the Screen Name field.
- Choose Request Demo in the Element Key field.
- Leave the Parameters section blank.
- Click Save.
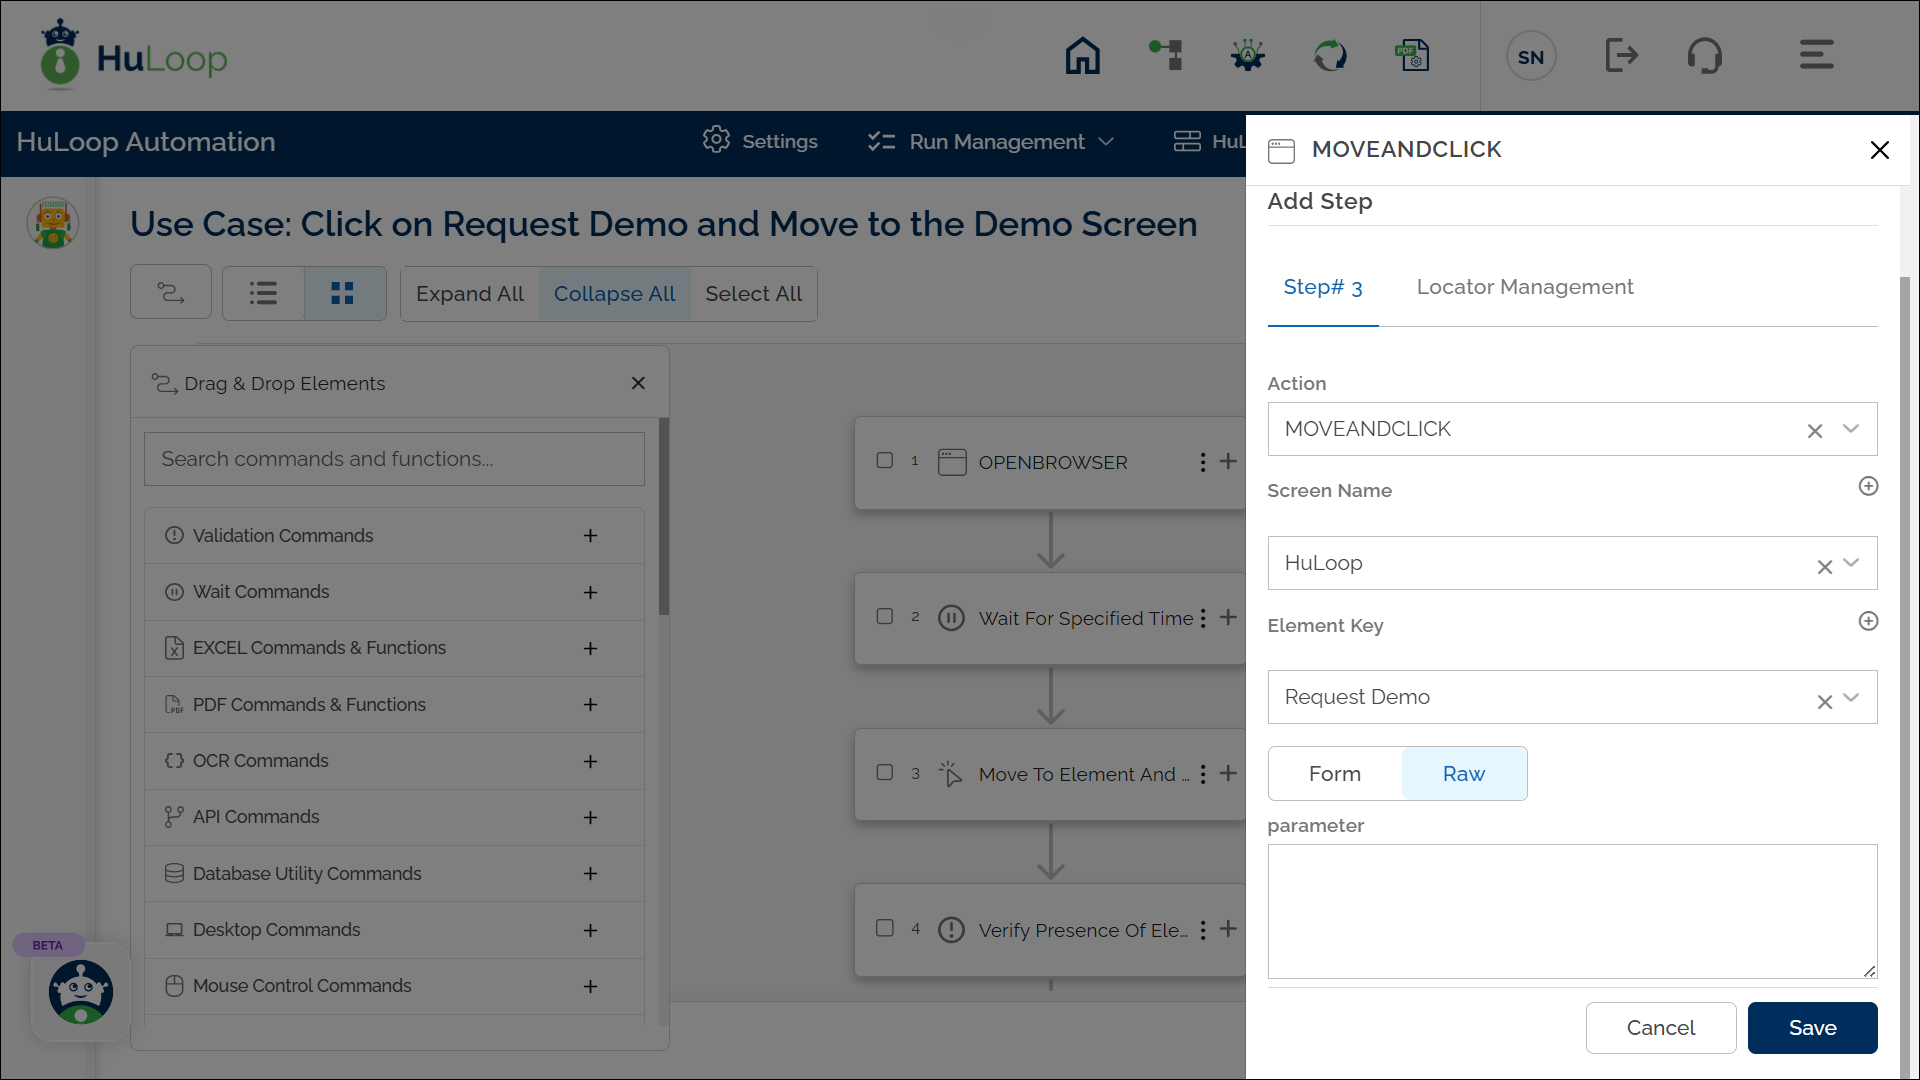
Note: While the steps for adding an Action are identical in both views, the display of the steps changes:
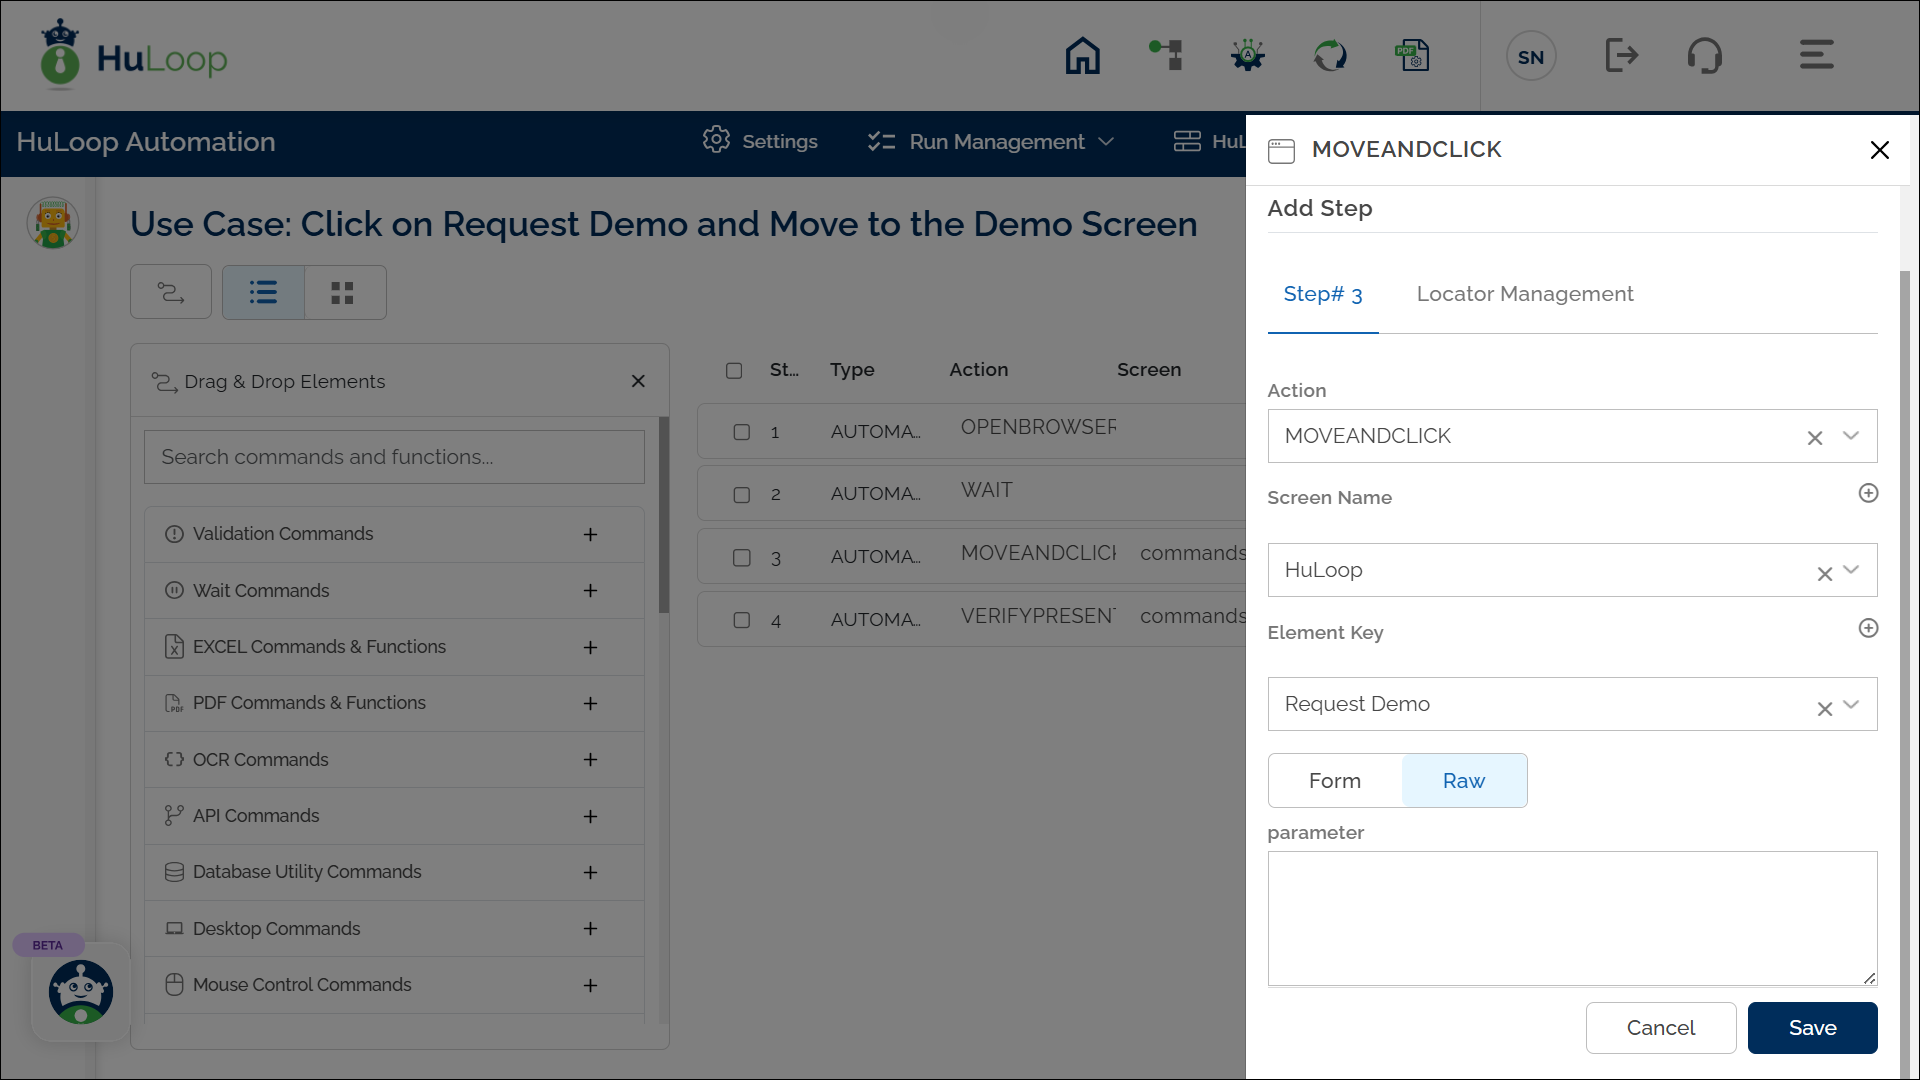
Note: Ensure that the Screen Name and Element Key are already defined before using this action.
Expected Outcome on Execution: The mouse moves to the Request a Demo button, and a click is executed.
- Example 2: Let’s say we want to click the Solutions dropdown on the HuLoop.ai homepage, but we cannot create a locator for it. We will provide the locator of another nearby element (e.g., Product link) and specify the x and y coordinates for the element we want to click.
Steps to configure:
- Select MOVEANDCLICK from the Action drop-down.
- Enter HuLoop in the Screen Name field.
- Choose the nearby element (e.g., Product link) as the Element Key.
- In the Parameters section, enter x and y coordinates relative to the product link (e.g., if x: 50 and y: 10, you should define the parameters as [50,10]).
- Click Save.
Note: While the steps for adding an Action are identical in both views, the display of the steps changes:
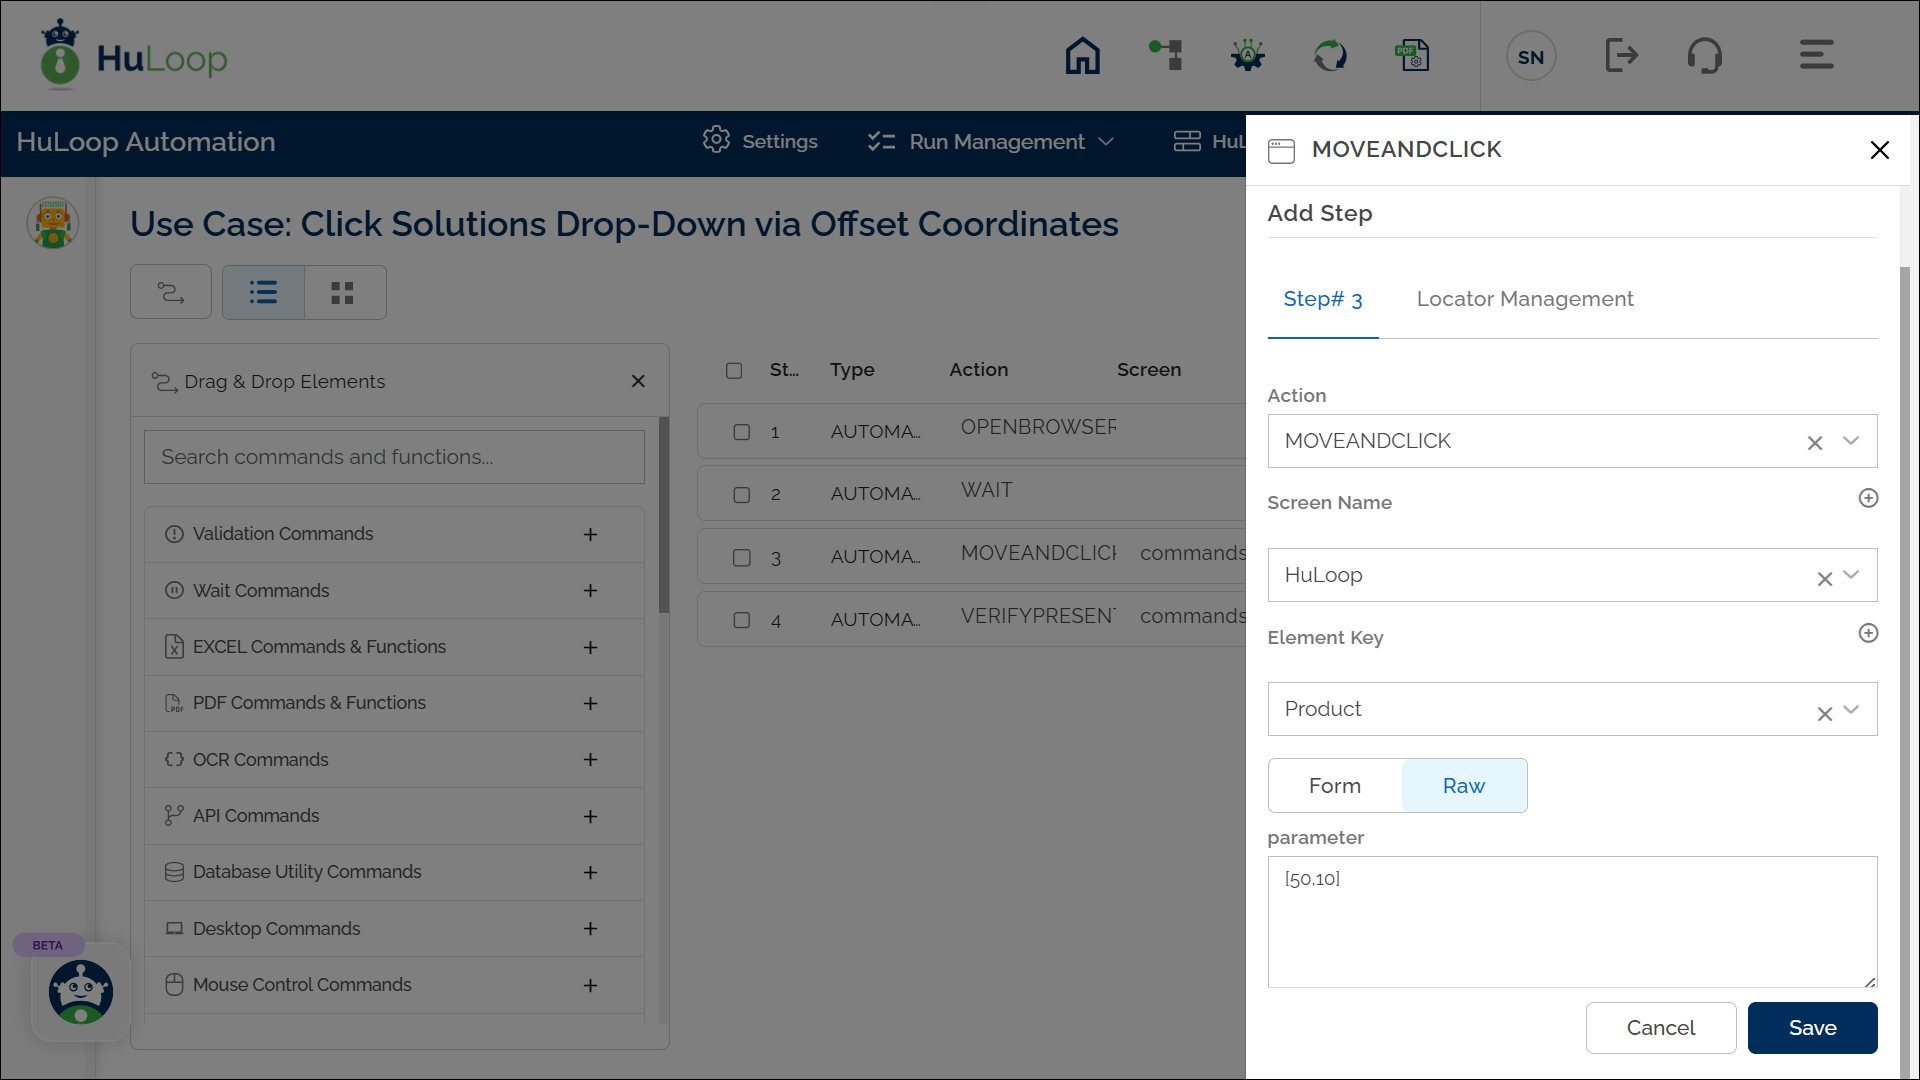

Note: Ensure that the Screen Name and Element Key are already defined before using this action.
Expected Outcome on Execution: The mouse moves to the specified coordinates relative to the Product link, and a click is executed at the precise location (Solutions drop-down).
Last updated: Sep 12, 2025