Format Action: format
The format command in the Excel Handler Function is used to apply a specific date format to a column in an Excel sheet. This ensures consistency in date presentation, making it easier to process and analyze date-related data.
Note: Ensure that the file being used is not open during the Case execution to avoid errors or conflicts.
Example: You need to format the JoiningDate column in the EmployeeData.xlsx file on the EmployeeDetails sheet to display dates in the mm/dd/yyyy format.
Steps to Configure:
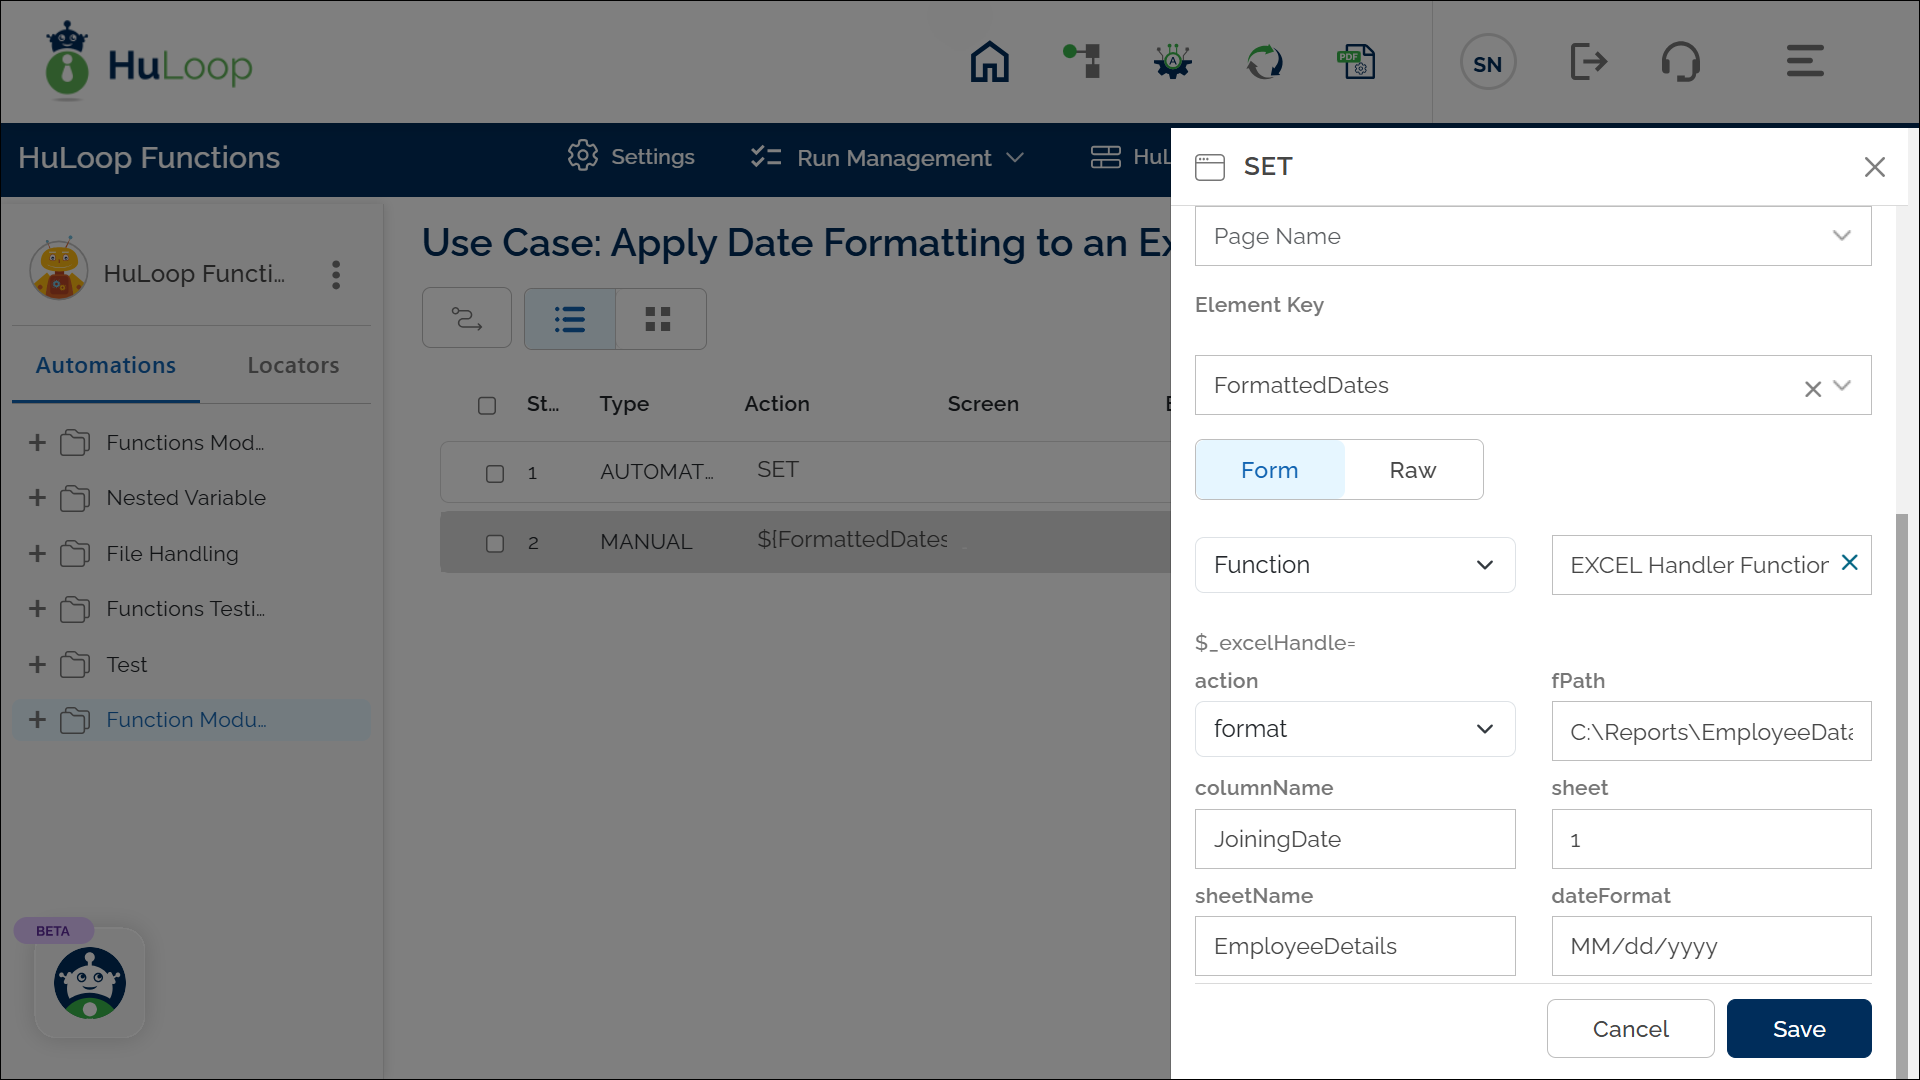
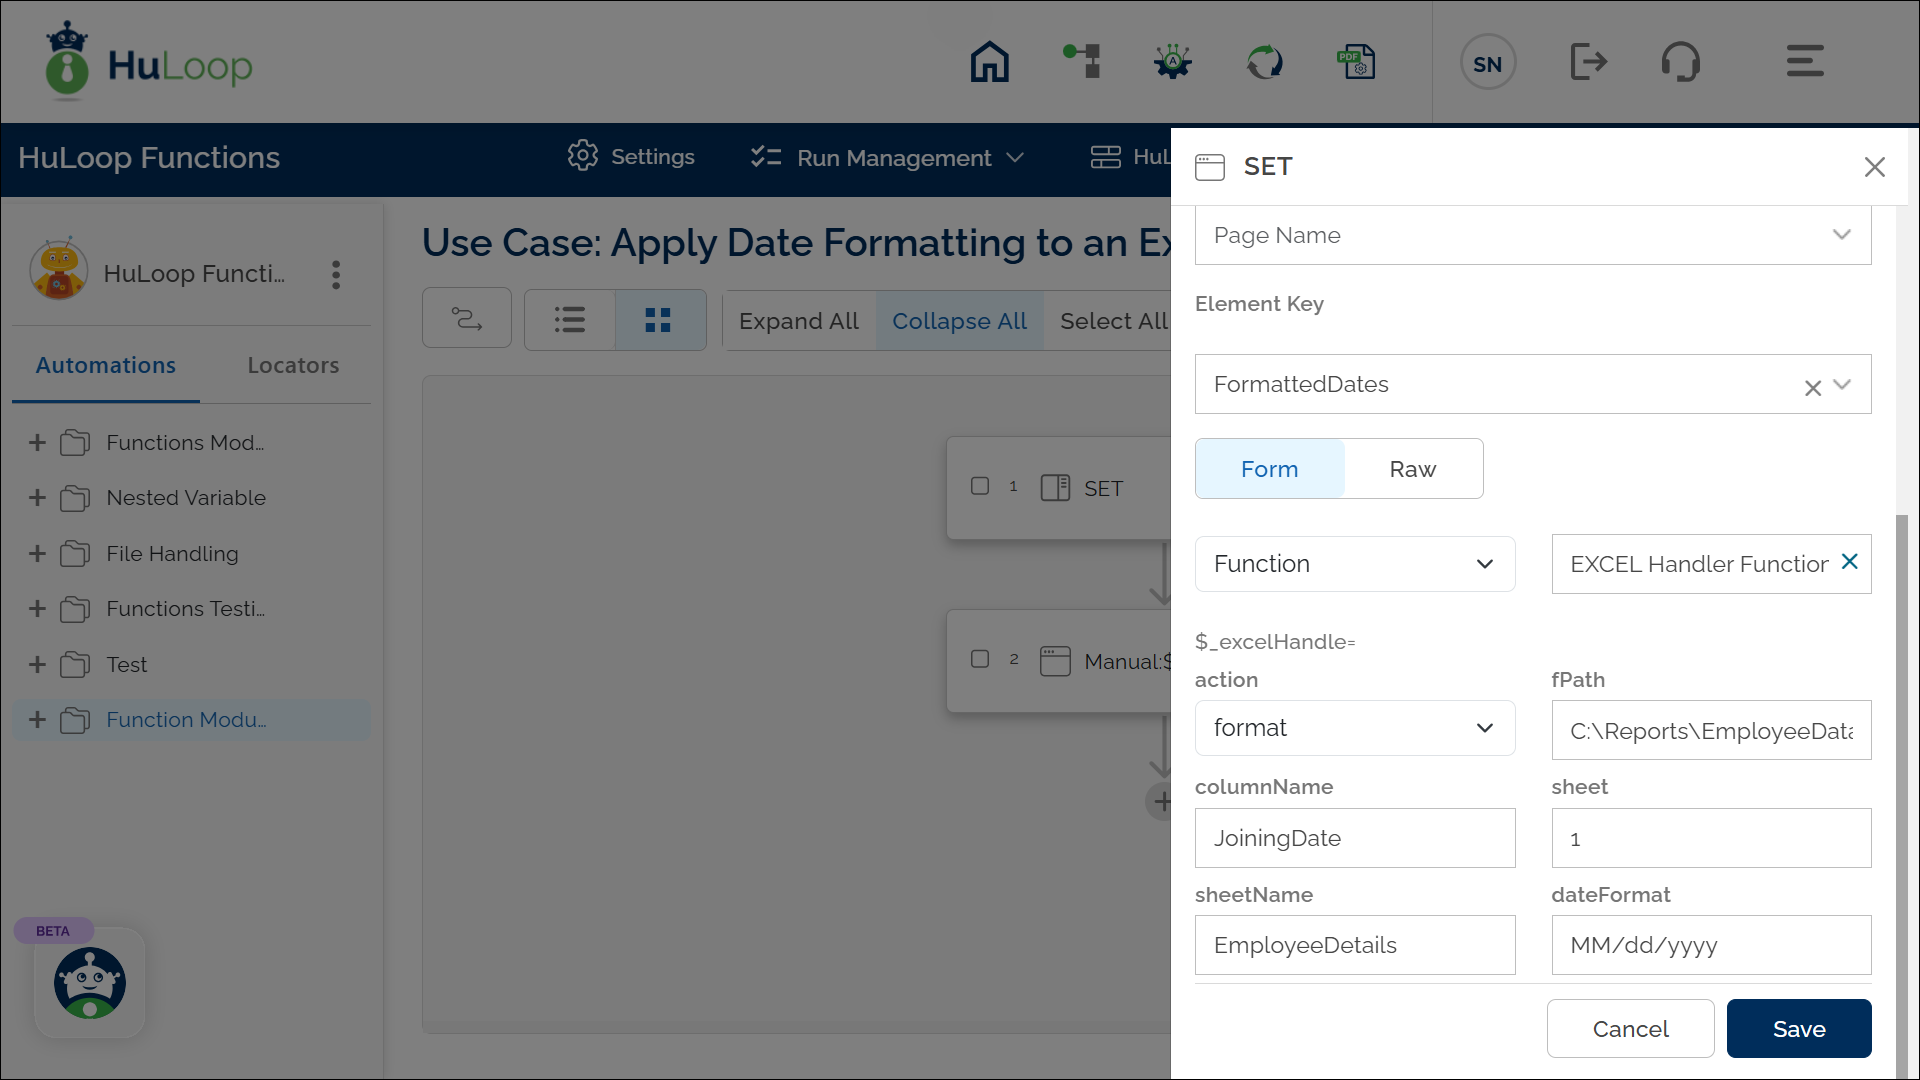
- Add a new step.
- Select SET from the Action dropdown.
- Enter a variable name in the Element Key field (e.g., FormattedDates). This variable will store the file path of the updated Excel file.
- Click on Form, select Functions, and choose EXCEL Handler Functions from the dropdown.
- In the action field, select format and provide the following parameters:
- fPath: Enter the full path of the Excel file to be formatted (e.g., C:\Reports\EmployeeData.xlsx).
- columnName: Specify the column to format (e.g., JoiningDate).
- Sheet: Enter the name of the sheet containing the column (e.g., EmployeeDetails).
- sheetNumber: Specify the sheet number in the file (e.g., 1).
- dateFormat: Provide the desired date format (e.g., MM/dd/yyyy or dd-MM-yyyy).
- Click Save.
Outcome on execution:
- The command applies the specified date format to the JoiningDate column in the EmployeeDetails sheet.
- The data is stored in the variable defined in the Element Key field for use in subsequent steps.
- This variable can be referenced in subsequent steps of the automation process using the syntax ${VariableName} (e.g., ${FormattedDates}).