Load EXCEL Table Using Index: loadExcelTable
The Load EXCEL Table Using Index function loads a specified range of data from an Excel file based on user-defined start and end indexes. This function is useful for working with structured table data within an automation workflow.
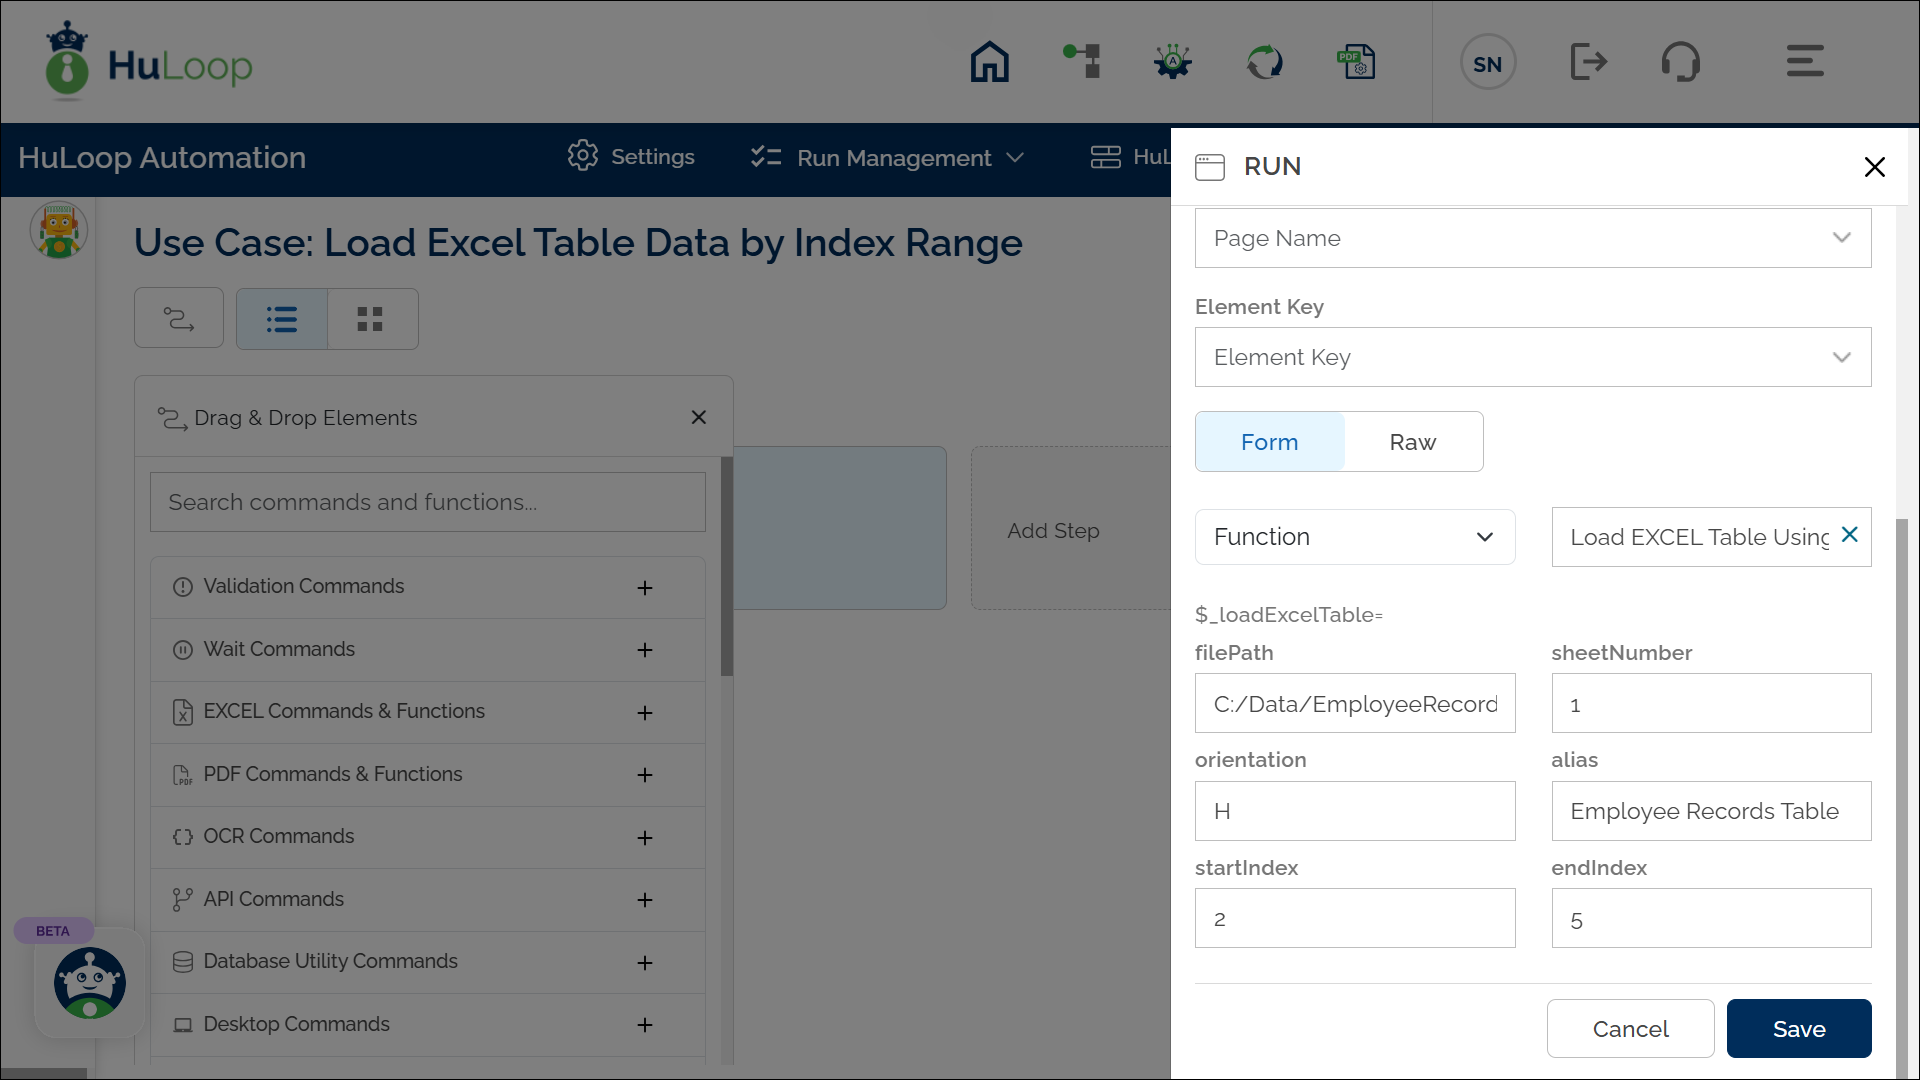
Example Usage: Imagine you have an Excel file with employee records, and you need to extract data from rows 2 to 5 in Sheet 1 for processing. Instead of manually filtering the data, you can use Load EXCEL Table Using Index function to load only the required range into a variable, making it available for further actions.
Steps to Configure:
- Select RUN from the Action dropdown.
- Leave the Screen Name and Element Key fields blank.
- In the Parameter section, click Form and select Functions from the dropdown.
- Choose Load EXCEL Table Using Index from the list of functions.
- Provide the following details:
- filePath: Enter the full path of the Excel file (e.g., C:/Data/EmployeeRecords.xlsx).
- Sheet Name or Sheet Number: You can provide either:
- sheetName (e.g., EmployeeData) OR
- sheetNumber (e.g., 1 for the first sheet).
- orientation: Specify how the data is structured:
- H for Horizontal (row-wise data loading)
- V for Vertical (column-wise data loading)
- alias: Enter a variable name that will reference the loaded table (e.g., Employee Records Table).
- startIndex: Enter the row/column index where the table starts (e.g., 2).
- endIndex: Enter the row/column index where the table ends (e.g., 5).
- Click Save.
Note: The Alias is the variable in which the Excel table data will be stored. Once the table is loaded into the alias, you can retrieve values using GETCELLVALUE or update values using SETCELLVALUE.

Expected Outcome
- The specified range of data from the Excel file is loaded into the alias variable.
- The extracted data can be used dynamically in subsequent automation steps using the syntax ${Alias Variable Name}.