Autoit Script Handler Function: autoitscripthandler
The Autoit Script Handler function allows you to run pre-defined AutoIt scripts within your automation workflow. AutoIt is a scripting language used to automate Windows-based tasks, such as handling popups, entering credentials, or interacting with system dialogs.
This function is especially useful when automating interactions with Windows UI elements that cannot be directly controlled through other Element identifiers.
Creating an Automation Script: Before using this function, define your AutoIt script by following these steps:
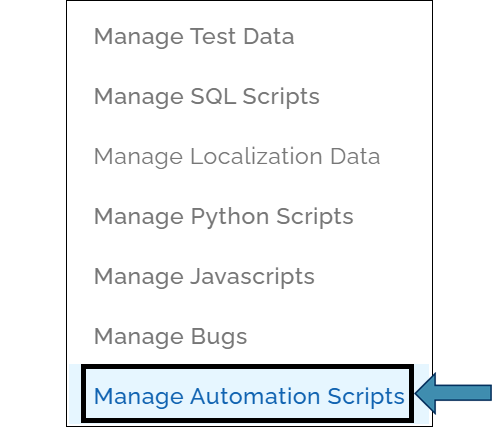
- Open the Automation you are working on and click Data as show:

- Select Manage Automation Scripts:
- You will see the Manage Automation Scripts page:
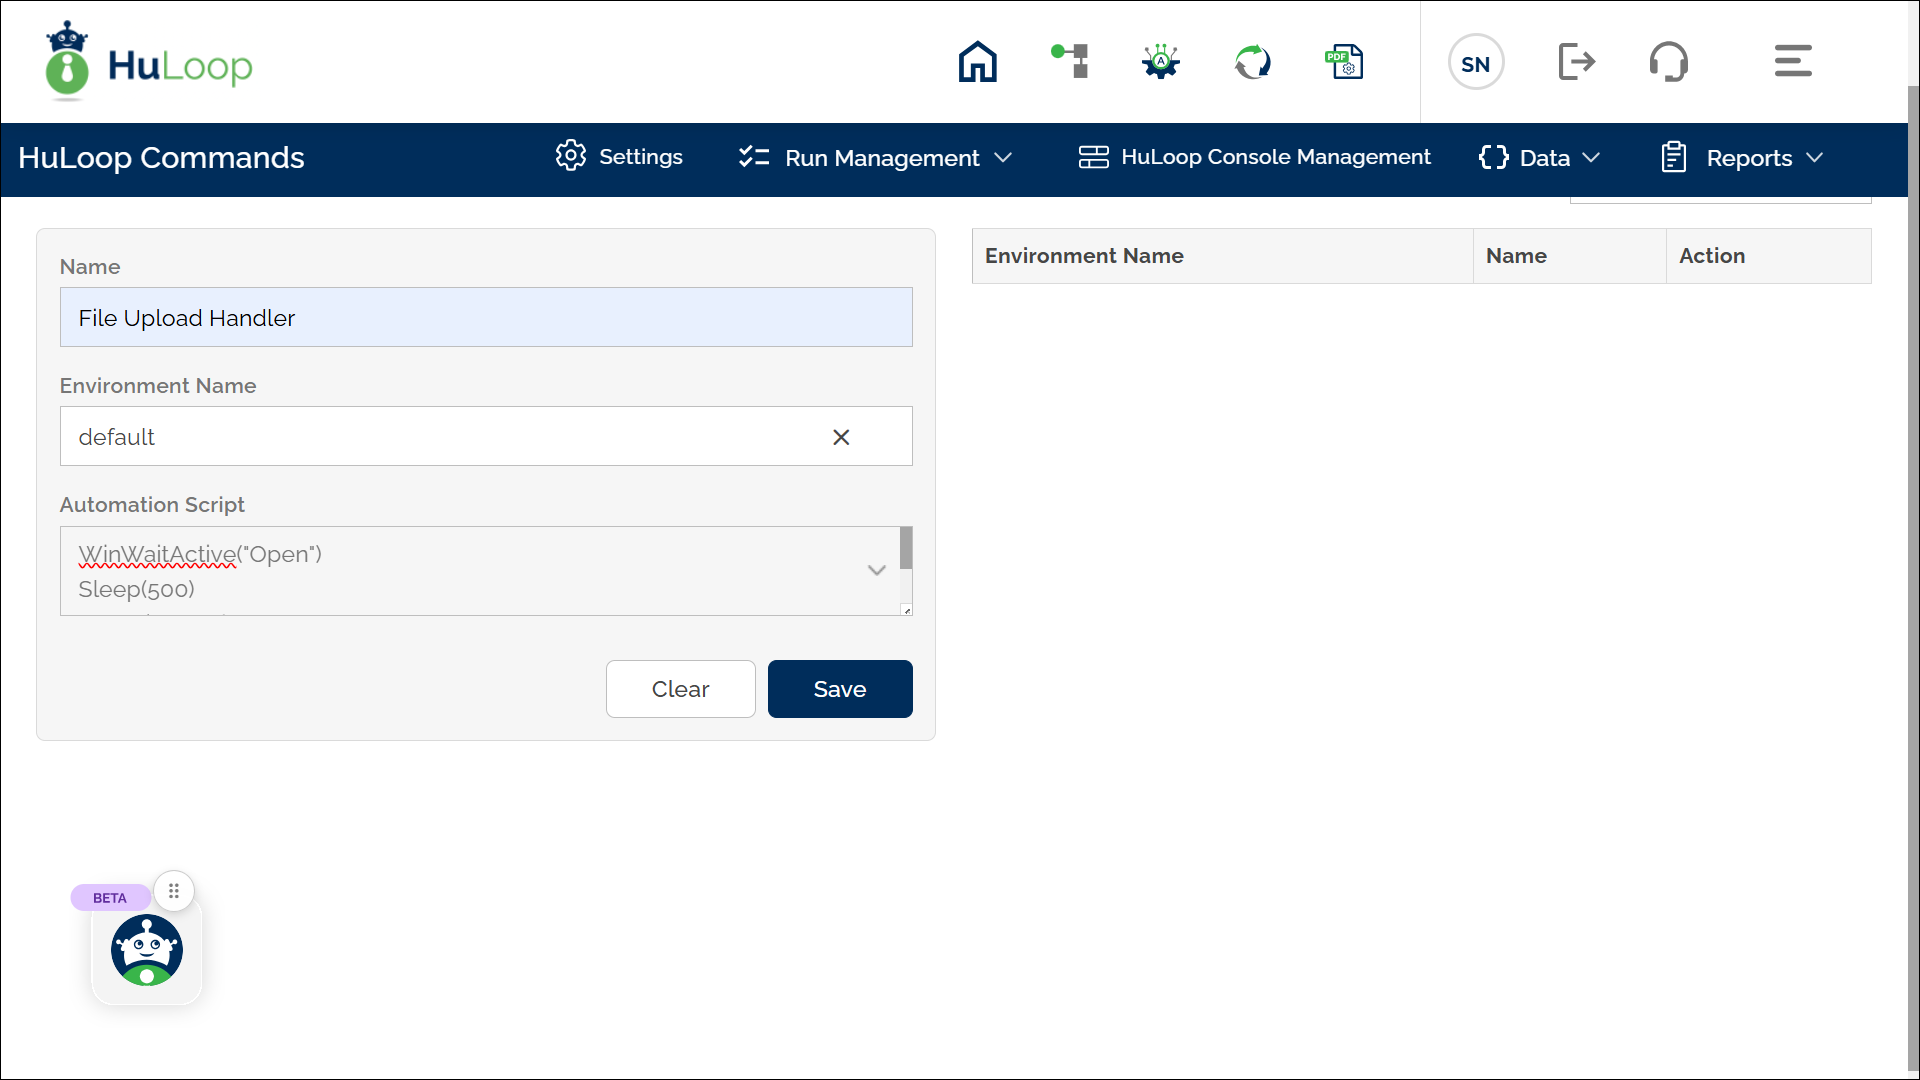
- Provide a name for the script, keep the Environment Name as default, and enter Autoit script in the Automation Script text area.
- Click Save.
All existing scripts appear on the right side of the Manage Automation Scripts window, where you can edit or delete them by clicking the respective icons.
Usage Example: Uploading a File with a Dynamic Path
Let’s say your automation requires selecting and uploading a file, where the file path is dynamically stored in a pre-defined variable.
Steps to Configure:
- Define the AutoIt Script:
- Go to Data > Manage Automation Scripts and create the script.
- Assign a name to the script (e.g., File Upload Handler).
- Enter the AutoIt script for file upload.
- Click Save.
- Configure the Function in Your Automation Workflow:
- Add a new step at the required index.
- Select RUN from the Action dropdown.
- Leave the Screen Name and Element Key fields blank.
- Click on Form, select Functions, and choose AutoIt Script Handler from the dropdown.
- All scripts defined in Manage Automation Scripts will appear here. Select the appropriate script (e.g., File Upload Handler).

- Passing Arguments to the AutoIt Script
Since the file path is dynamic, we will pass it as an argument.
- In the Automation Workflow, click the
 icon to add an argument.
 - Enter the variable storing the file path (e.g., ${FilePath}).
- In the Automation Workflow, click the
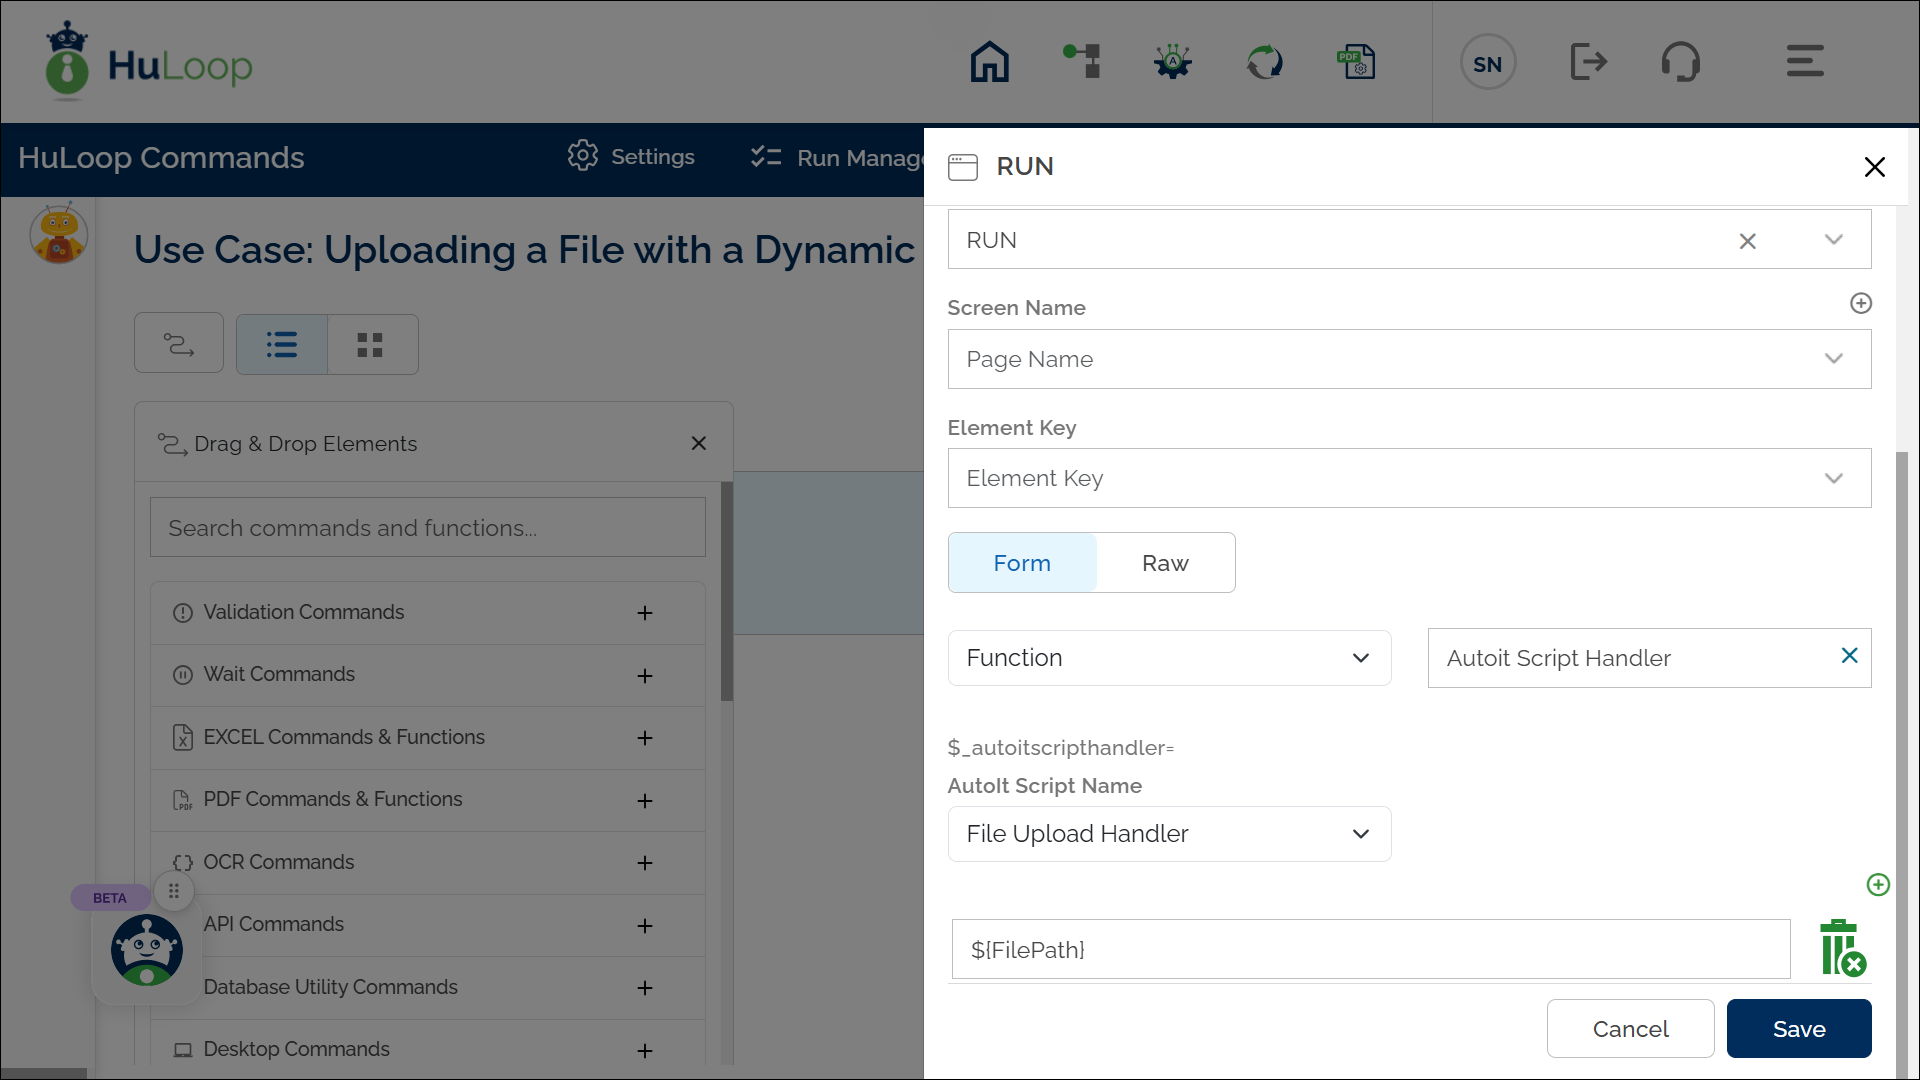
- Repeat this step to add multiple arguments if needed.
- Click the delete icon to remove an argument if necessary.
The following screenshot shows an example of how the automation workflow is configured for a file upload scenario using the AutoIt Script Handler function:
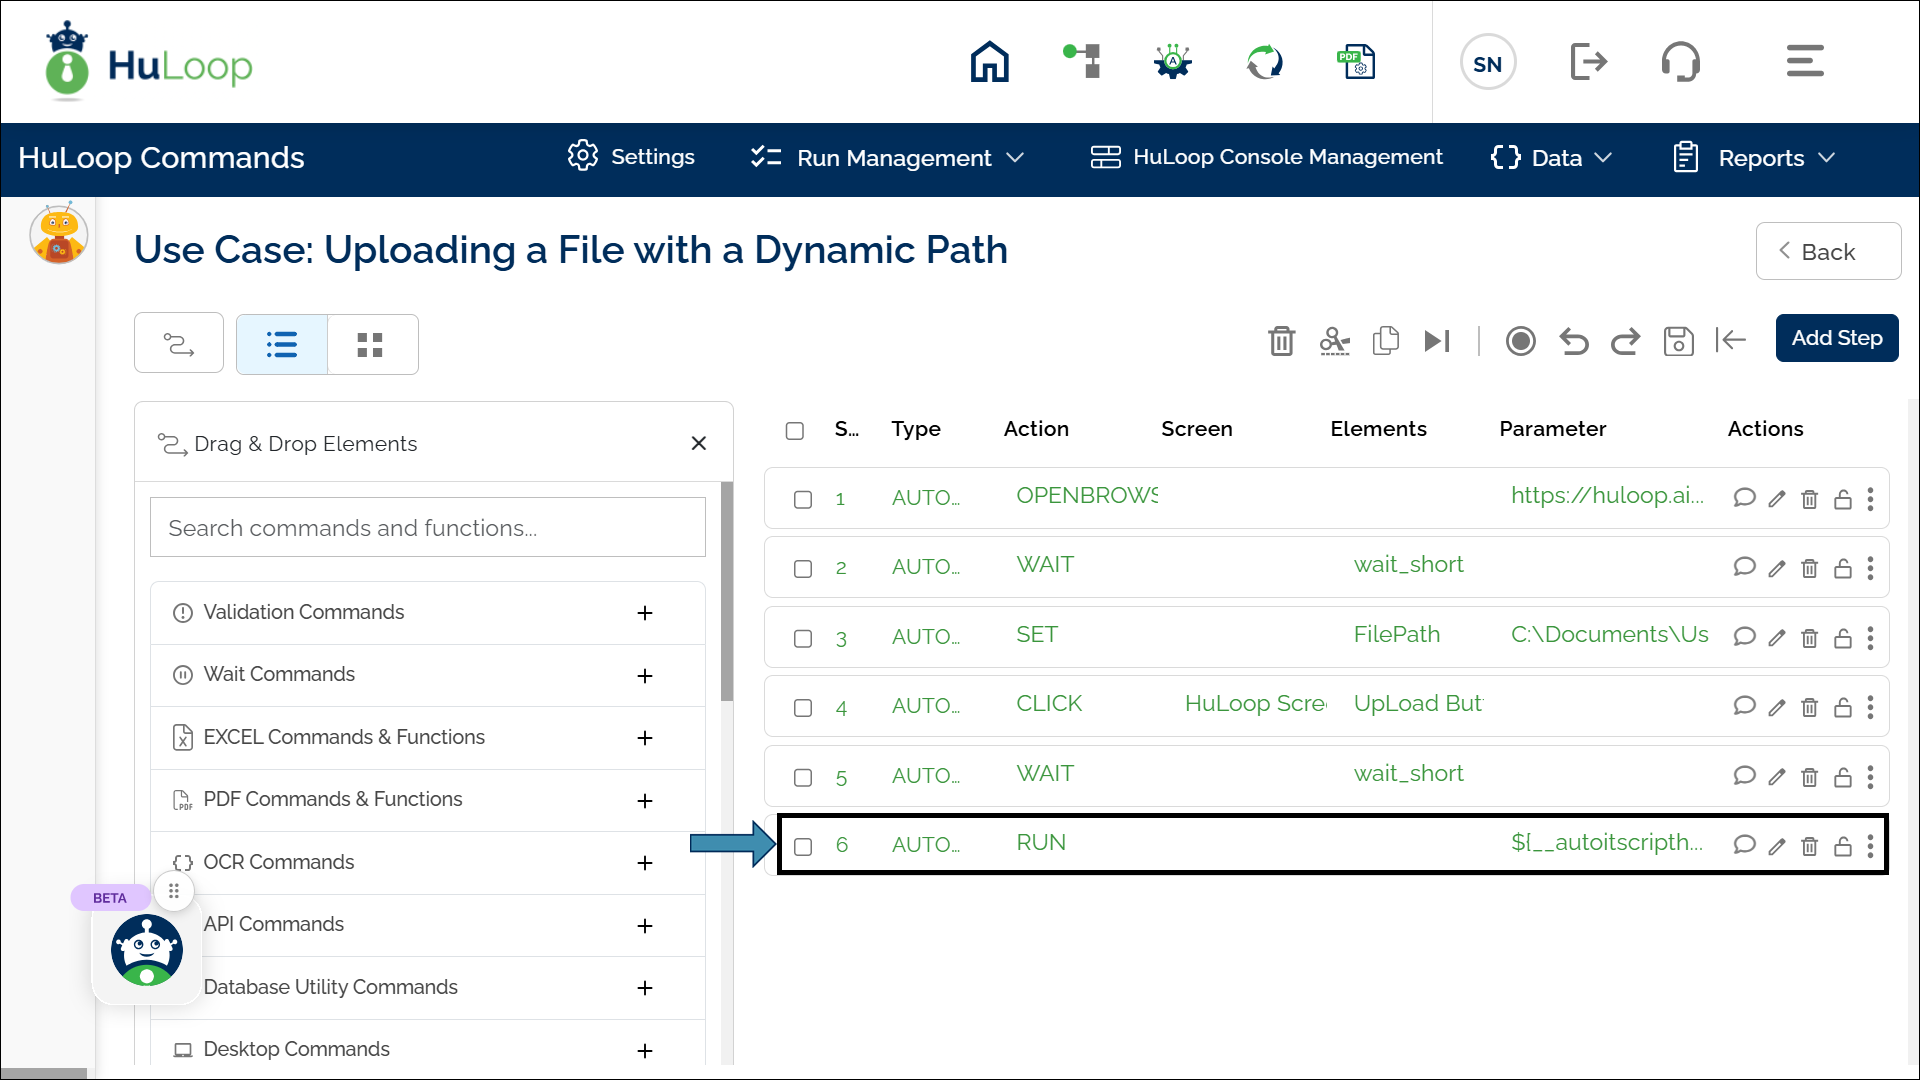
In this example, the AutoIt script retrieves the parameterized value using $CmdLine[1].
![Example of a parameterized AutoIt script where the input value is passed as $CmdLine[1]](https://huloop.ai/wp-content/uploads/2025/10/v7_functions_autoitscripthandler_retrieve_value.webp)
Outcome on Execution:
- The AutoIt script executes with the provided argument (file path).
- The script performs the necessary action, such as selecting and uploading the file.
Retrieving Output and Error Details from the Script
The AutoIt Script Handler function allows AutoIt scripts to return both output values and error details to HuLoop. These results are retrieved using a manual step added immediately after the AutoIt Script Handler step.
Adding a Manual Step to Retrieve Script Results
To capture the script output or error:
- Add a new step directly after the AutoIt Script Handler step.
- Switch the Manual toggle ON for the step.
- Click Save.
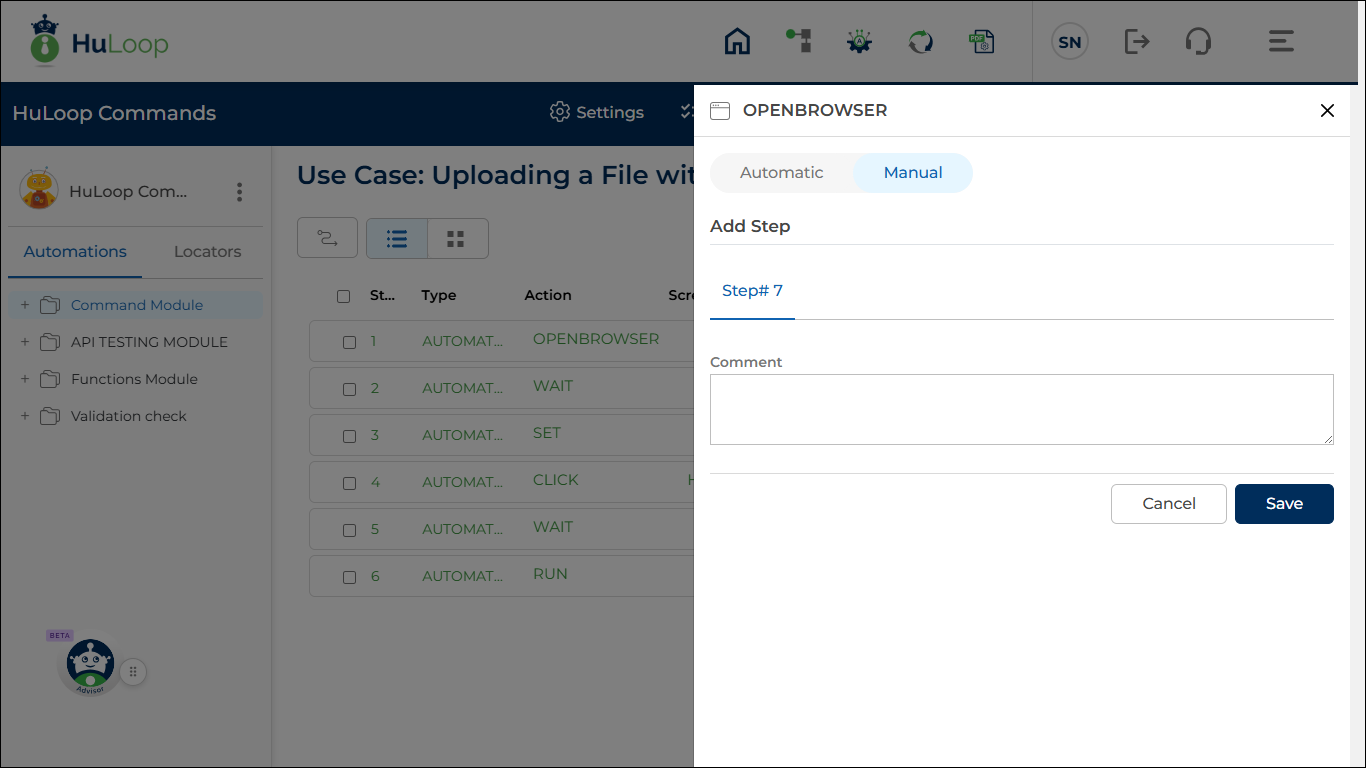
Once saved, the step is added as a manual step, which is used to retrieve the execution result returned by the AutoIt script.
Using the Returned Result
The value returned by the AutoIt script can then be:
- Stored in a variable
- Used for validation
- Used in conditional logic (for example, pass/fail checks or branching)
This approach enables workflows to respond intelligently based on the script’s execution outcome.
Outcome on Execution
- The AutoIt script executes with the provided arguments.
- The required system-level action (such as file upload) is performed.
- Output values or error details are returned to HuLoop.
- The returned result is retrieved using a manual step and can be reused in subsequent workflow steps.