Setting Up HuLoop Agent for Windows
This section provides step-by-step instructions for setting up the HuLoop Agent to enable automation test case execution. By following the instructions outlined in this document, you will be able to install the Agent, configure it with your projects, and run automated test cases.
Prerequisites
- HuLoop Server URL
- Login credentials for accessing your HuLoop account.
Logging into HuLoop Server
Follow these steps to log in to HuLoop server:
- Enter the HuLoop server URL in your browser and you will be redirected to the following screen.

- Enter your HuLoop email ID i.e., [email protected] and password in the respective fields and click Sign In.
- You will now be redirected to the HuLoop homepage as shown:

Executing a Test Case
To execute a test case, an Agent must be downloaded and installed. Follow these steps to complete the process:
To Download the Agent
- Click the Menu
 available on the top right of the screen and you will get the following options:

![]()

- Expand the Tools option and select the HuLoop Windows Agent:

The agent will be downloaded as a Zip file (e.g., HuLoop.zip).
To Install the Agent
- To save the zip file contents in your system, copy and paste this file to a desired location, and then extract files.
- To extract files right-click the zip file and select Extract All.
- You will see a pop-up window. You can either:
- Click Browse to select your desired location to save the contents or use the default location.
- Click Extract to unpack the folder contents.

- Open the folder and double click HuLoopAgent.exe file. You will get the following pop-up. Click More Info, as shown:

- You will get another pop-up, as shown. Click Run Anyway to run the downloaded application (HuLoop Agent).

- This will launch the HuLoop Desktop Agent:

- On successful installation, the following screen will appear where you should enter your HuLoop server URL to be used in the Agent and click Continue.
You can find the HuLoop server URL in the following ways:
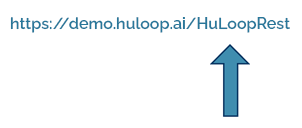
Option 1: In the browser where you are logged into HuLoop, copy the URL up to huloop.ai shown: https://demo.huloop.ai/ (this URL could appear different depending on your specific server URL) and append HuLoopRest. The final URL will look like:
Option 2: You can also find the HuLoop server URL to be used in the Agent in the email shared by the HuLoop support team.

- Sign in using your HuLoop credentials.

- Once the Agent is set up, you will see all the automations (projects) you have created in your account. Click on the automation title to open the desired automation:

- To execute the automation, expand it by clicking the
 icon next to it:

- A list of associated Modules will appear. Expand a Module to view the associated Suites:

- Similarly, expand a Suite to get a list of associated Cases:

- Select the Case by checking the checkbox next to it, then click the Run selected automation button
 as shown:

- This will start the case execution. You can track the progress of the execution via the progress bar at the bottom of the screen:

- You can view the Case steps by clicking the Case title:

Note:
- After making any changes in the portal, such as editing or updating a step in your automation use case, sync the Agent by clicking the Sync automation
 icon as shown. This ensures your changes are synced and the correct project is loaded for execution.

- Whenever you want to switch to a different automation project on the Agent, click on HuLoop at the top left of the screen to refresh the Agent.
