Capture Screenshot: SCREENSHOT
The Capture Screenshot action captures an image of the current screen in PNG format. This is useful for saving a visual record of your automation process at specific steps. You can add a prefix to the screenshot filename in the Parameter section to help identify it later.
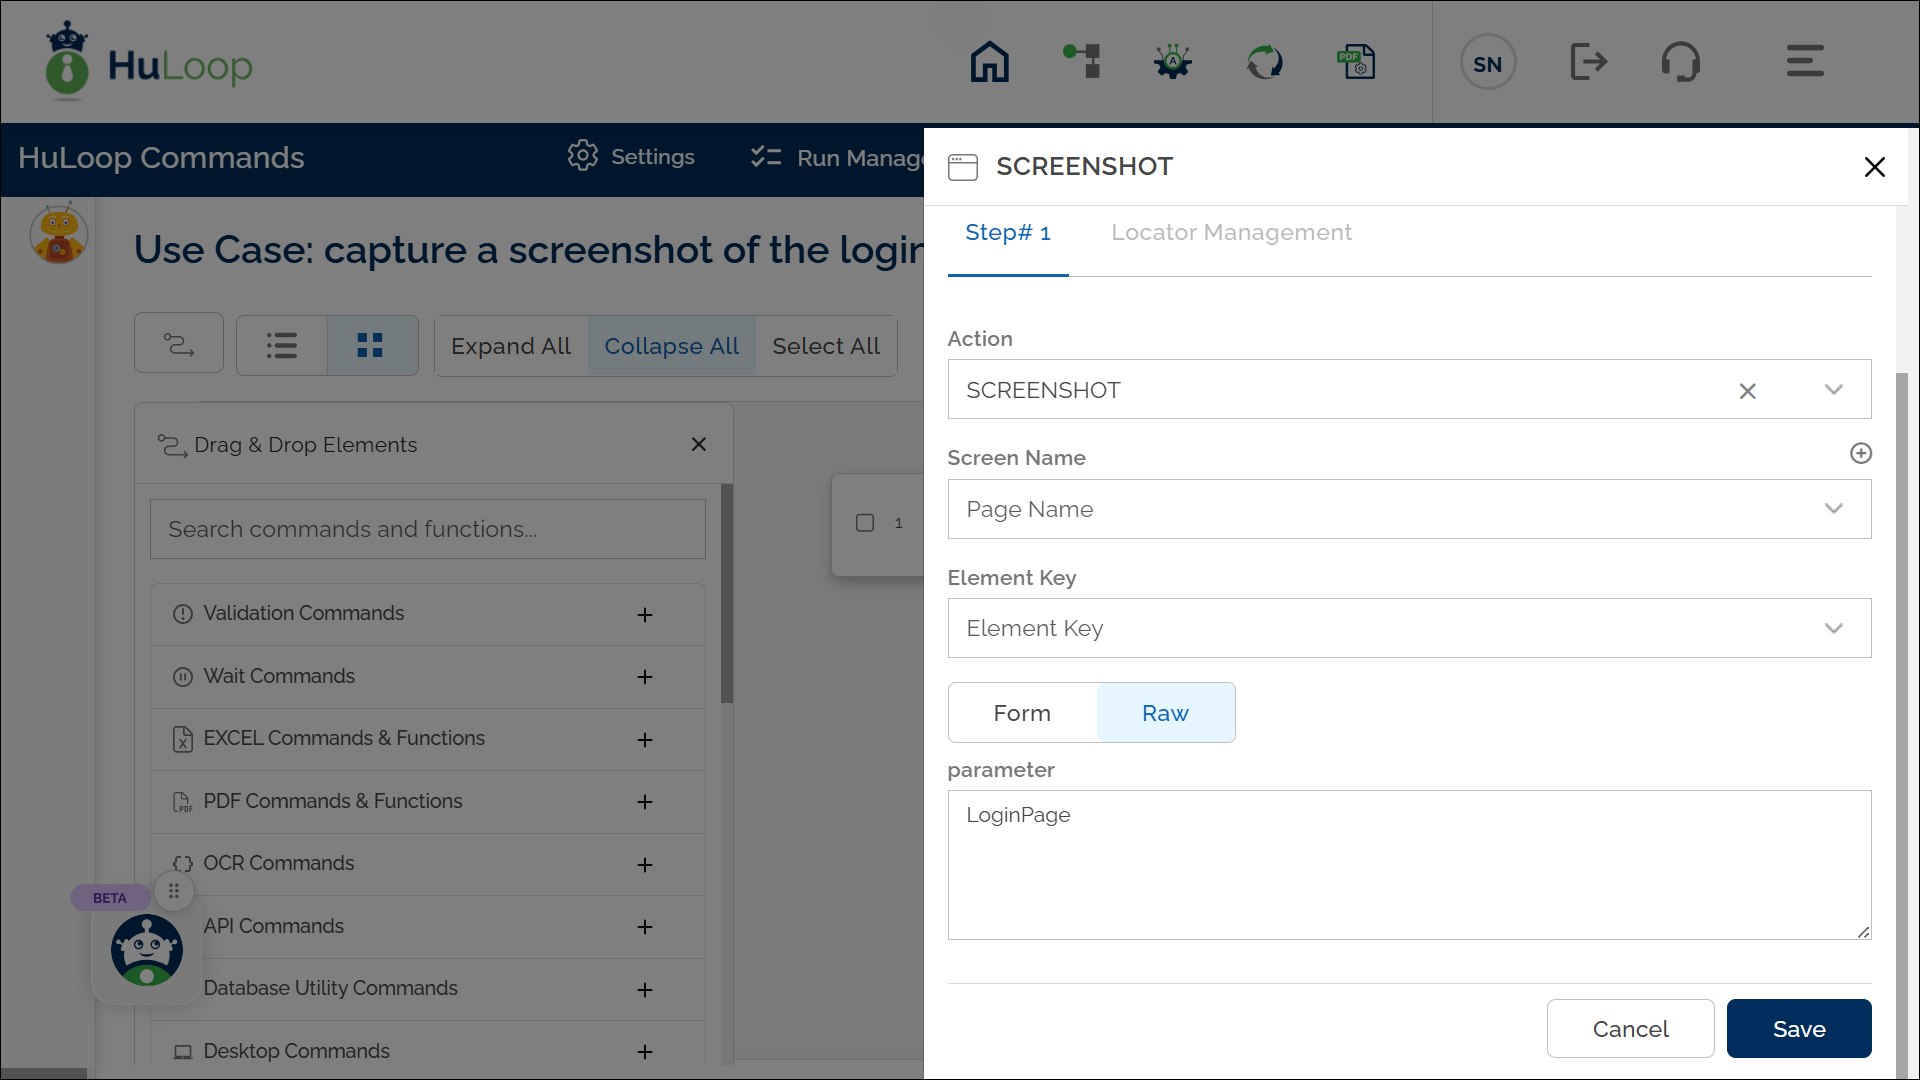
Example: Let’s capture a screenshot of the login page with the filename prefix “LoginPage”.
Steps to configure:
- Select SCREENSHOT from the Action drop-down.
- Leave the Screen Name and Element Key fields blank, as this action captures the entire screen rather than a specific element.
- In the Parameter section, enter a prefix for the screenshot filename (e.g., LoginPage).
- Click Save.
Note: While the steps for adding an Action are identical in both views, the display of the steps changes:

Expected Outcome on Execution:
- The Capture Screenshot action will save a PNG file of the current screen with the specified prefix in the filename (e.g., “LoginPage_[timestamp].png”).
- You can find this file in the designated screenshot directory for later reference.