Associating the Test Data with Your Automation
Test data can be associated at two levels:
- Case Level – The test data applies to a specific Case only.
- Suite Level – The test data applies to all Cases within the Suite.
How to Associate Test Data to a Case?
To associate the defined test data to your automation, follow these steps:
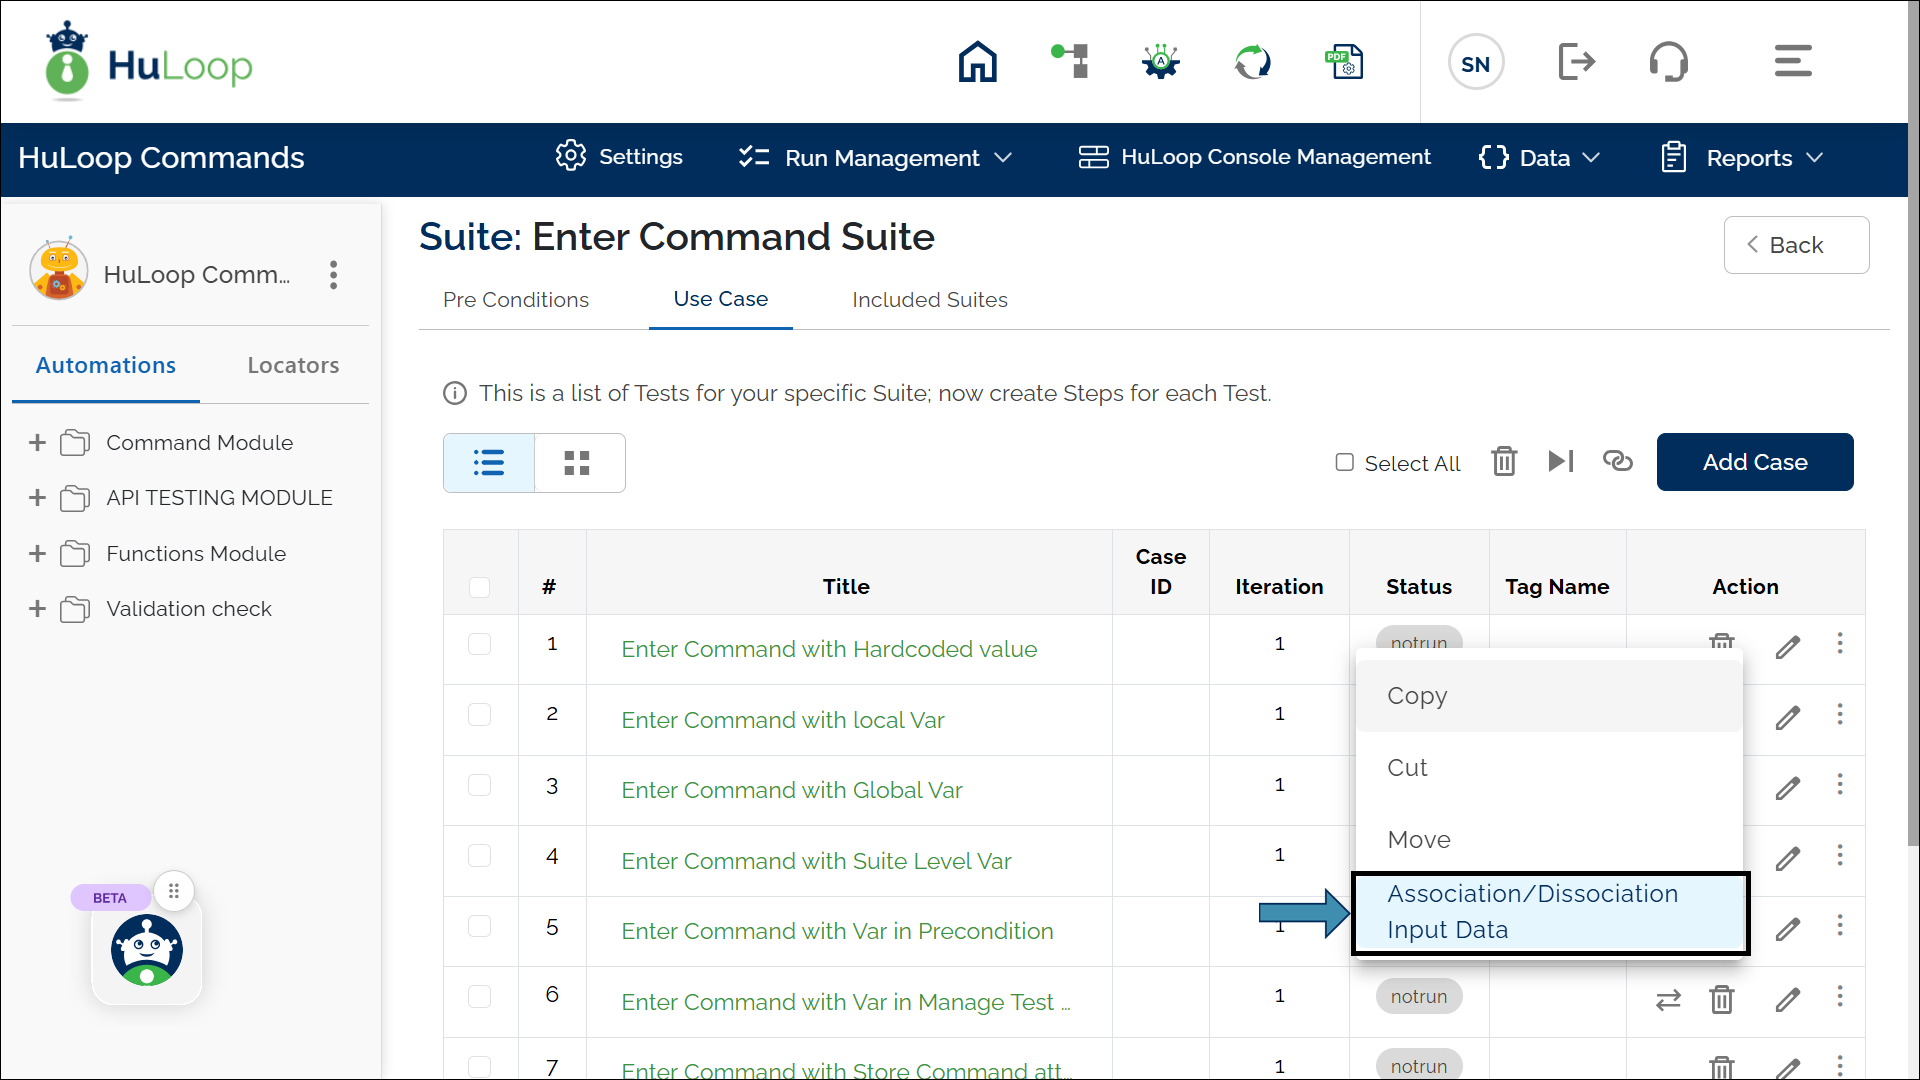
- Open the Automation Project and navigate to the Case where test data is needed.
- Click the three dots
 against the Case name and select Association/Disassociation Input Data.
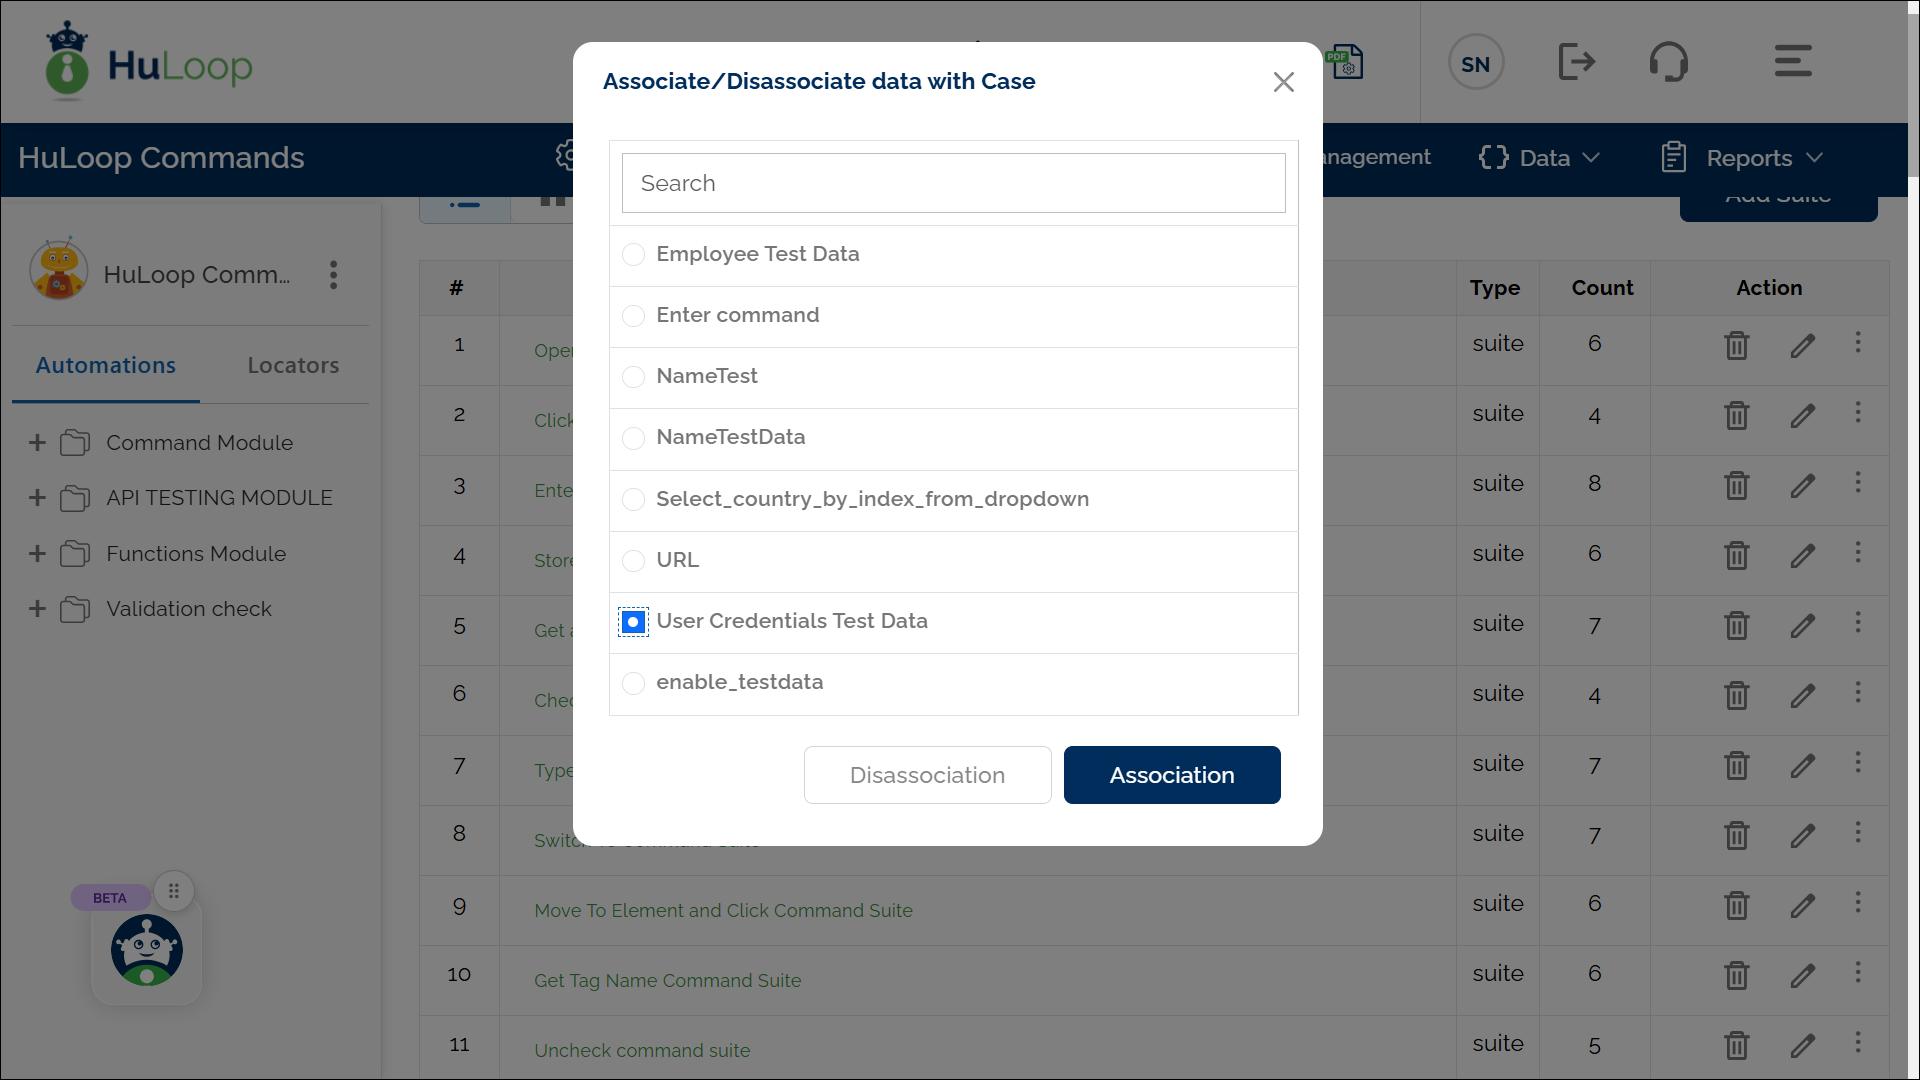
- A pop-up appears with a list of all previously created Test Data in the selected automation.
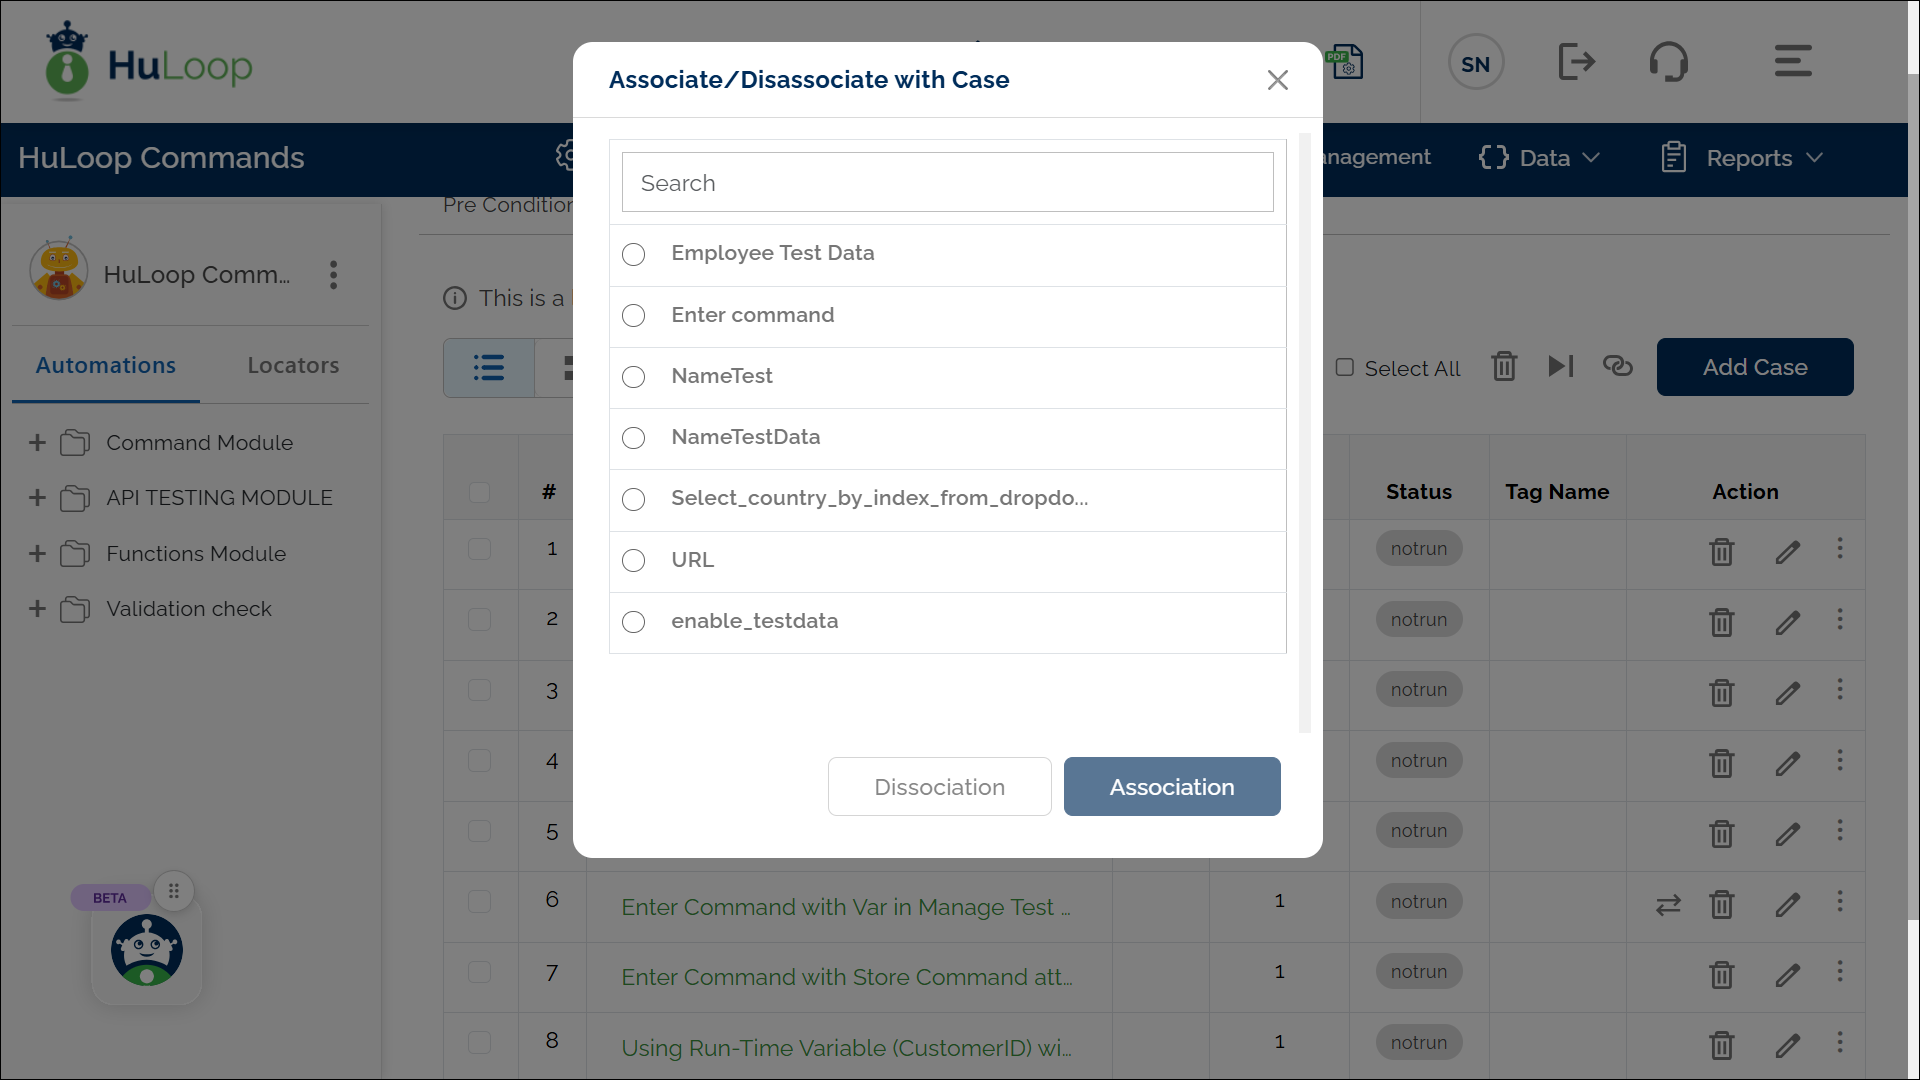
- Select the required test data by clicking the radio button next to its name.
- Example: If using the test data for employee details, select “Employee Test Data” from the list.
- Click the Association button to link the test data to the Case.
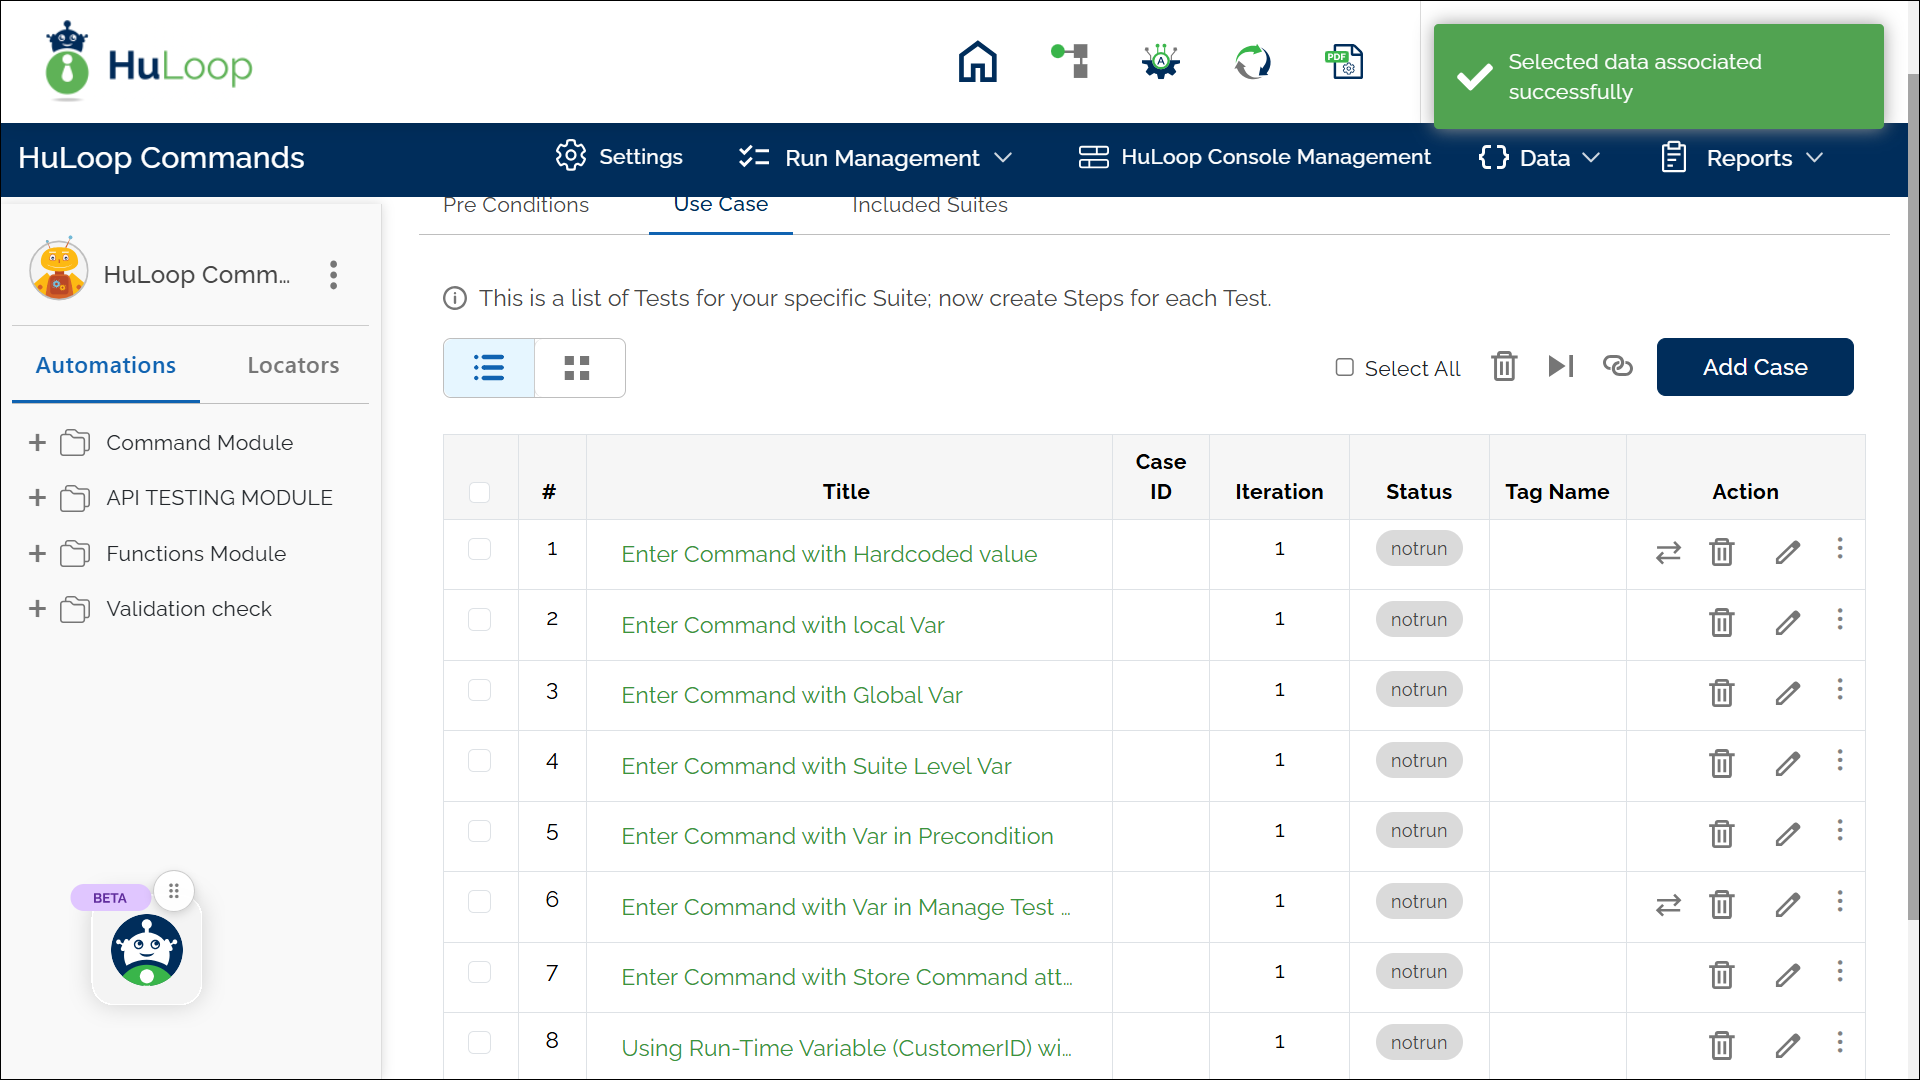
- A notification will appear in the top-right corner confirming the association. Additionally, a test data icon
 will appear next to the Case under Action in tabular view, indicating that test data has been successfully linked.
- Click on the Test Data Icon to navigate to the Manage Test Data page. Here, you can:
- Verify the associated test data.
- Modify the test data if needed.
Note: You can disassociate an already associated test data by clicking the Disassociate button on the Manage Test Data page.
How to Associate Test Data with a Suite?
- Open the Automation Project and navigate to the Suite where test data is needed (e.g., Enter Command Suite).
- Locate the Suite and click the three-dot menu
 under Actions.
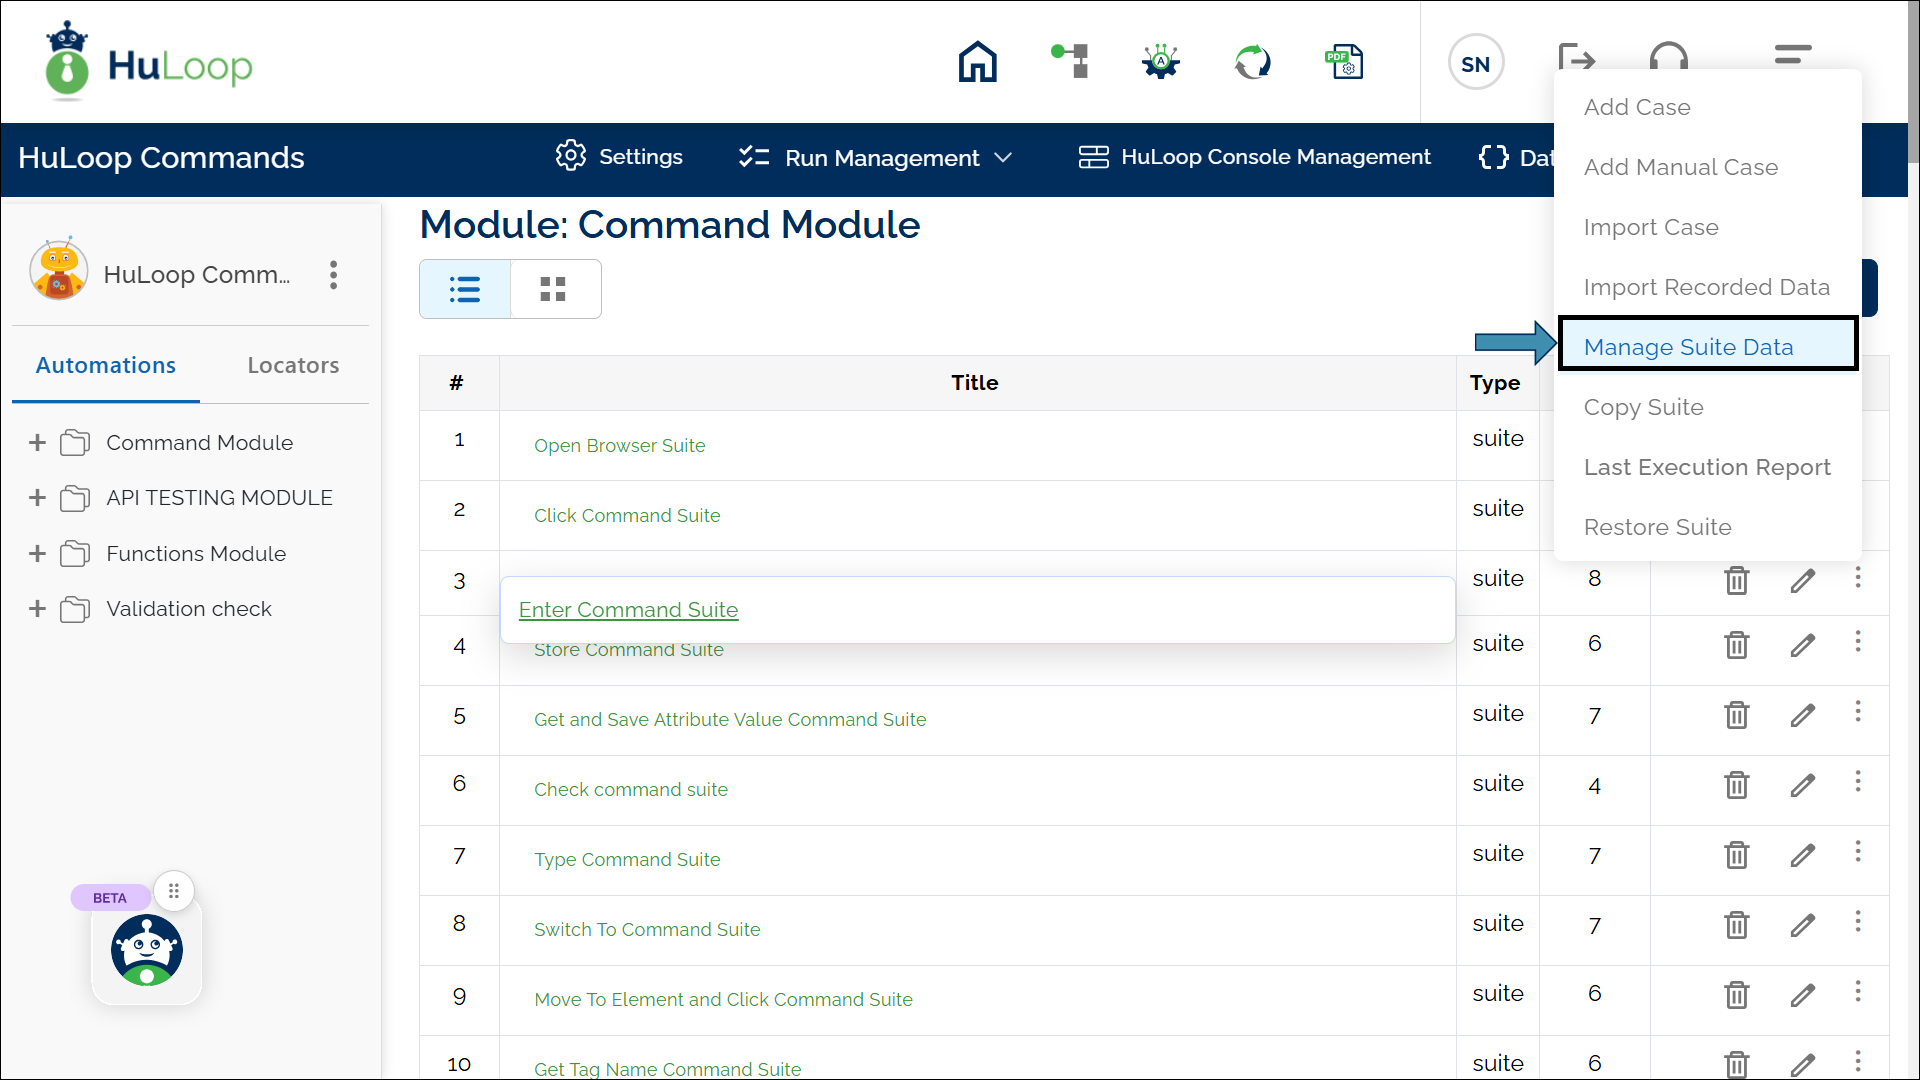
- Select Manage Suite Data. A pop-up appears, showing available test data.
- Select the required test data by clicking the radio button next to it.
Example: If associating User details, select “User Credentials Test Data”.
- Click the Association button.
A notification appears in the top-right corner, confirming the association. Additionally, a test data icon ![]() will appear next to the Case under Action (in List view only), indicating that test data has been successfully linked.:
will appear next to the Case under Action (in List view only), indicating that test data has been successfully linked.:

Note: You can disassociate an already associated test data by clicking the Disassociate button on the Manage Test Data page.
Last updated: Sep 16, 2025