Step 1: Download and Install the HuLoop Desktop Recorder
- Sign in to your HuLoop account.
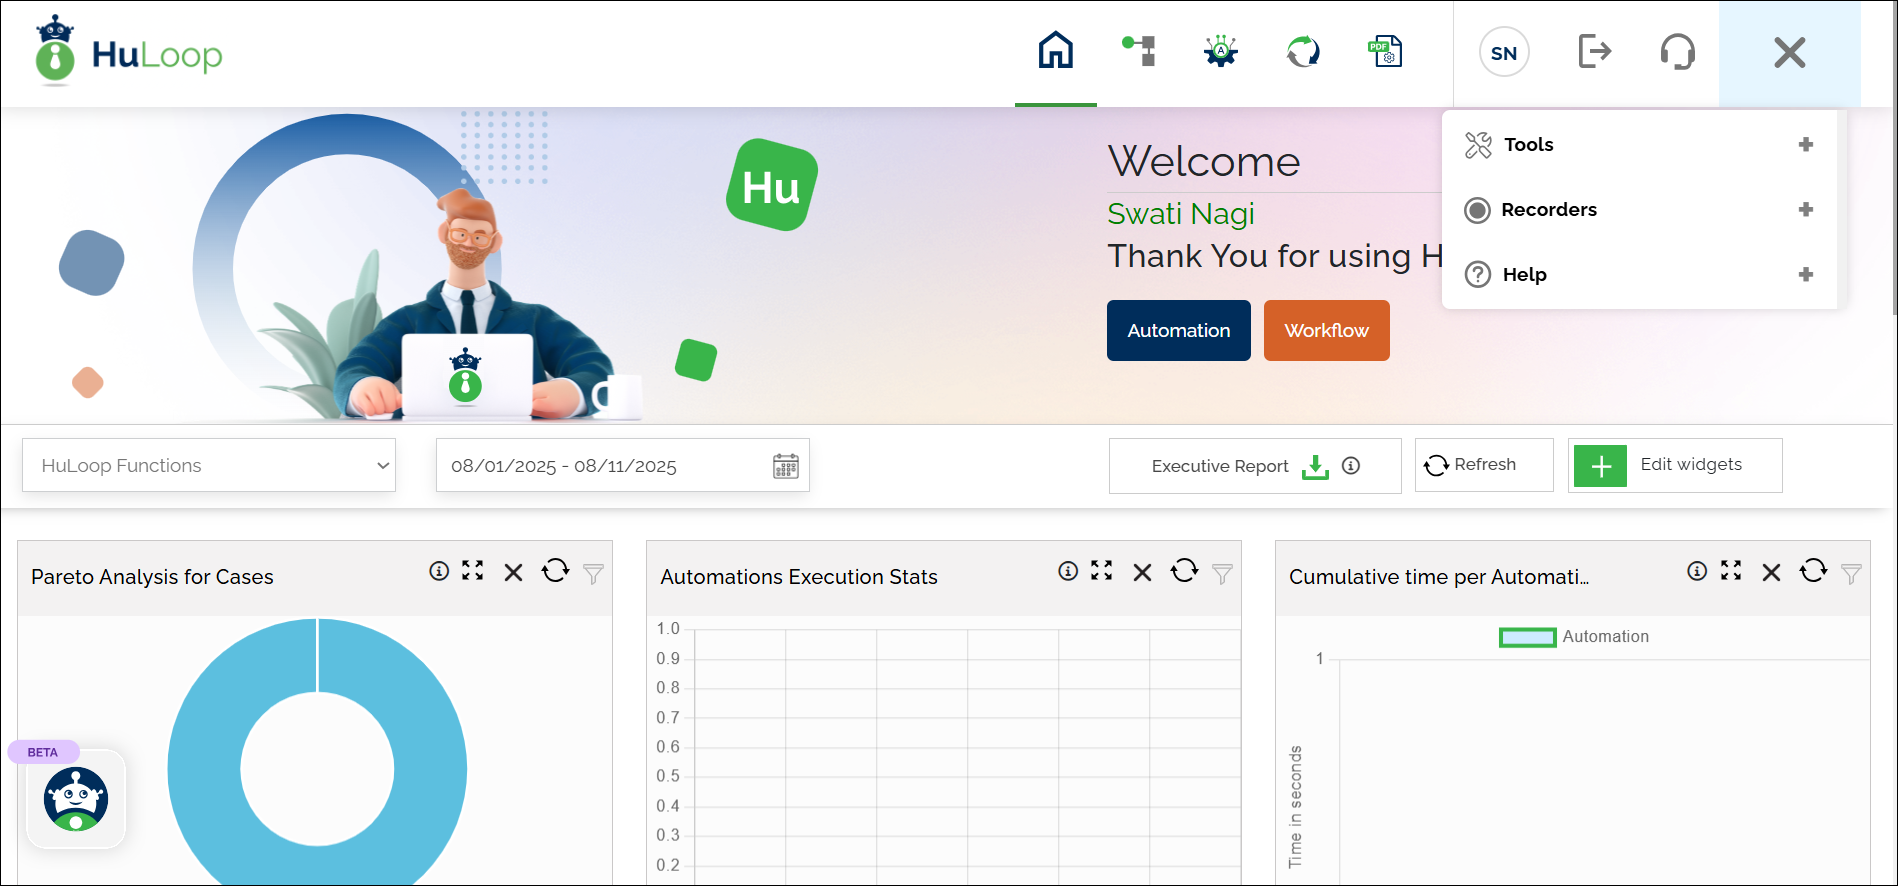
- Click on the Menu
 available on the top right of the screen and you will get the following options:
![]()
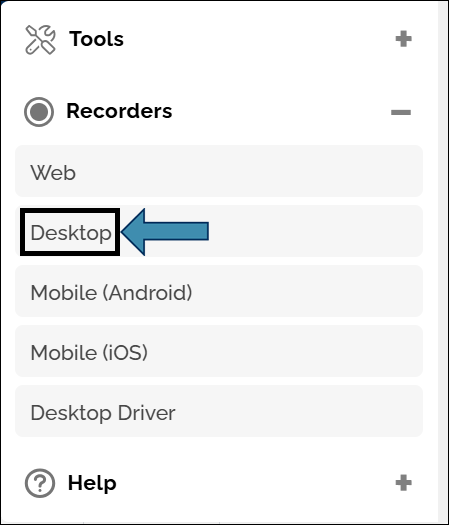
- Expand the Recorders option and select Desktop:
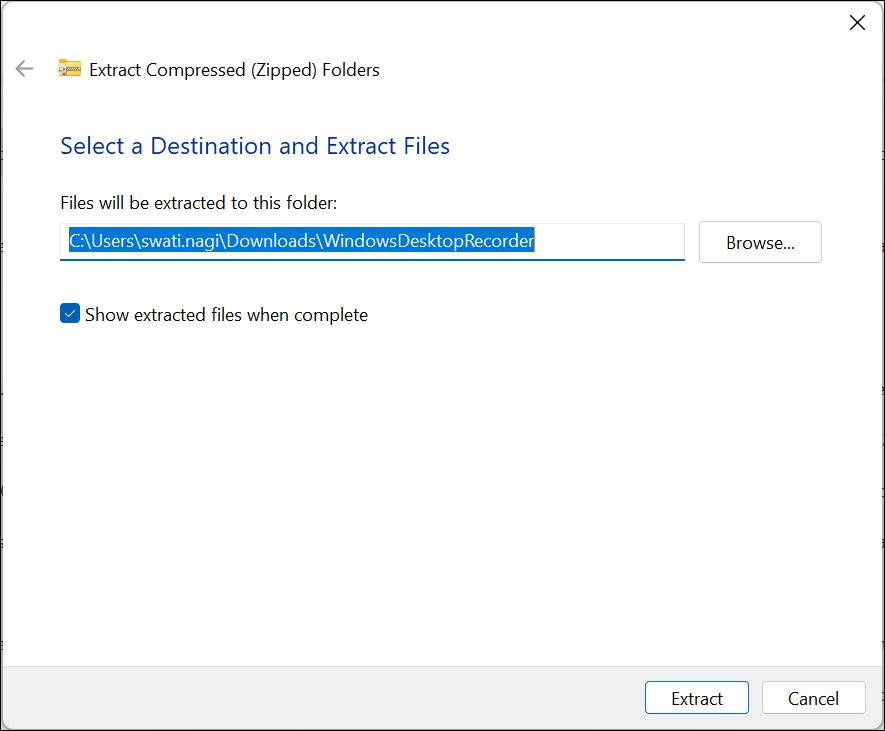
The Desktop Recorder will be downloaded as a Zip file (e.g., WindowsDesktopRecorder.zip).
- To save the zip file contents in your system, copy and paste this file to a desired location, and then extract files.
- To extract files right-click the zip file and select Extract All…
- You will see a pop-up window. You can either:
- Click Browse to select your desired location to save the contents or use the default location.
- Click Extract to unpack the folder contents.
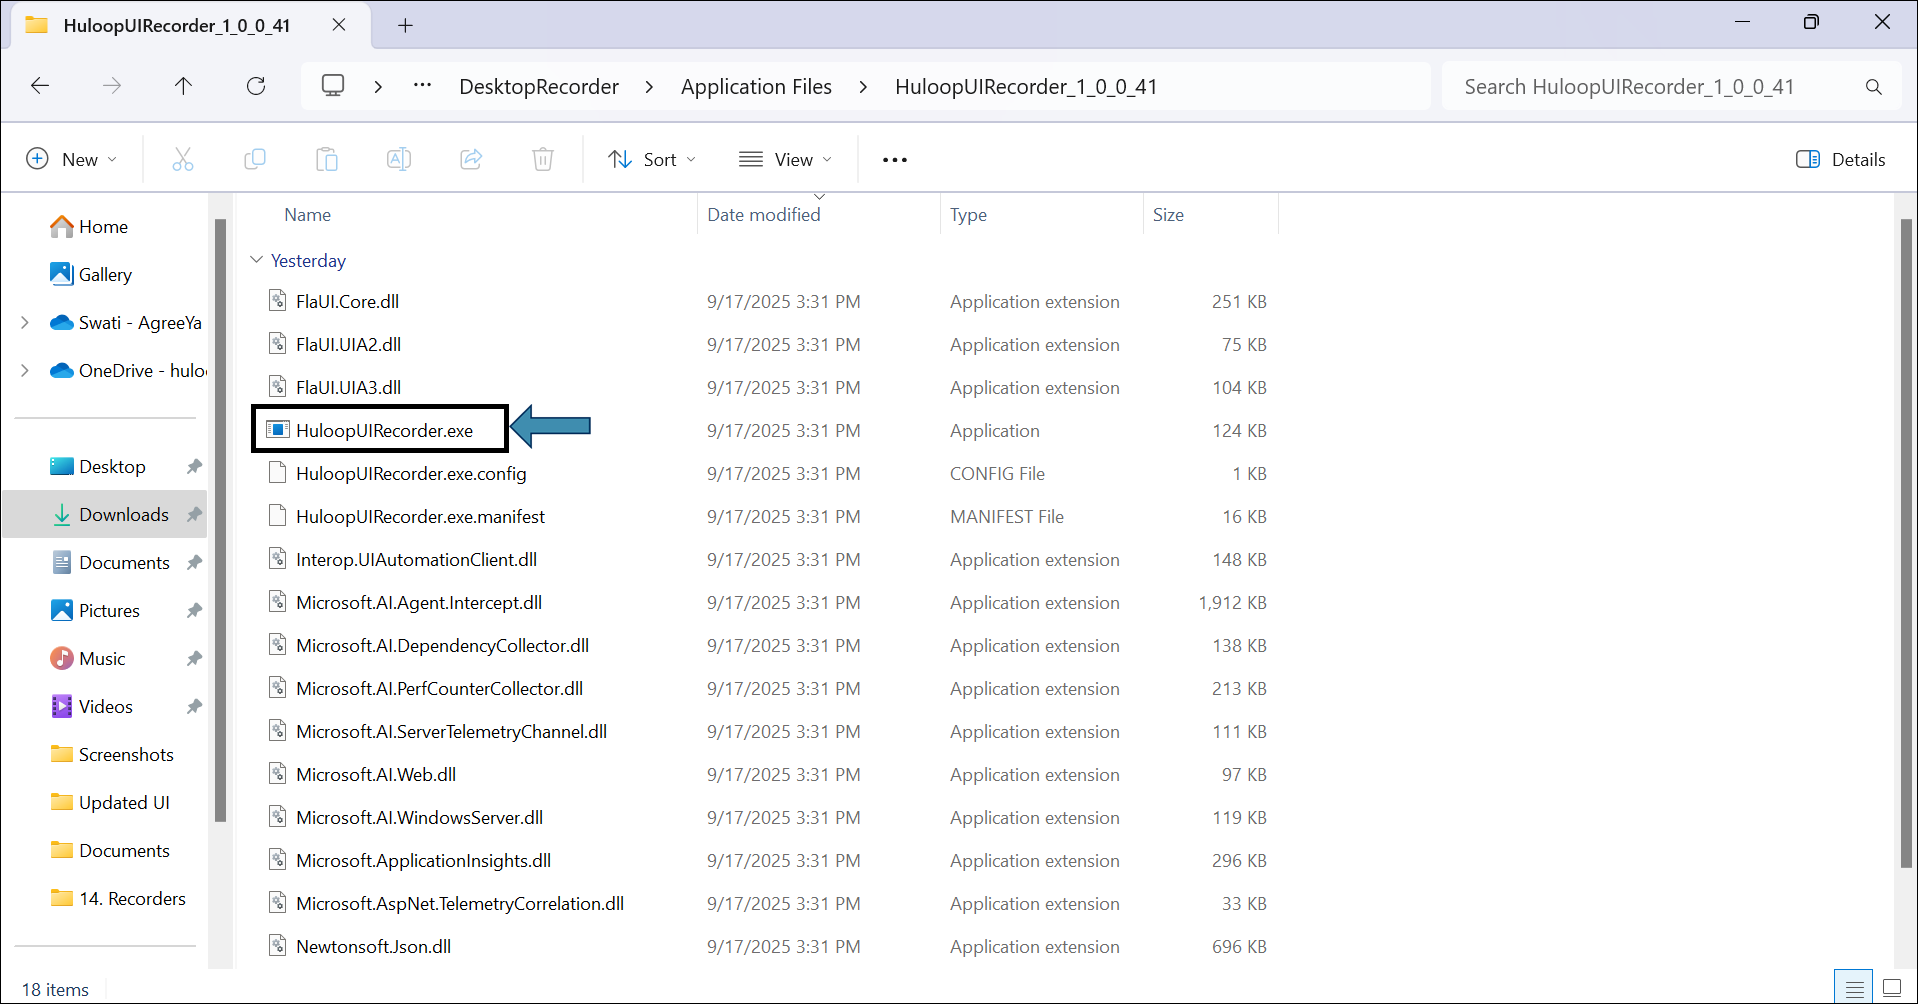
- Open the folder, then navigate to DesktopRecorder > Application Files > HuloopUIRecorder_1_0_0_41, and double-click the exe file to launch it.
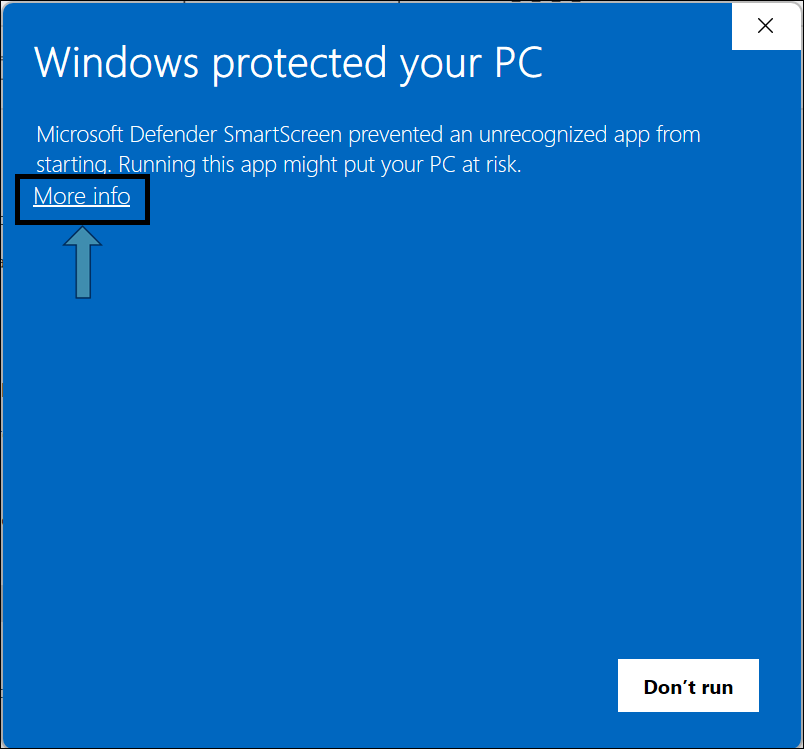
- You will get the following pop-up. Click More Info, as shown:
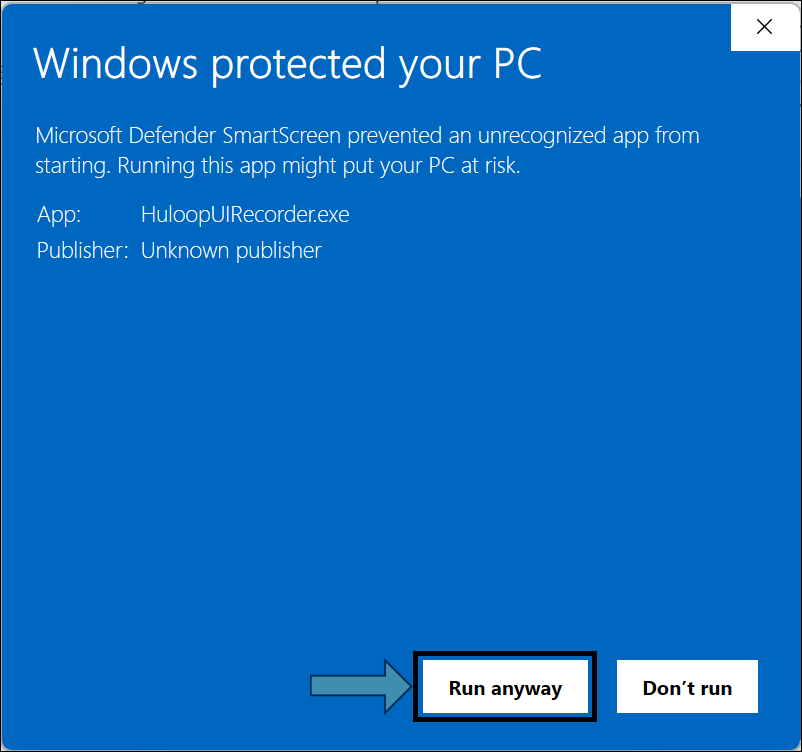
- You will get another pop-up, as shown. Click Run Anyway to run the downloaded application (HuLoop Desktop Recorder).
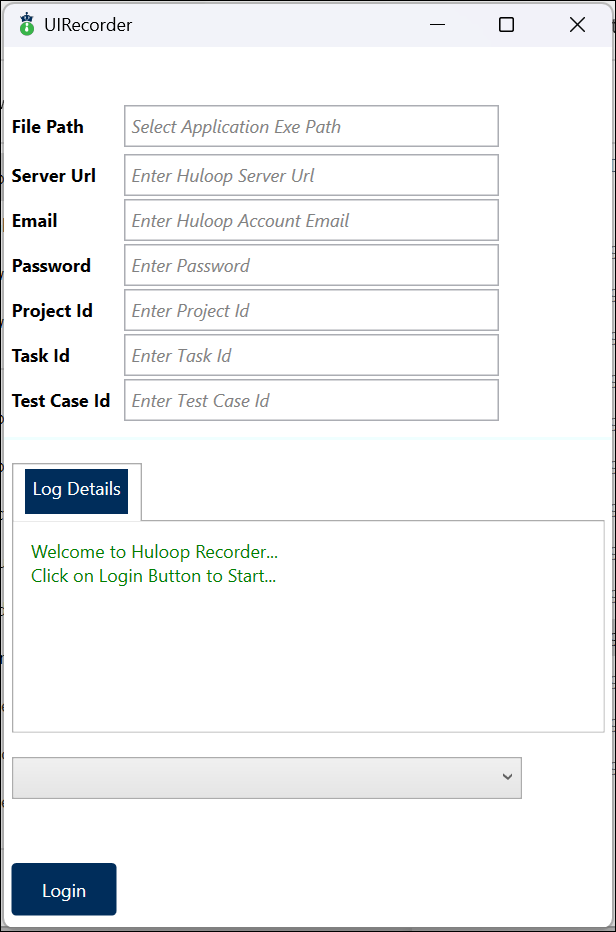
- This will launch the HuLoop Desktop Recorder, and the following UI Recorder pop-up will appear:
-
In the pop-up, you will need to enter the following details:
- Server URL: Enter the server environment URL (e.g., https://demo.huloop.ai), this URL will be specific to the user’s HuLoop server URL.
- Email: Enter the email address you used to create the blank test case in the automation project.
- Password: Enter the corresponding password.
-
Project ID: This is the alphanumeric code found in the URL of your blank test case after
TestStep/.
For example, in the following URL, the Project ID is66e7cedee4b0833b8bc42f98.https://demo.huloop.ai:451/HuLoopSubscriptionUI/#/test/TestStep/
66e7cedee4b0833b8bc42f98/66f5835be4b081e890968774/66fa7eb1e4b081e89096b86c -
Task ID: The next alphanumeric code in the URL after the project ID. Using the same URL example, the Task ID is
66f5835be4b081e890968774.https://demo.huloop.ai:451/HuLoopSubscriptionUI/#/test/TestStep/66e7cedee4b0833b8bc42f98/
66f5835be4b081e890968774/66fa7eb1e4b081e89096b86c -
Test Case ID: The last alphanumeric code in the URL. Using the example, the Test Case ID is 66fa7eb1e4b081e89096b86c.https://demo.huloop.ai:451/HuLoopSubscriptionUI/#/test/TestStep/66e7cedee4b0833b8bc42f98/66f5835be4b081e890968774/
66fa7eb1e4b081e89096b86c
- Login: Click Login.
- Once you have successfully logged into the HuLoop Server, a notification will appear confirming the login.
- Launch the Application: Once logged in, a Browse button will appear.
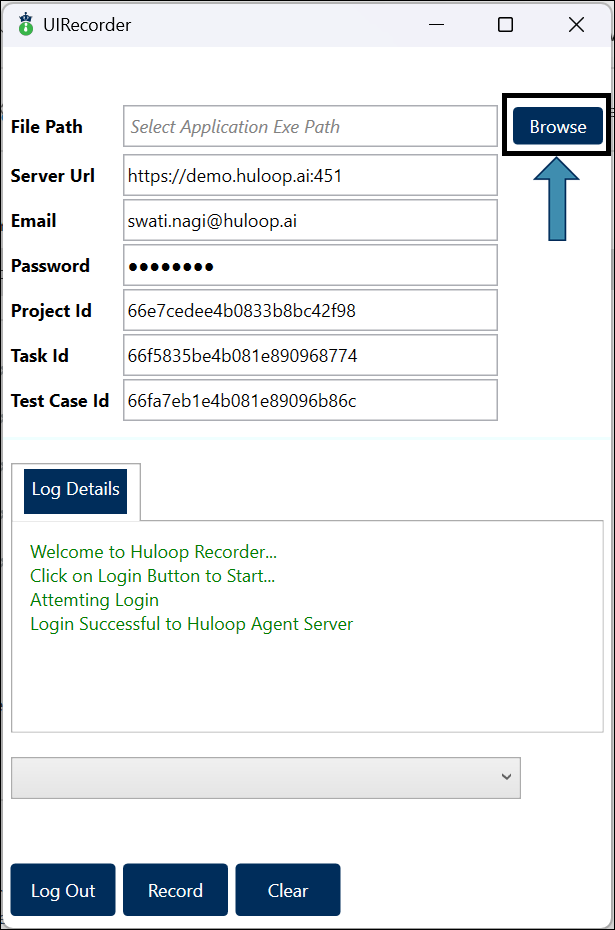
- Click Browse to navigate to the application file path.
- A pop-up window will appear.
- Navigate to the application file path.
Example for Excel: C:\Program Files\Microsoft Office\root\Office16\excel.exe
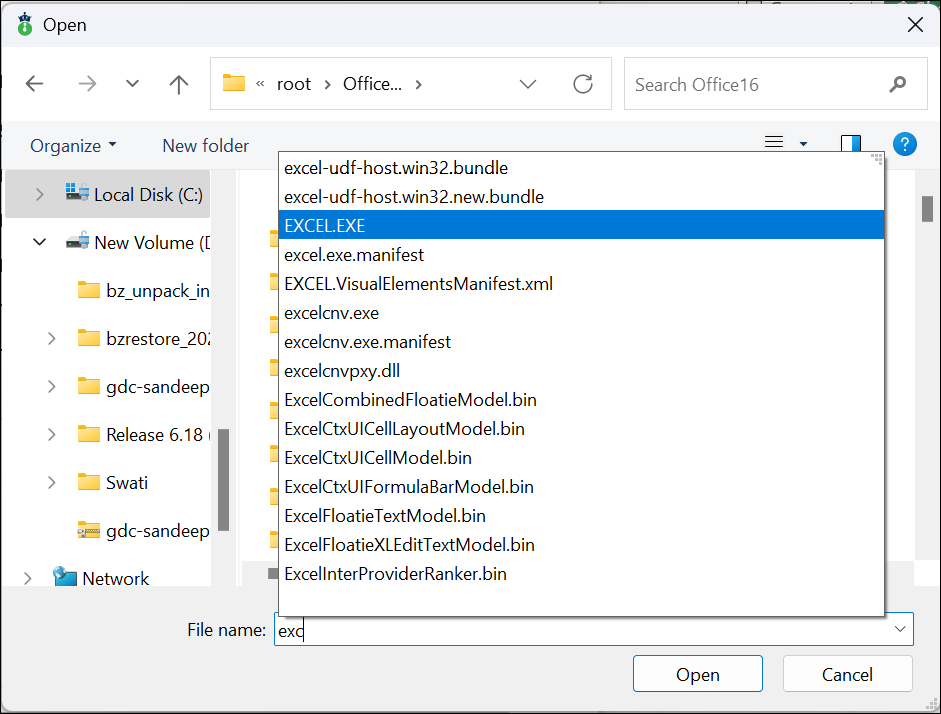
- Select the file and click Open to launch the application.
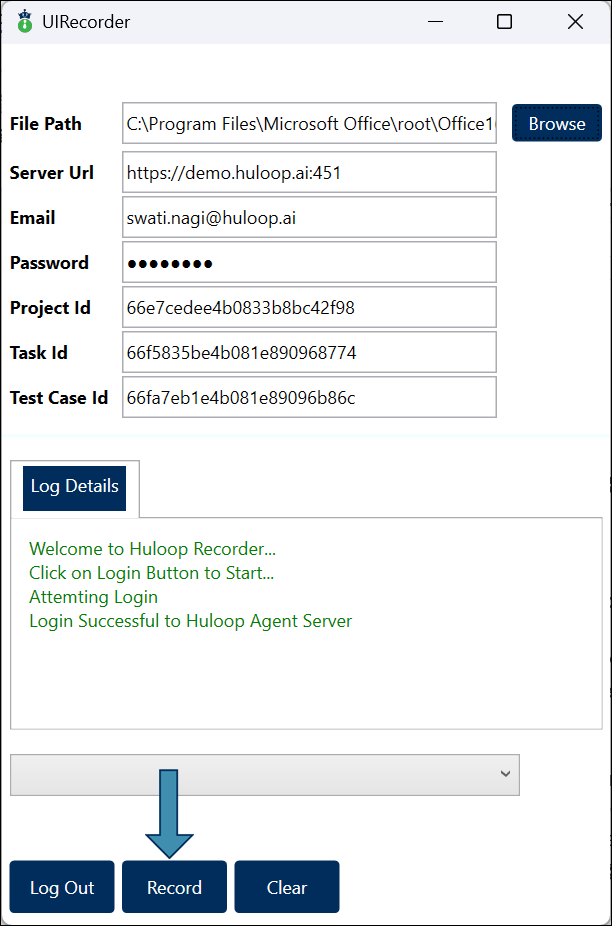
Note: The file path will automatically appear in the HuLoop UI Recorder window once you’ve selected it.
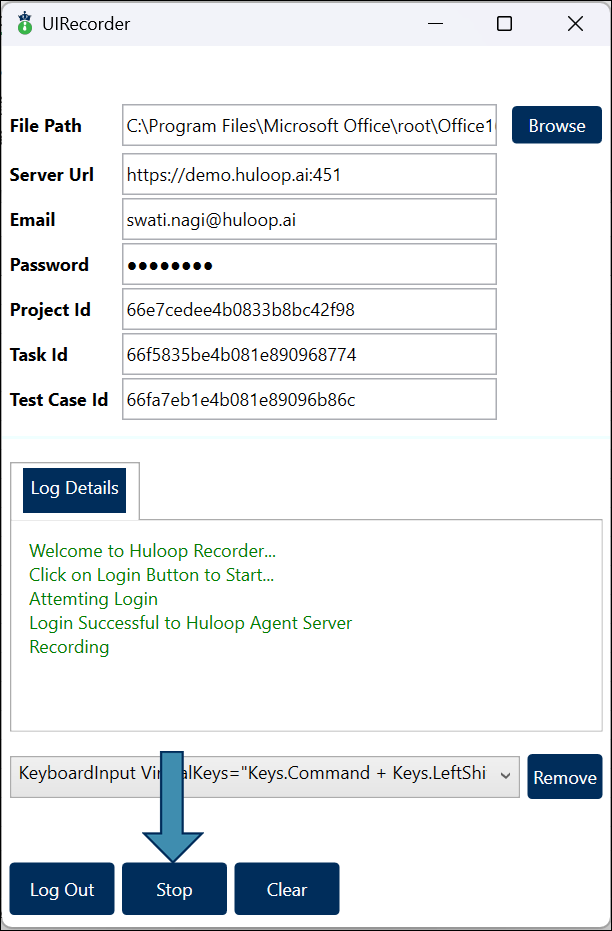
- Start Recording: In the HuLoop UI Recorder window, click Record to begin capturing the actions.
- Perform Your Actions: For example, if you’re entering values into different columns of a new Excel sheet:
- Start entering values into the columns. Start entering values into the columns. Wait until the cell is highlighted with a blue boundary, indicating that the recorder has recognized the cell you’re interacting with.
- To record the Enter Action, press Tab or Enter.
- Once done, return to the UI Recorder and click Stop to end the recording. A notification will appear confirming that the automation record was uploaded successfully.
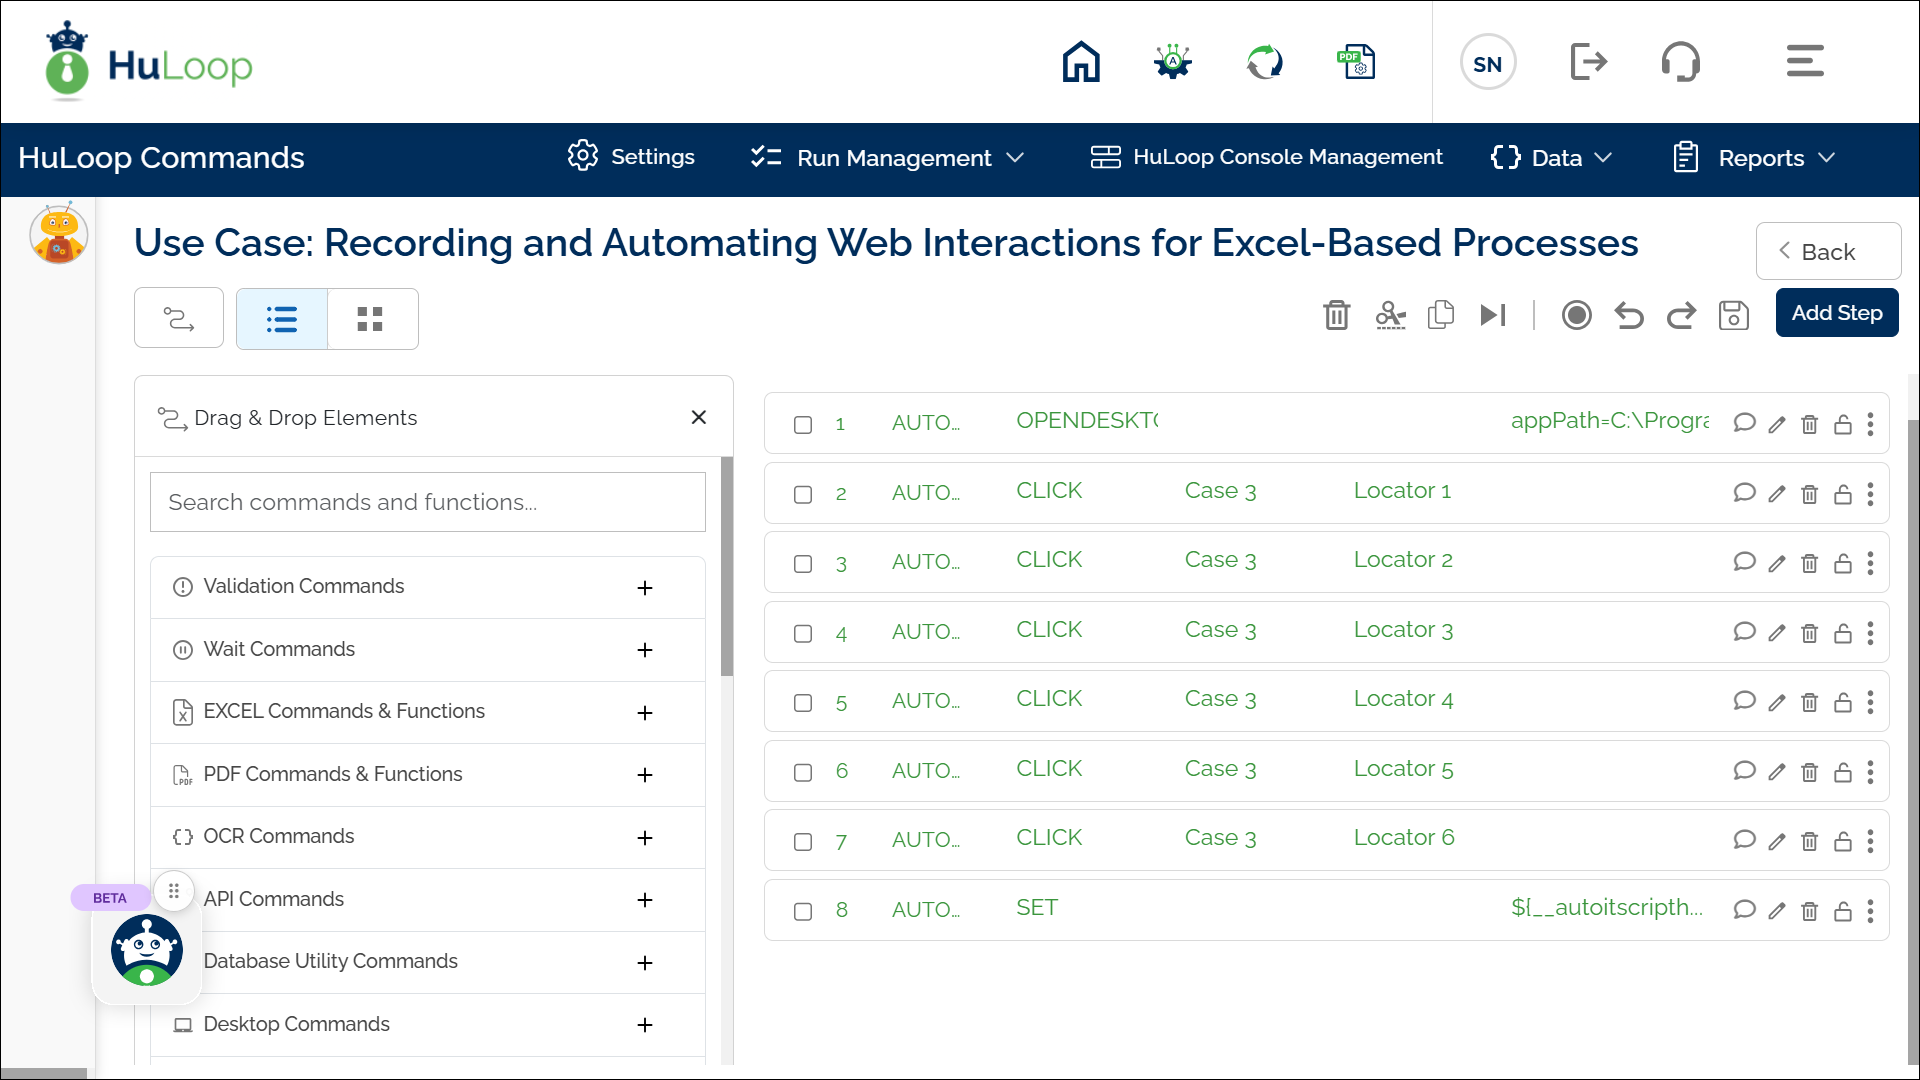
- Review the Recorded Steps:
- Go to the HuLoop web server.
- You will be automatically logged out. Log in again using the same credentials.
- Navigate to the blank Case you created earlier, and you will see that all the recorded steps have been captured.
- The Screen name and Element (Locators) will be automatically filled in, but you can edit the screen name and locator name if needed.
- You can also manually add new steps or edit the existing ones if required.
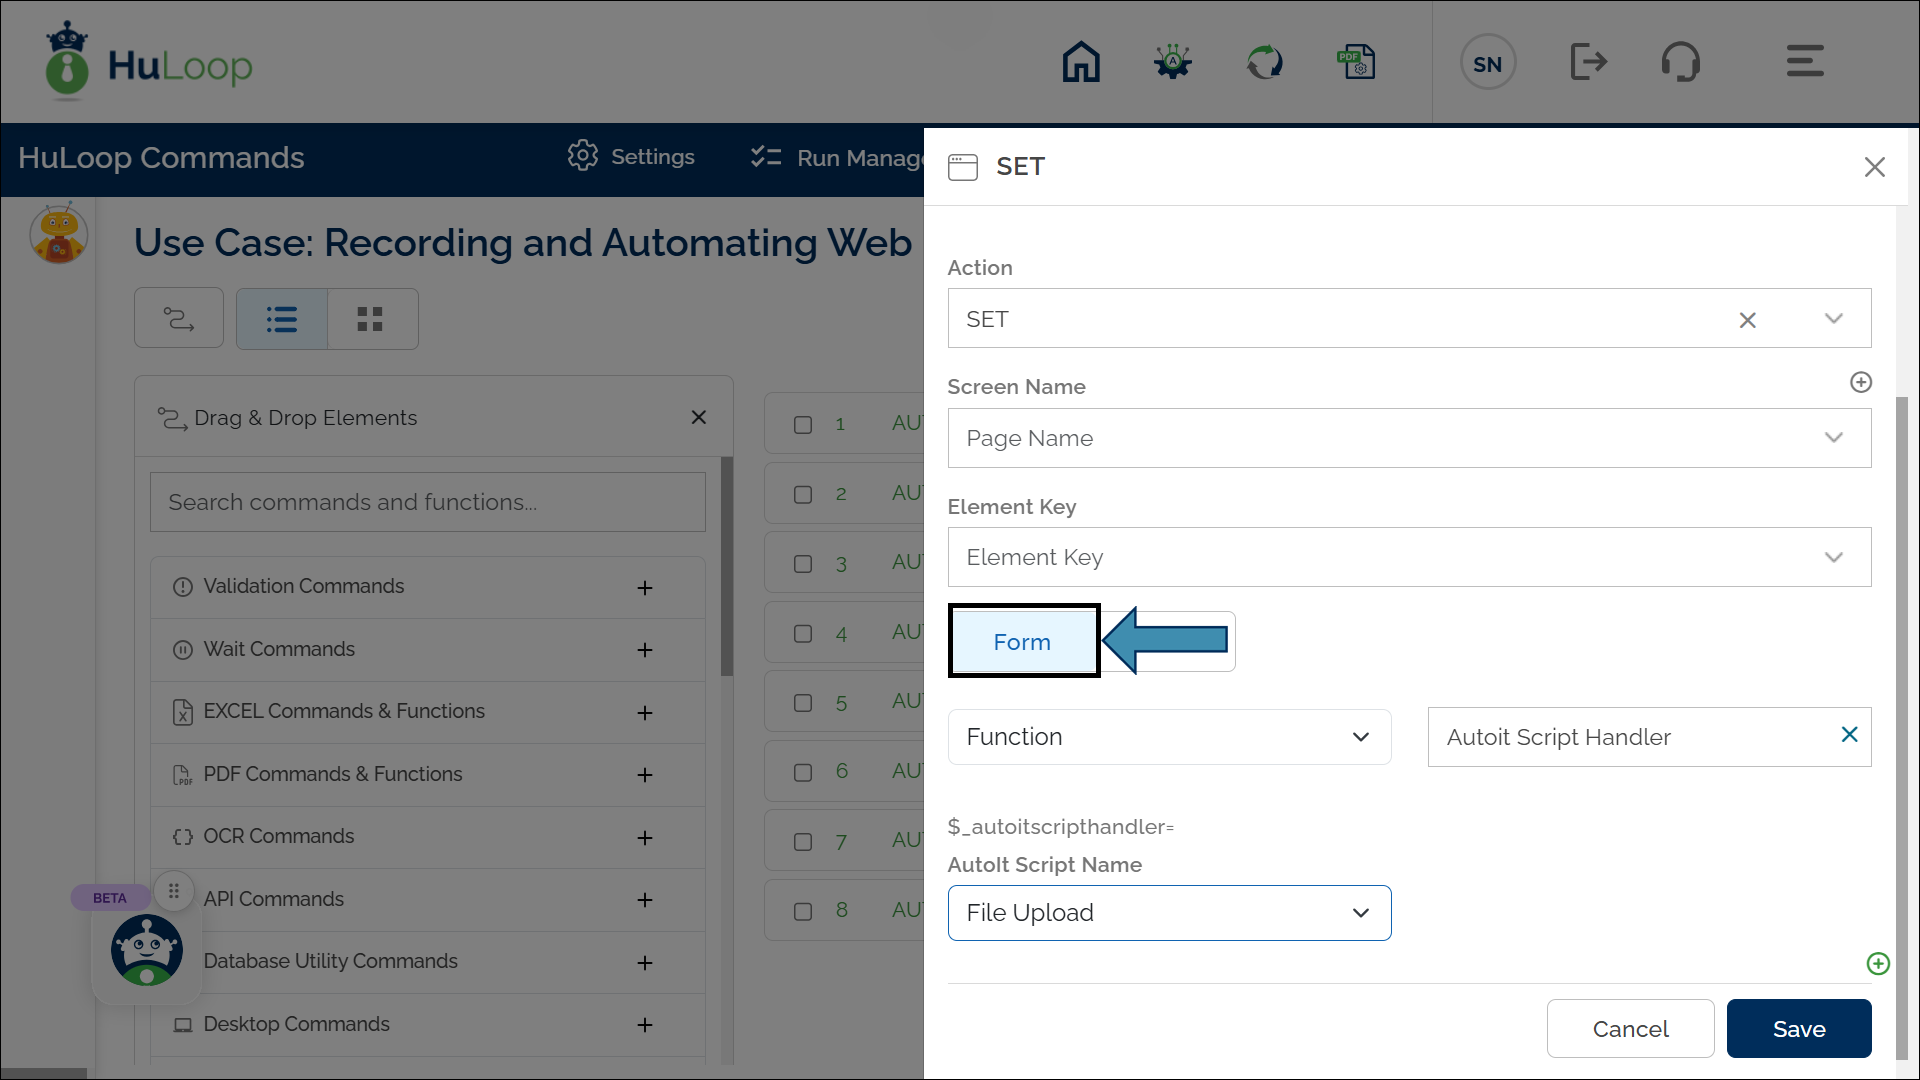
The system will create the automation script using the AutoIT Script Handler. You can verify the script by clicking Edit button ![]() against the Set Action. A pop-up will appear as shown. Click the Form button, and you will get the AutoIT Script Name as shown:
against the Set Action. A pop-up will appear as shown. Click the Form button, and you will get the AutoIT Script Name as shown: