Types of Variables
The following are the different types of variables supported in HuLoop:
Local Variables
These are variables that are only accessible within a specific case. They are used to store temporary values that won’t be needed outside that case.
- Scope: Can only be used within a specific Case.
- Usage: Variables that are only accessible within a specific Case. These variables store values that are temporary and specific to that particular Case.
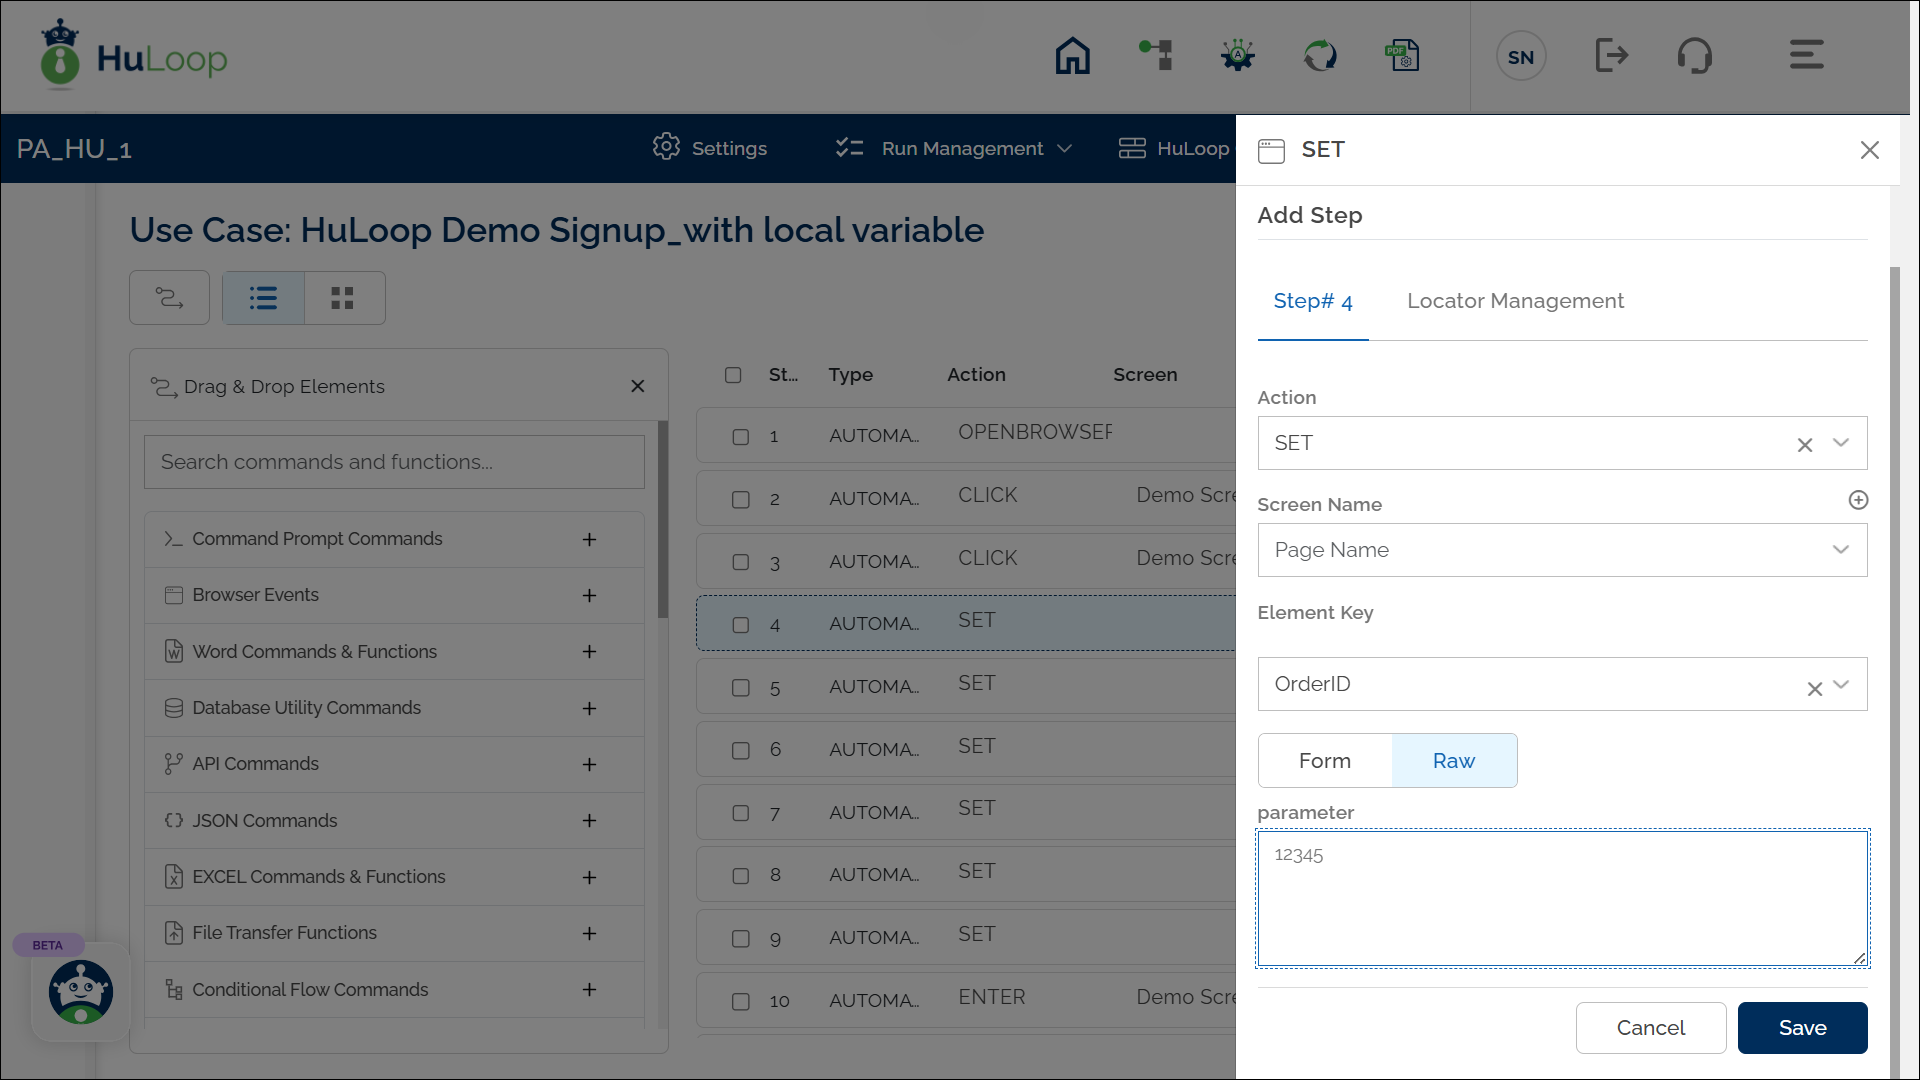
How to Define a Local Variable?
To create a Local Variable:
- Add a New Step in the Case.
- Select SET from the Action dropdown.
- Enter a variable name in the Element Key field (e.g., OrderID).
- Provide the value for the variable in the Parameters field (e.g., 12345).
- Click Save.
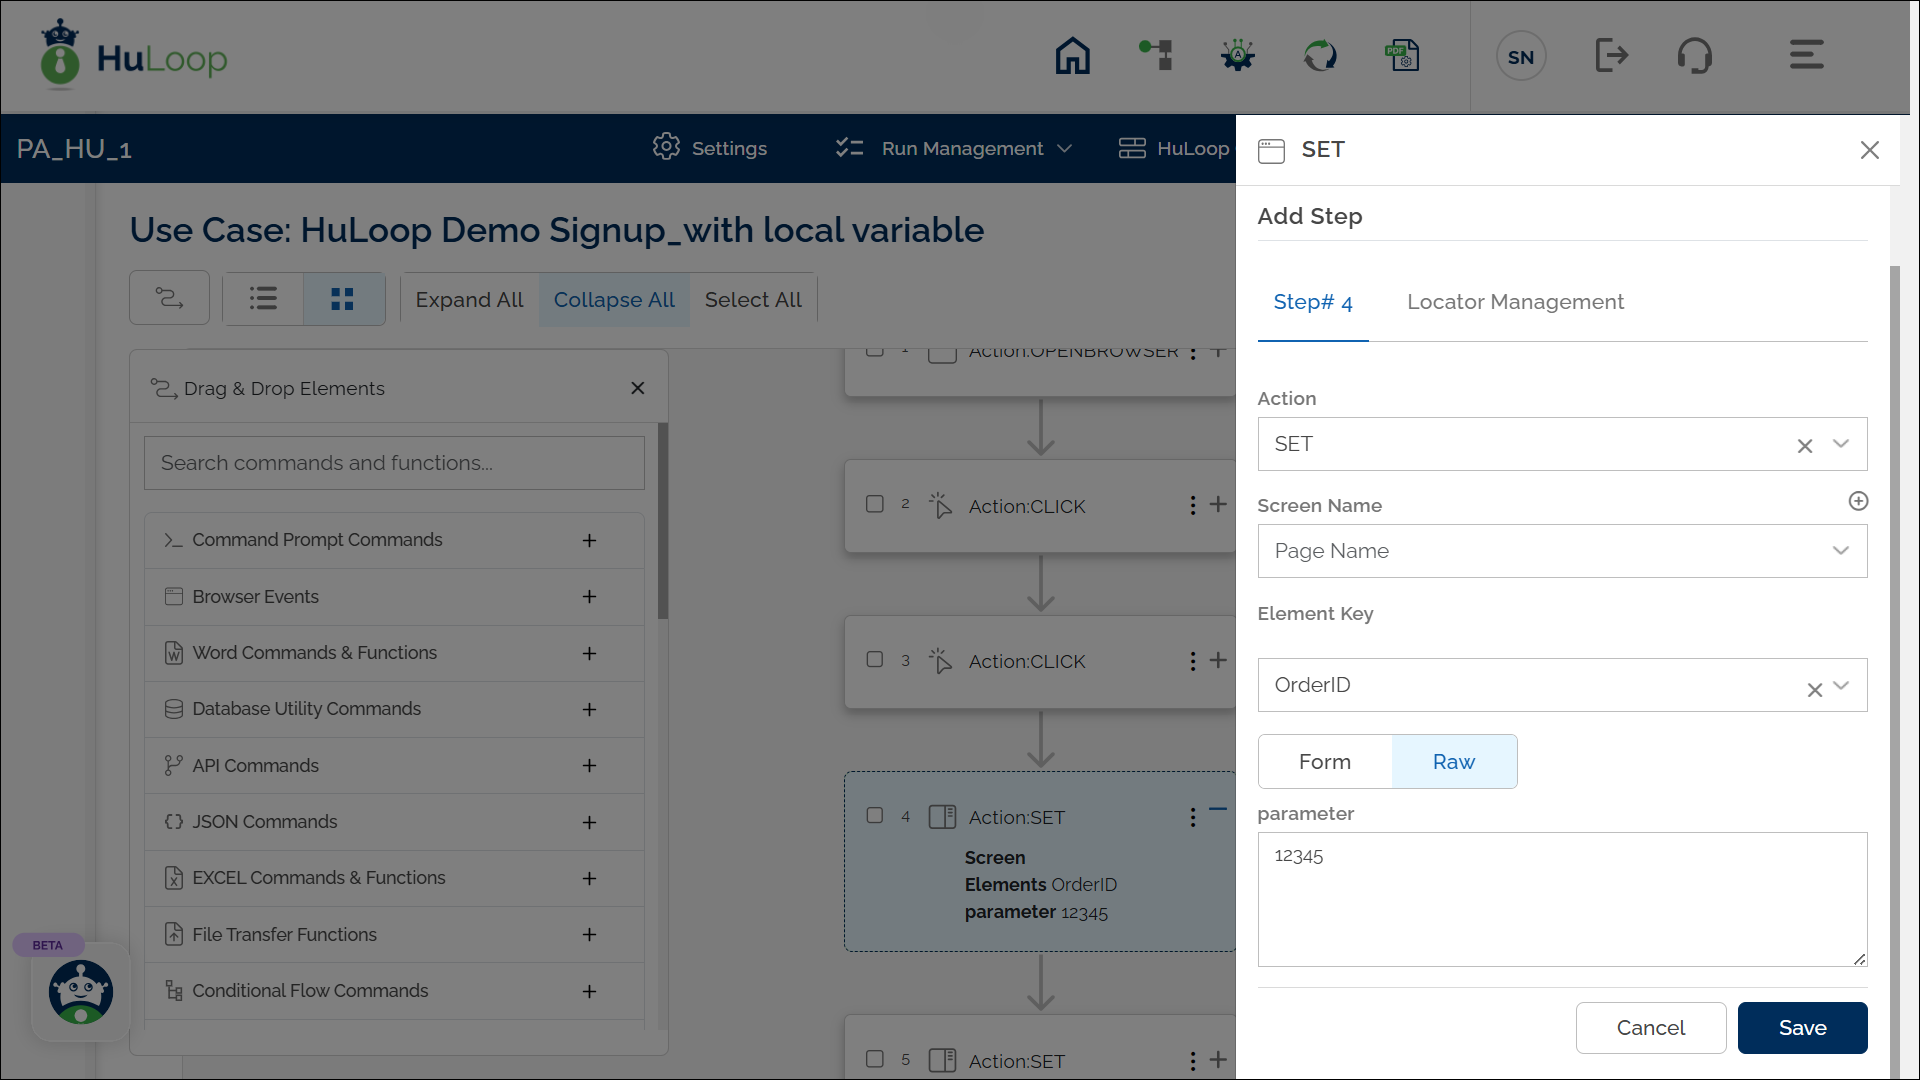
Note: While the steps for adding an action command are identical in both views, the display of the steps changes:
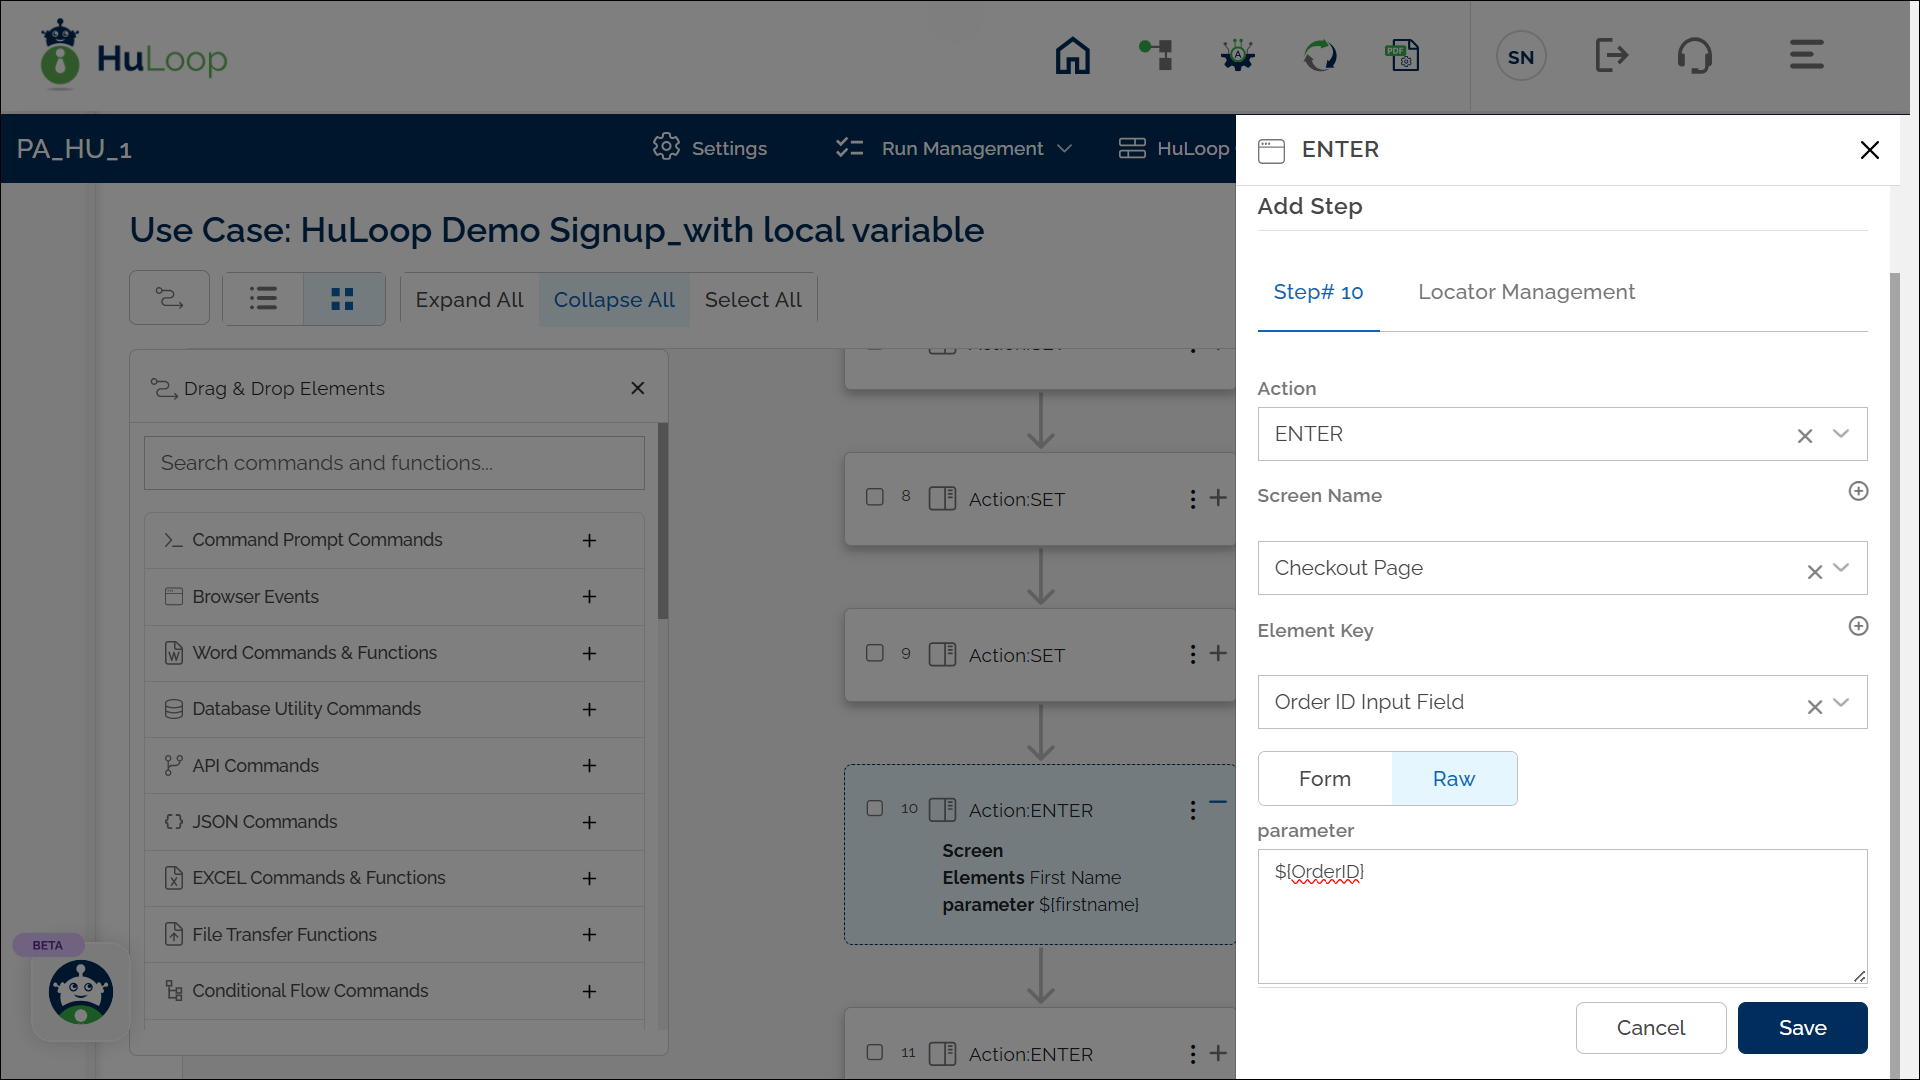
Usage Example: Suppose you want to use a local variable to input a value dynamically instead of manually entering it. In the following example, we are using the Enter Command to use the value stored in a Local Variable:
Steps:
- Select ENTER from the Action dropdown menu.
- Enter the Screen Name where the action is taking place (e.g., Checkout Page)
- Specify the Element Key for the field where the value should be entered (e.g., “Order ID Input Field”).
- In the Parameters section, enter the variable name in the following format: ${OrderID}.
- Click Save.

Expected Output on Execution:
- The automation will enter the value stored in the OrderID local variable into the specified input field.
- In this example, the value of OrderID is defined as 12345. So, the automation will enter 12345 in the Order ID Input Field on the Checkout Page.
Suite-level Variables
Variables that can be accessed across all cases within a suite, making them useful for automating workflows or processes that span multiple steps or stages.
- Scope: Can be used across all Cases within the same Suite.
- Usage: Define suite-level variables with the $S{variableName} syntax, and these variables can be accessed across all related tasks in the suite. For example, if a suite manages a multi-step approval process, you can store data like approval statuses or user roles as suite-level variables to ensure consistency across all steps. Suite level variables are used to pass on the data/information from one case to another case.
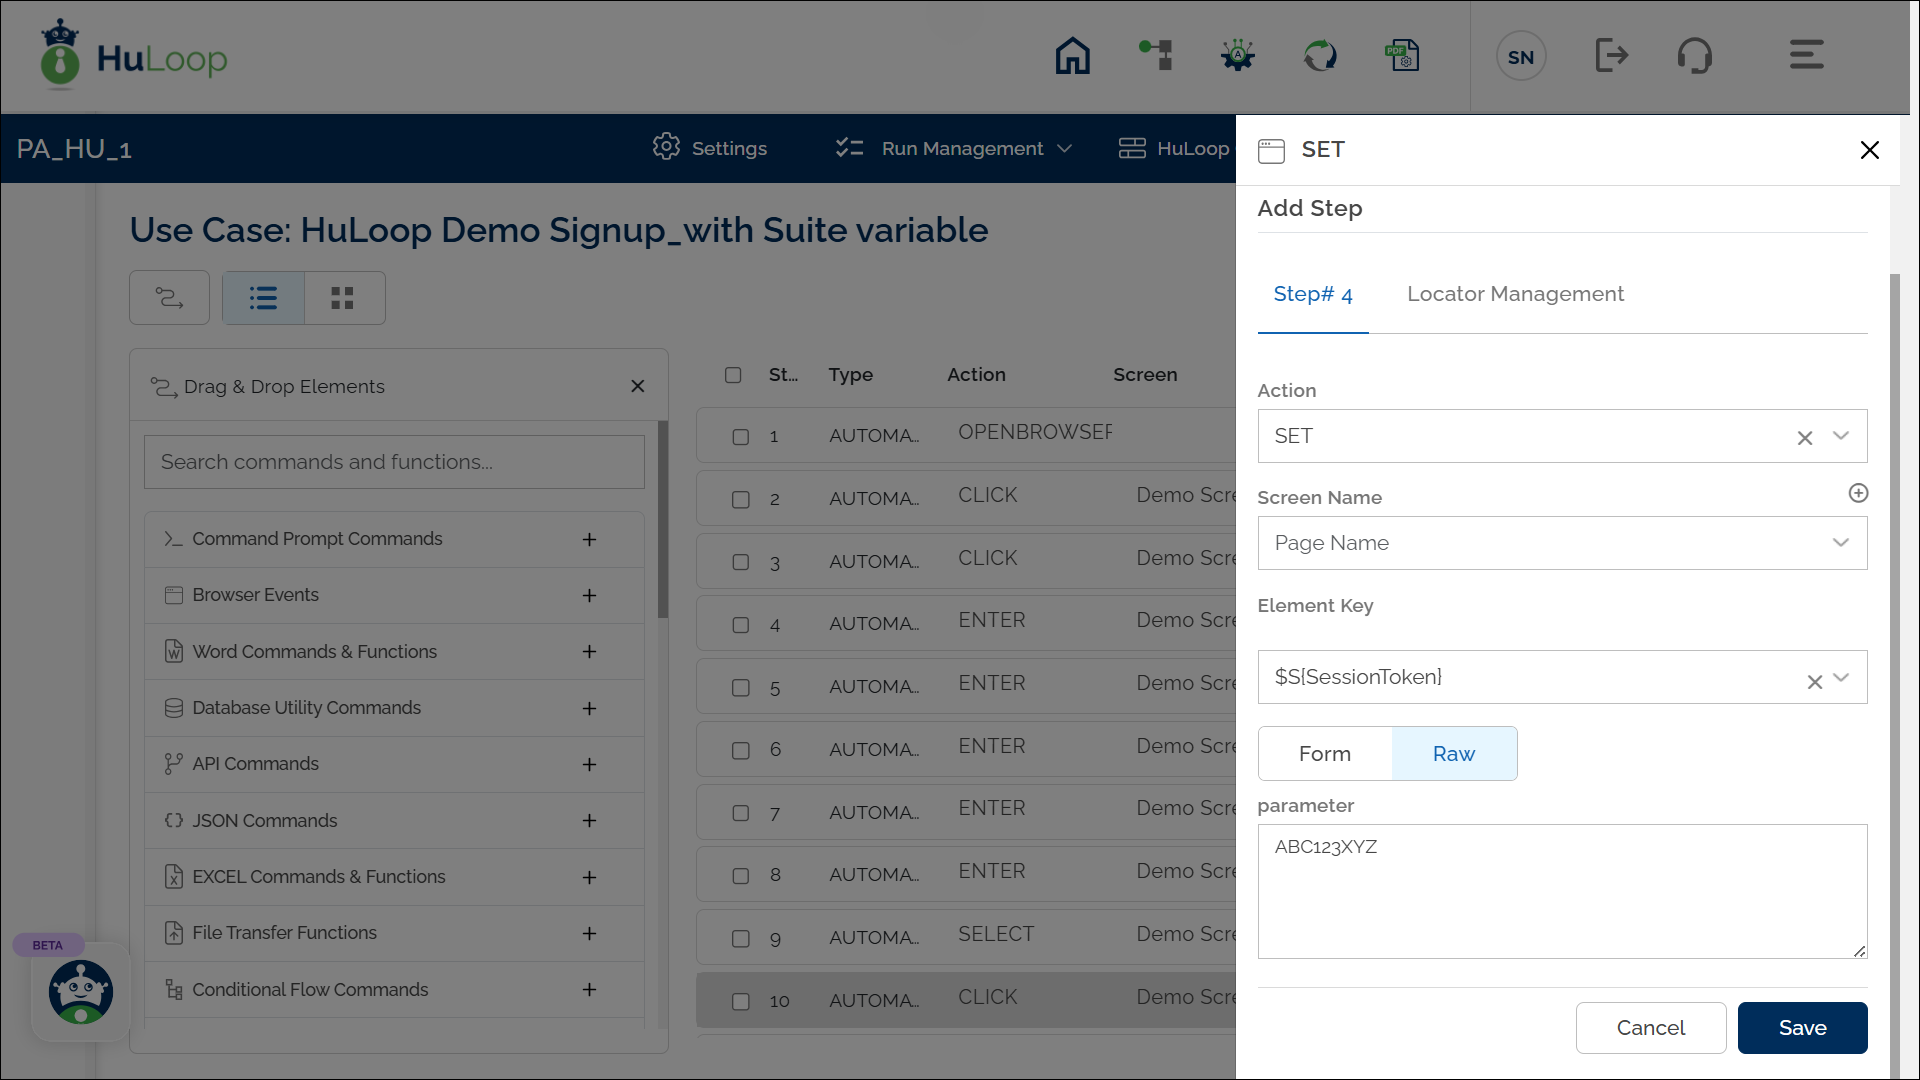
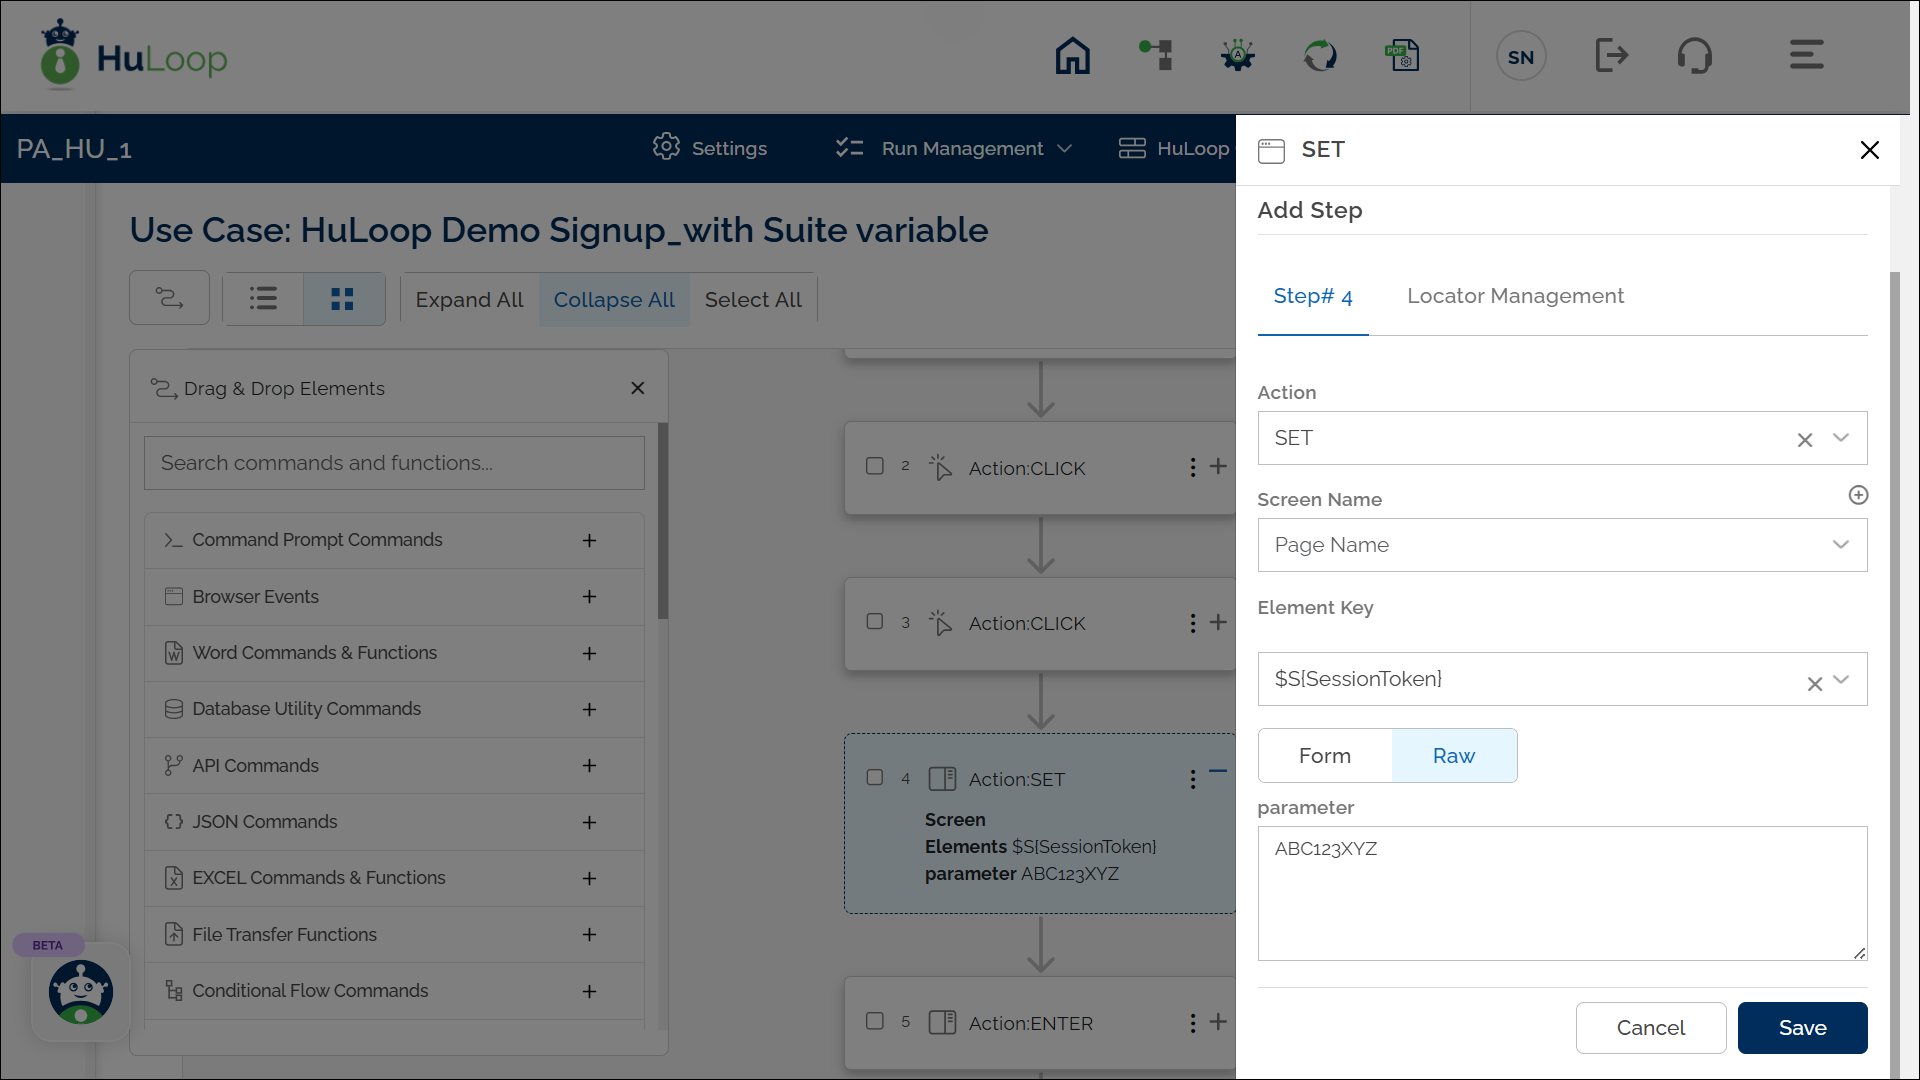
How to Define a Suite-Level Variable?
To create a Suite-Level Variable:
- Add a New Step in any Case within the Suite.
- Select SET from the Action dropdown.
- Enter a variable name in the Element Key field (e.g., $S{SessionToken}).
- Provide the value for the variable in the Parameters field (e.g., ABC123XYZ).
- Click Save.
Note: While the steps for adding an action command are identical in both views, the display of the steps changes:
To ensure the Suite-Level Variable stores the assigned value, you must execute the case where it is defined before using it in subsequent cases within the automation.
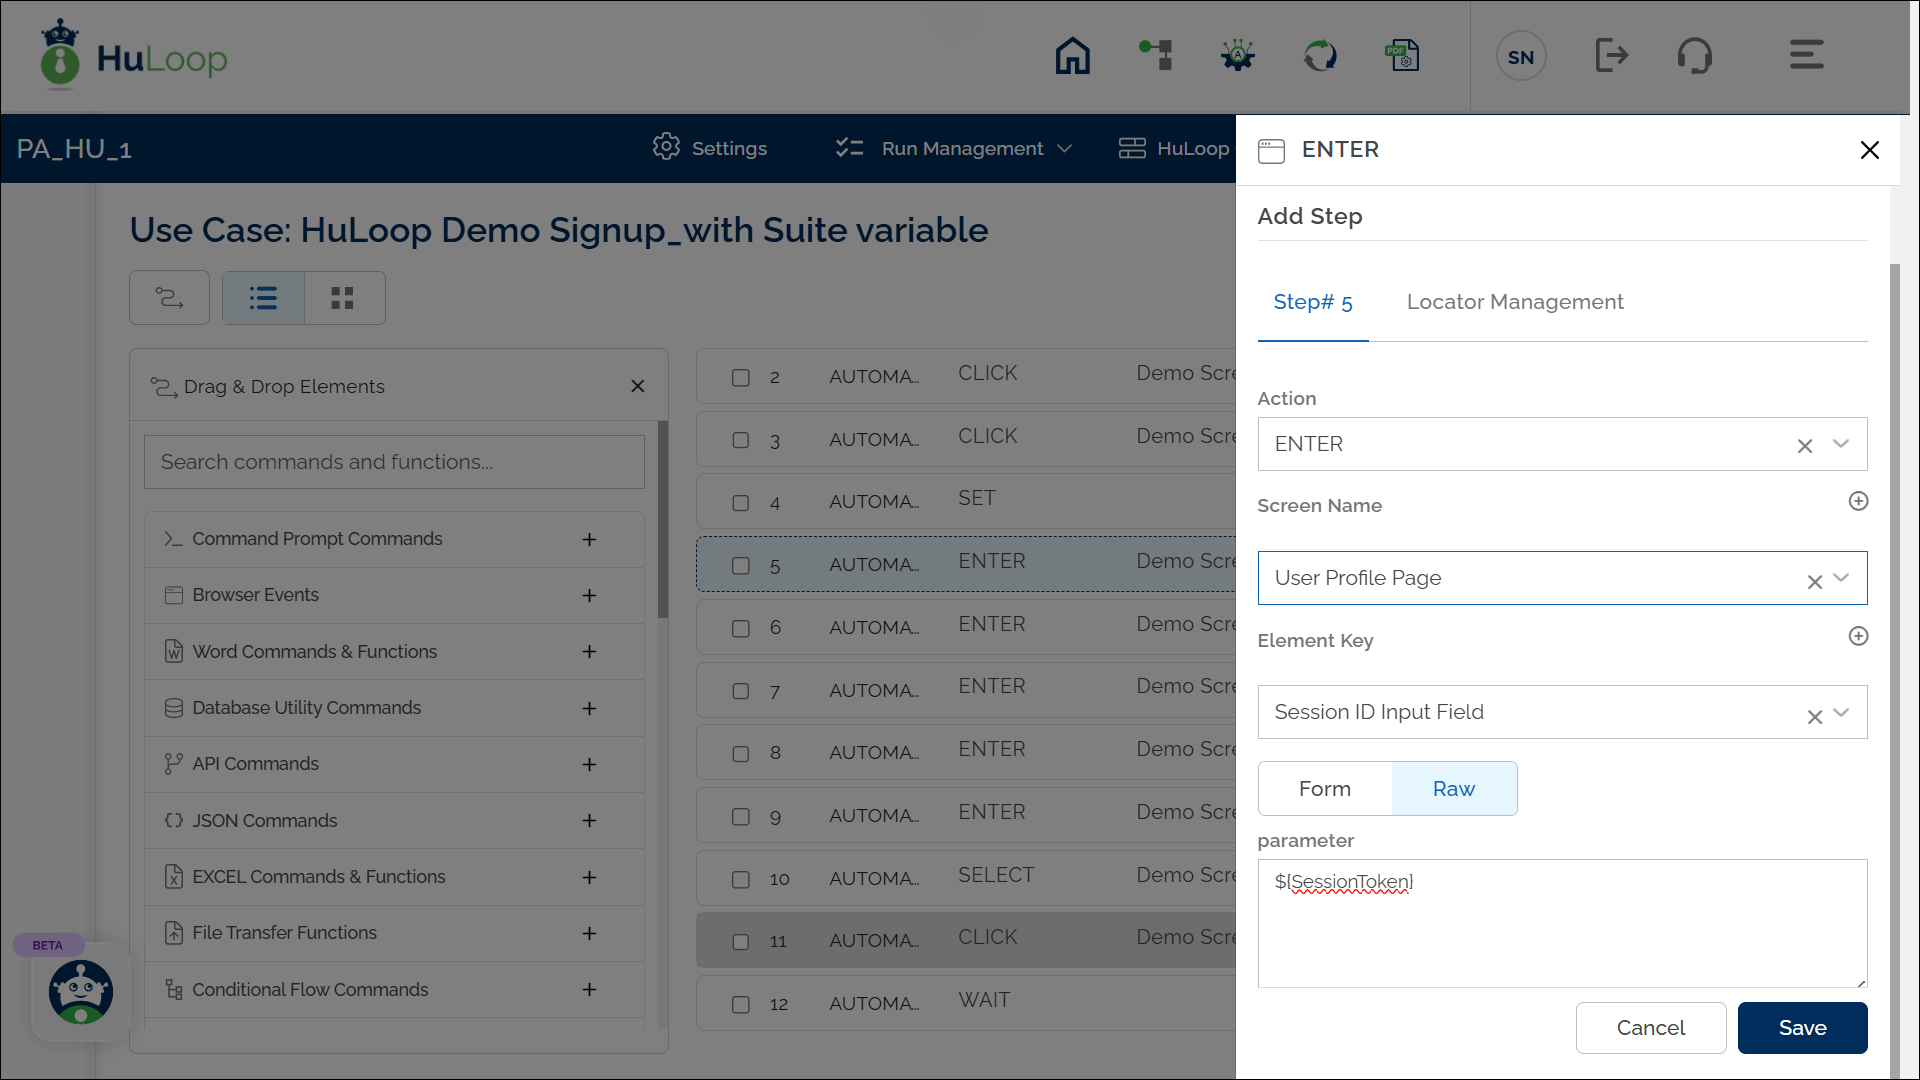
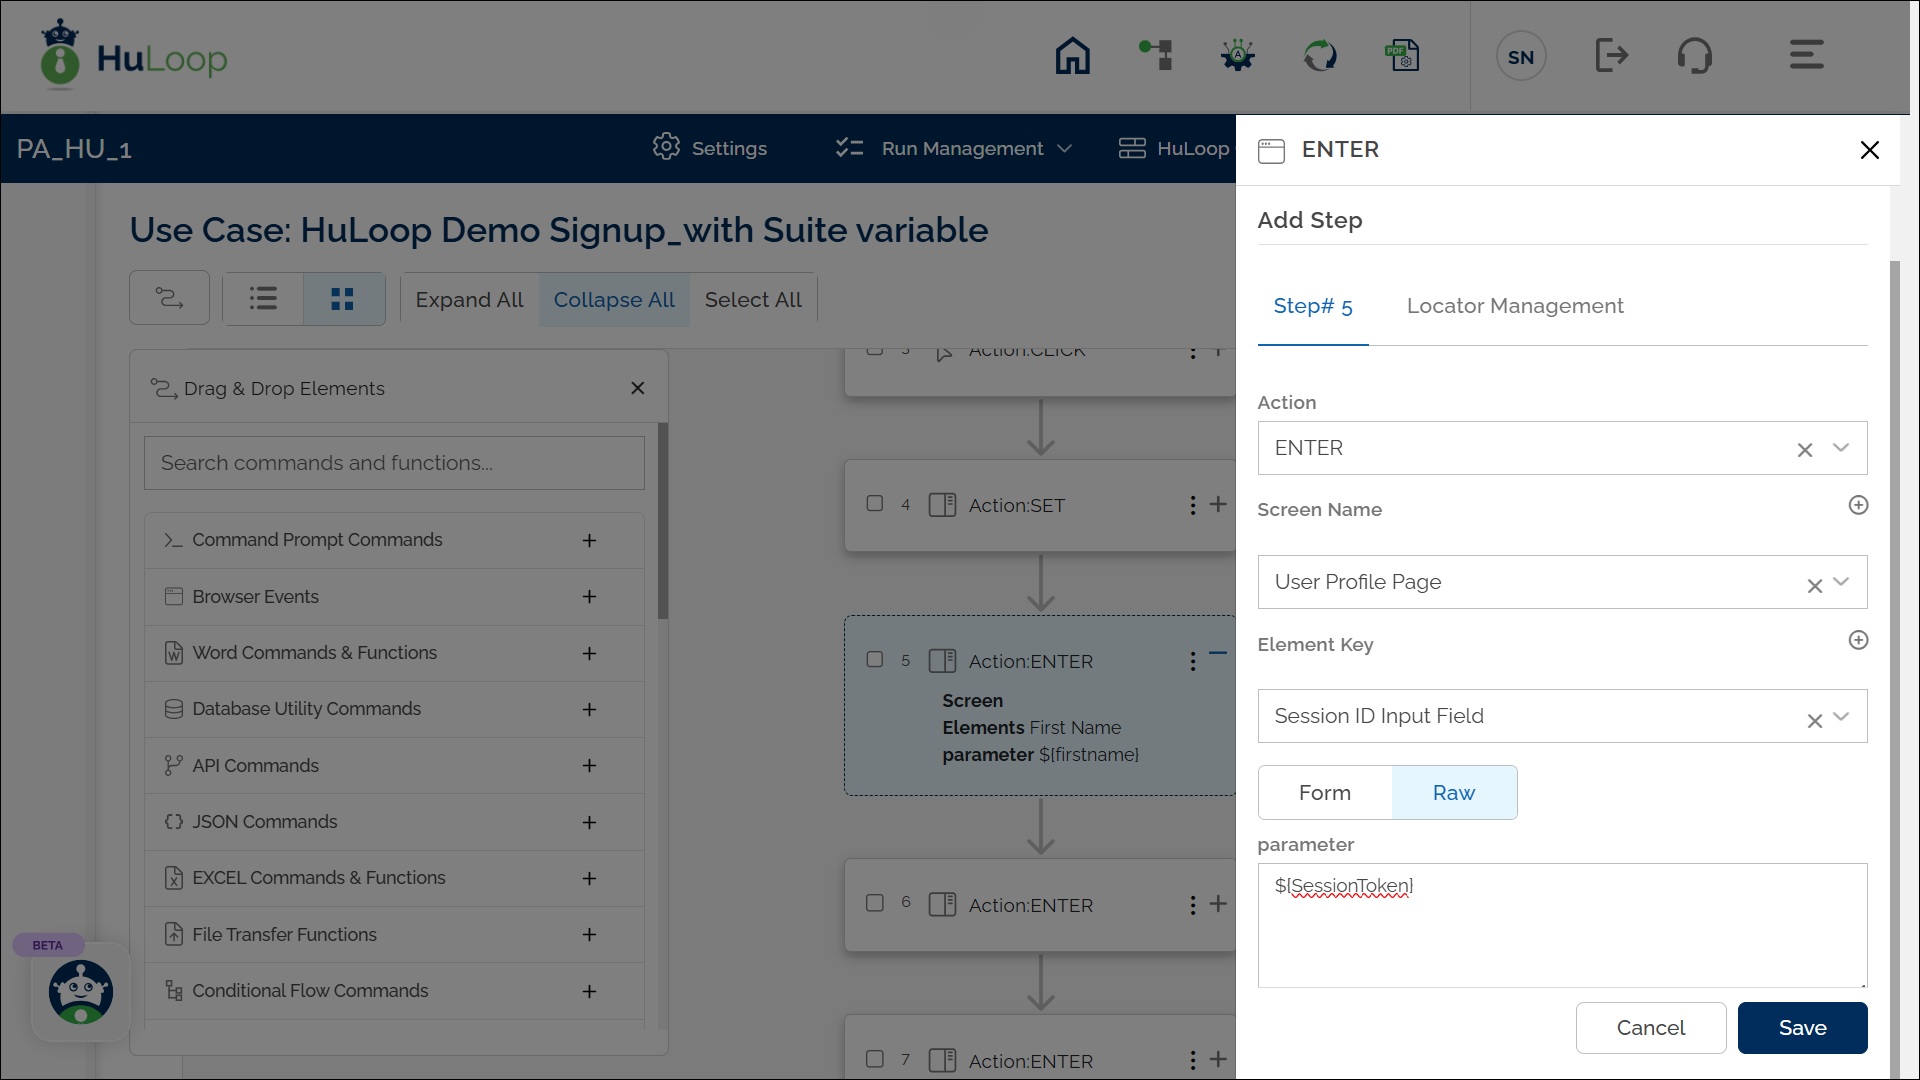
Usage Example: Suppose you want to use a suite-level variable in a case in the same suite the suite-level variable is defined in. In the following example, we are using Enter Command to use the value stored in the Suite-level Variable we defined above:
Steps:
- Select ENTER from the Action dropdown menu.
- Enter the Screen Name where the action is taking place (e.g., “User Profile Page”).
- Specify the Element Key for the field where the value should be entered (e.g., “Session ID Input Field”).
- In the Parameters section, enter the suite-level variable name in the following format: ${SessionToken}.
- Click Save.
Expected Output on Execution:
- The automation will enter the value stored in the SessionToken Suite-level variable into the specified input field.
- In this example, the value of SessionToken is defined as ABC123XYZ. So, the automation will enter ABC123XYZ in the Session ID Input Field on the User Profile Page.
Global Variables
These are variables that are accessible across the entire automation project, regardless of the suite or case. These variables store data or configurations that need to be reused across multiple processes, workflows, or test cases.
- Scope: Can be used anywhere within the entire automation project, across all Cases and Suites.
- Syntax: $G{variableName}
- Usage: Best for storing values like base URLs, system settings, file paths, or credentials that need to be accessed globally throughout your process or project. For example, in a business automation scenario, you might store organizational settings as global variables for use across multiple workflows.
How to Define a Global Variable?
To create a Global Variable:
- Open an Automation project and click Settings as shown:

- You will land on the Settings page.
- Navigate to Custom Settings page by clicking Custom Settings.
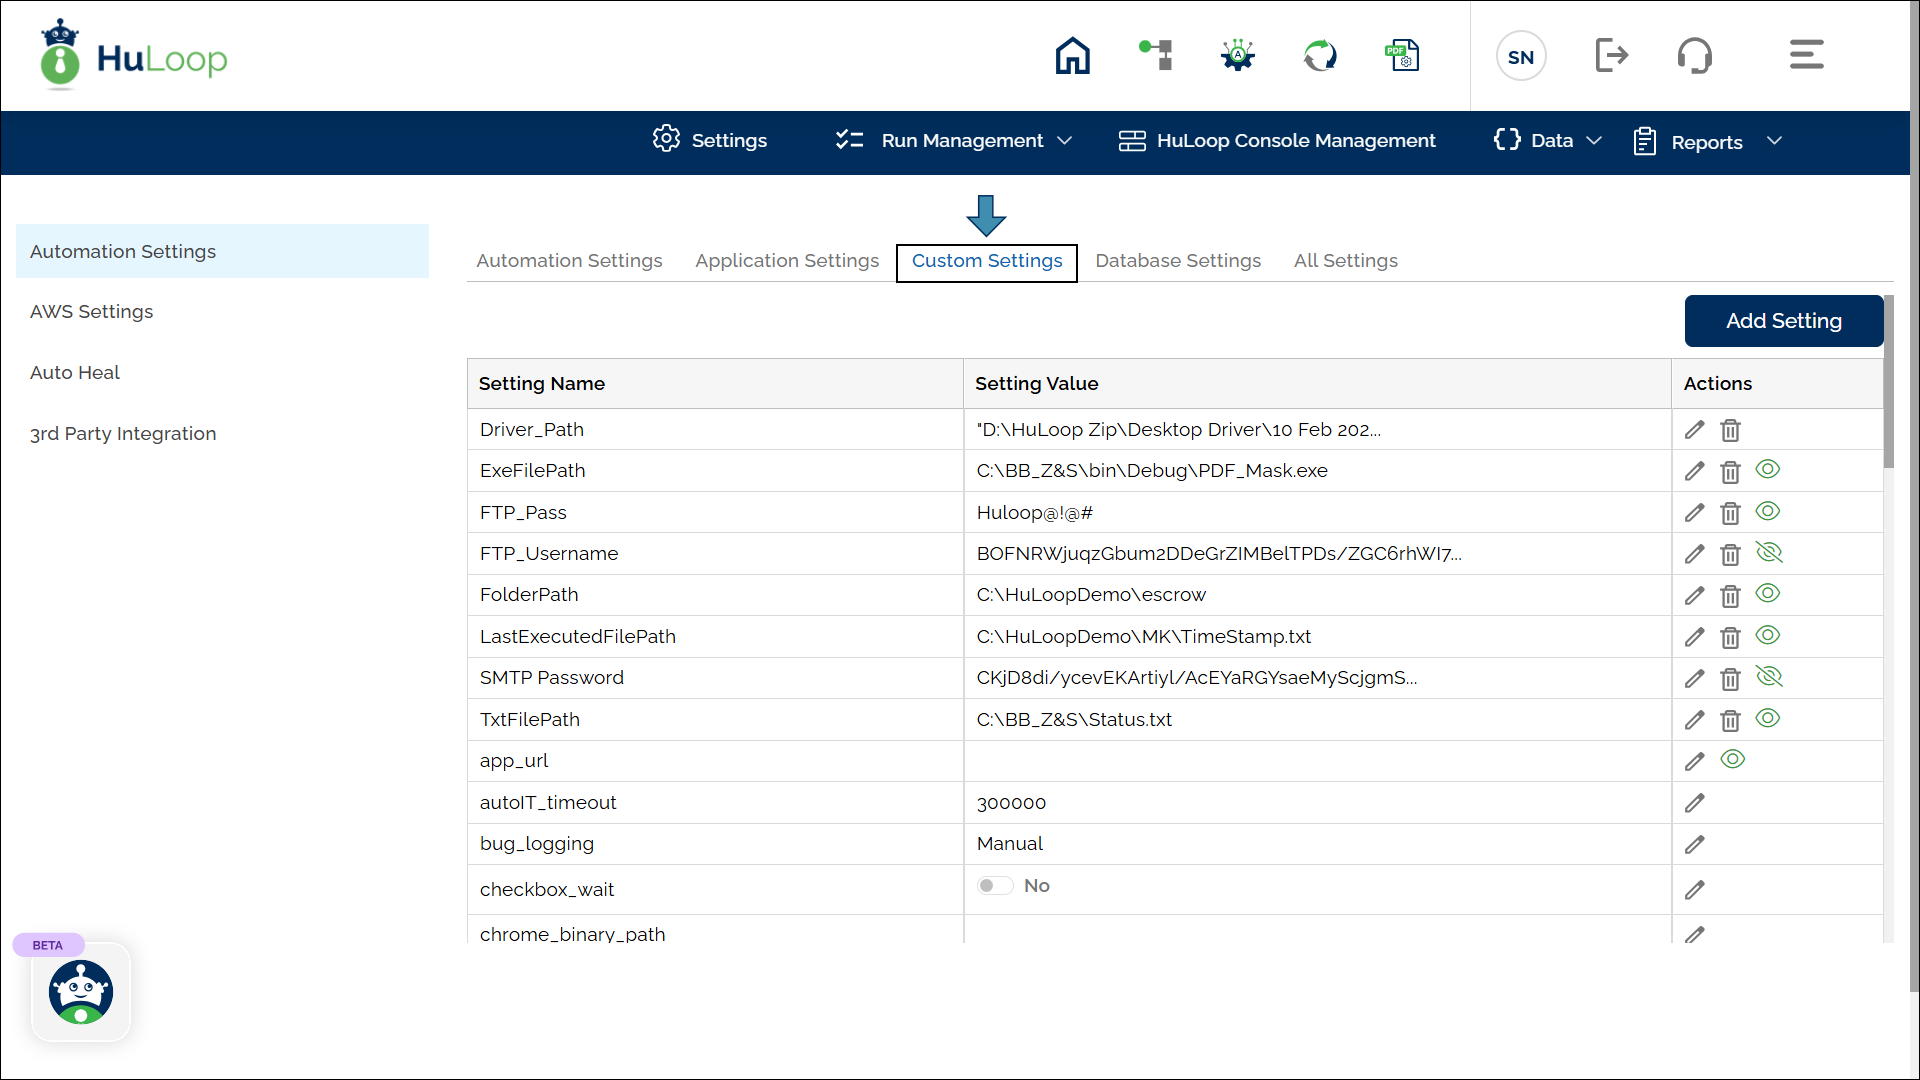
- Click the Add Setting button.
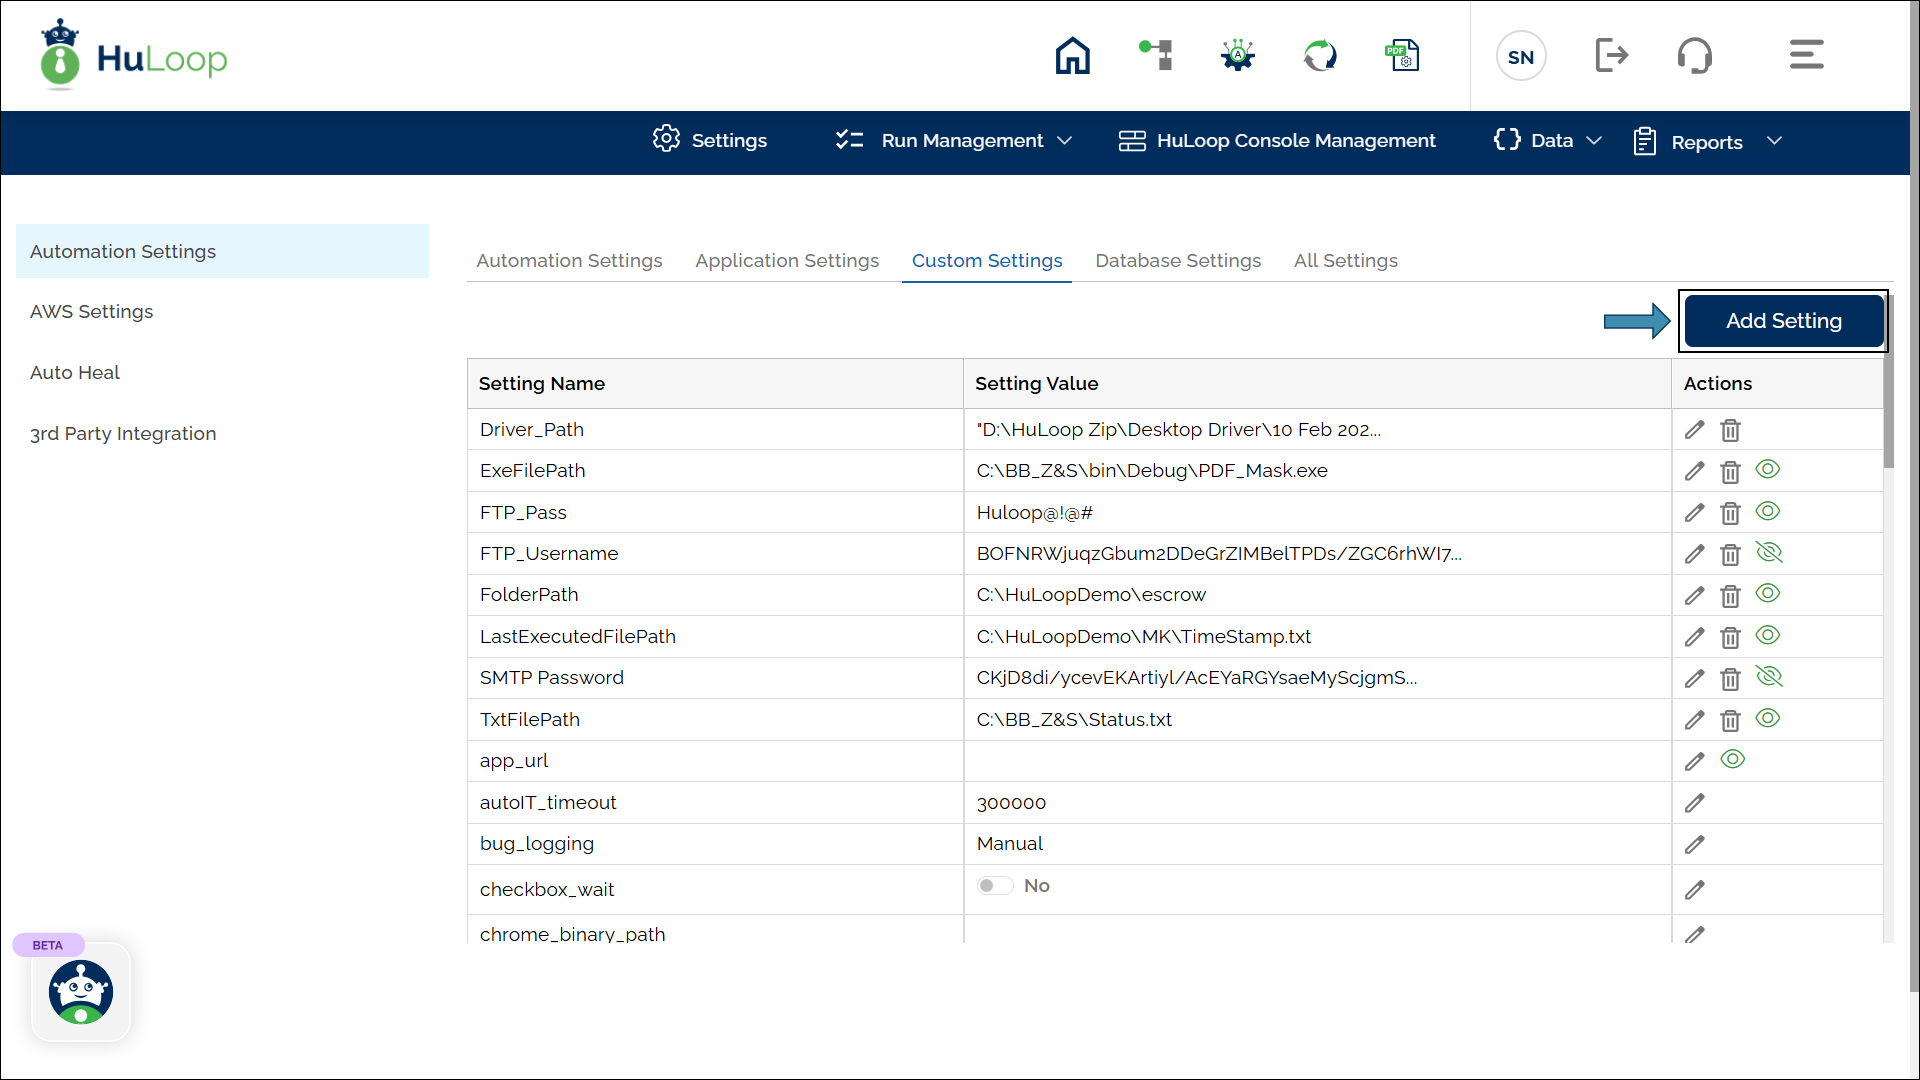
- In the Add a New Custom Setting pop-up:
- Enter the global variable name in the Setting Name field (e.g., BaseURL).
- Provide the value for the global variable in the Setting Value field (e.g., https://huloop.ai/).
- Click Save.

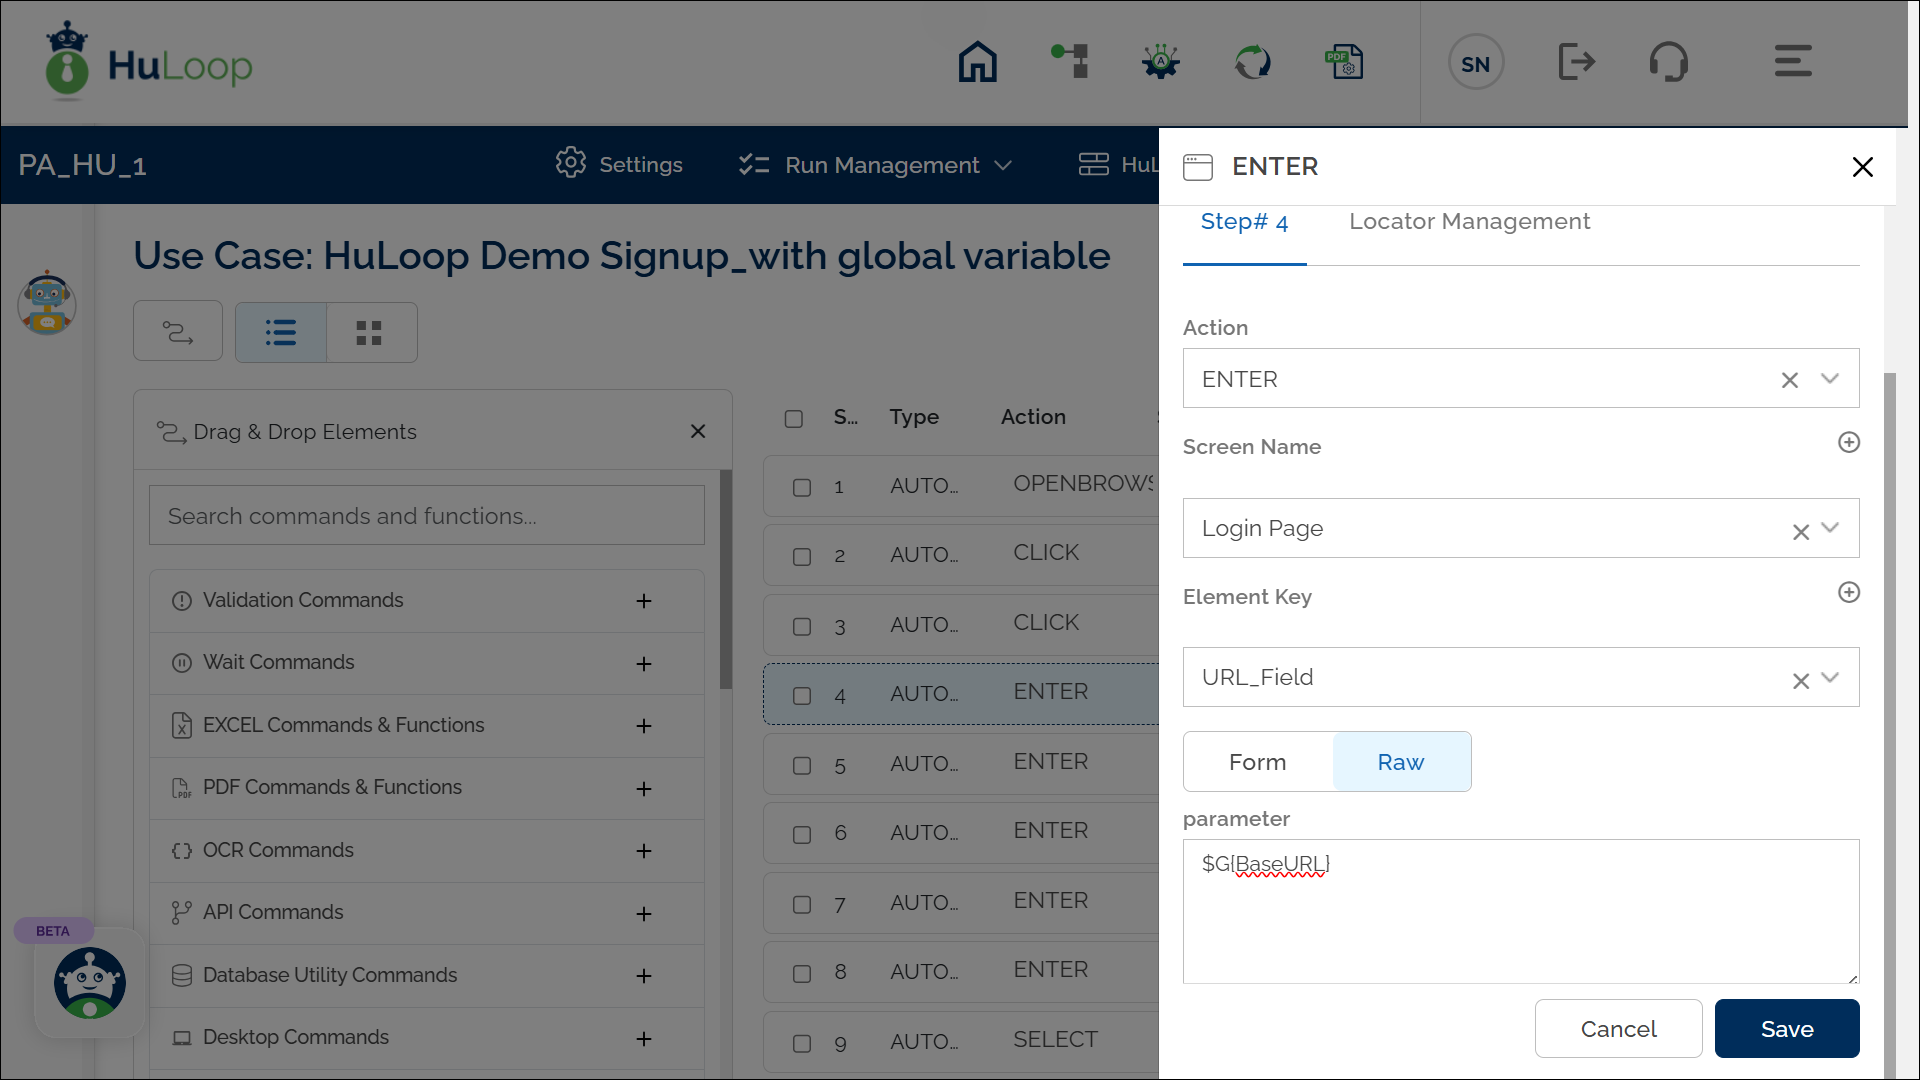
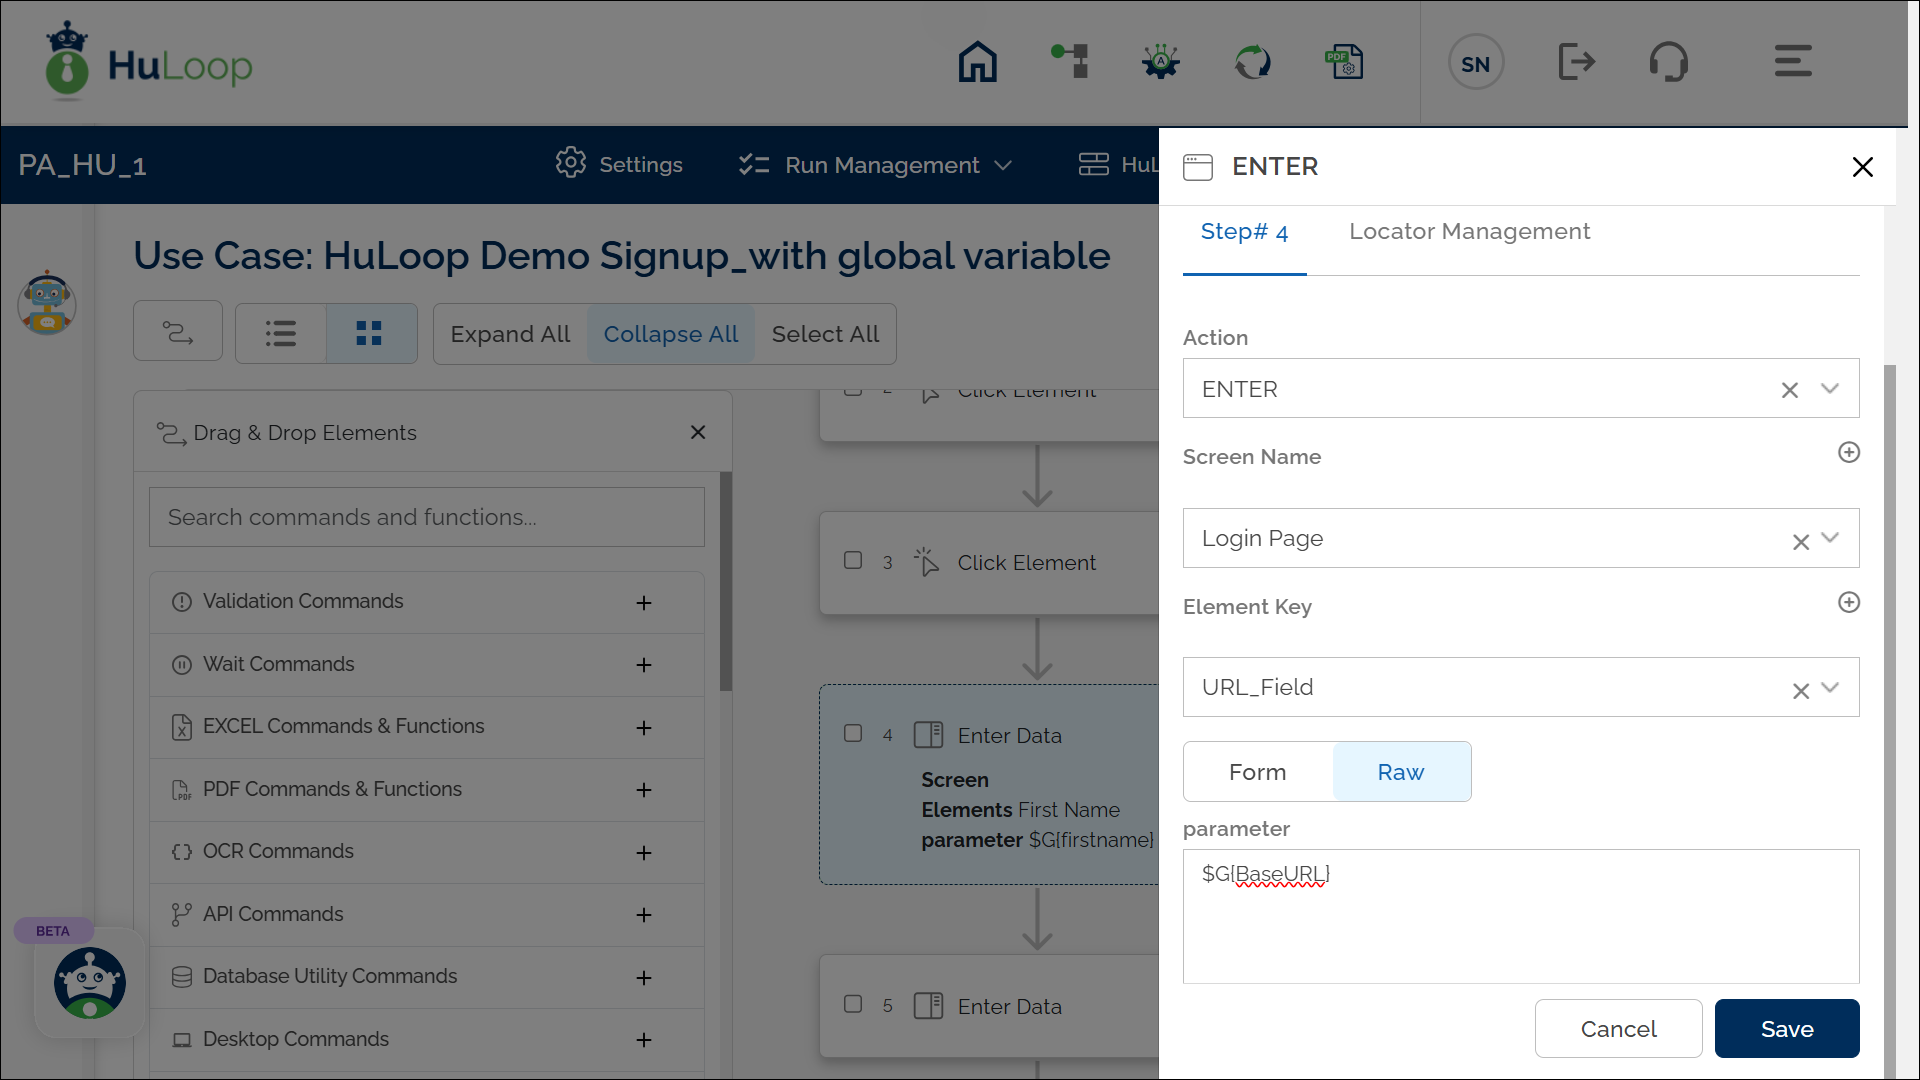
Usage Example: Suppose you want to use a Global Variable anywhere within the same Automation project, whether in a module, suite, or case. In the following example, we use the Enter Command to input the value stored in the Global Variable created earlier.
Steps:
- Select ENTER from the Action dropdown menu
- Enter the Screen Name where the action is taking place (e.g., “Login Page“)
- Specify the Element Key for the field where the value should be entered (e.g., “URL_Field“)
- In the Parameters section, enter the variable name in the following format: $G{BaseURL}
- Click Save.
Expected Output:
- The automation will enter the value stored in the BaseURL global-level variable into the specified input field.
- In this example, the value of BaseURL is defined as https://huloop.ai/. So, the automation will enter https://huloop.ai/ in the URL_Field on the Login Page.
Run-Time Variables
Run-Time Variables allow you to capture user input dynamically at the time of execution. These variables are useful when the value cannot be predefined and must be entered by the user at run time.
Scope: Used during execution to capture live input from the user.
Usage: Run-Time Variables are helpful when you want the user to provide a value-such as a customer ID, invoice number, or date, during the execution of a case. The value is not predefined; instead, it is entered on the spot.
How to Define a Run-Time Variable?
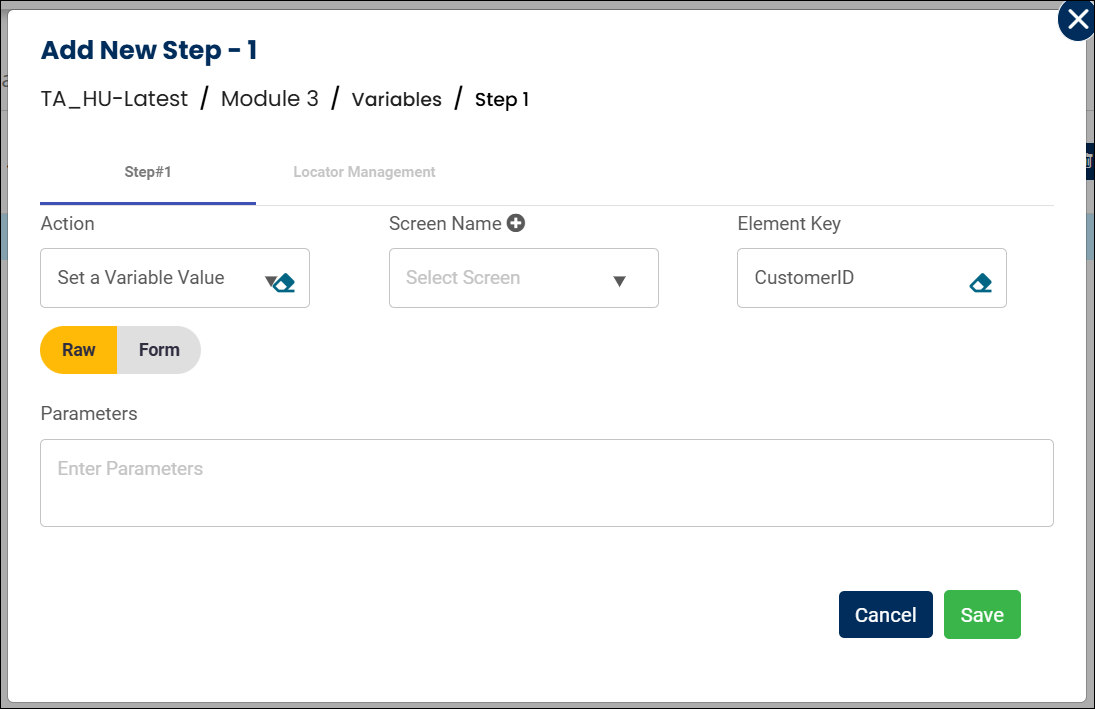
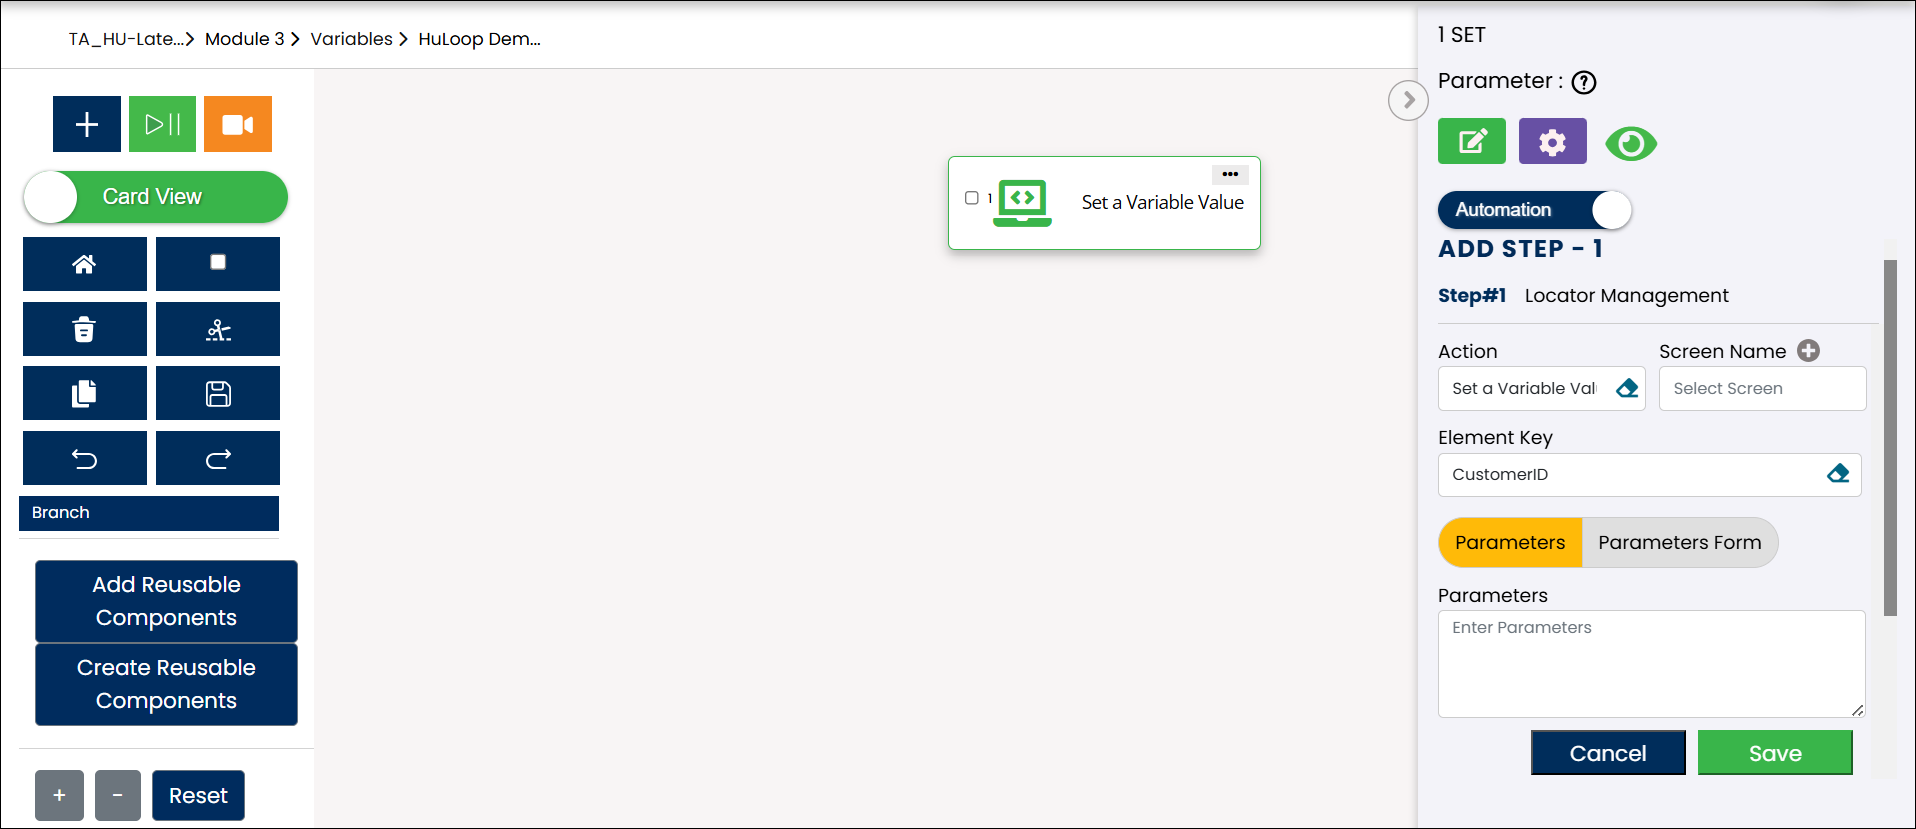
To create a Run-Time Variable:
- Add a New Step in the Case.
- Select Set a Variable Value from the Action dropdown menu.
- In the Element Key field, enter a variable name (e.g., CustomerID).
- Click Save.
Note: While the steps for adding an action are identical in both views, the display of the steps changes:
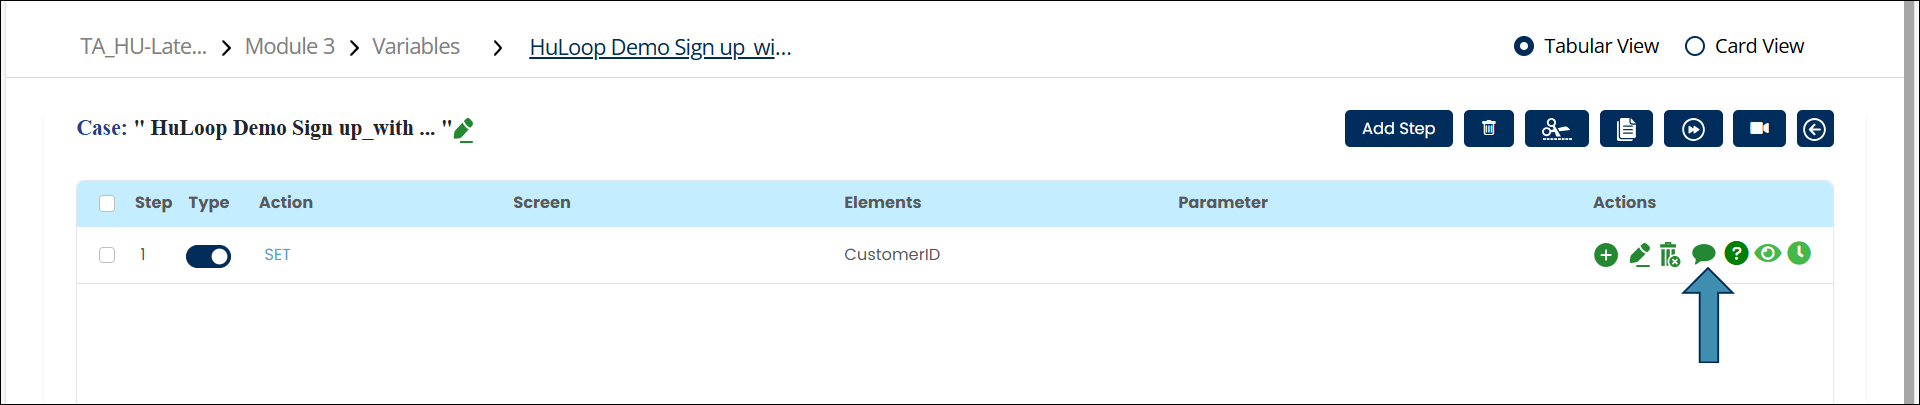
- Switch to Tabular View, if not already in it.
- Click the Comment
 icon beside the step to add an instruction for the user.
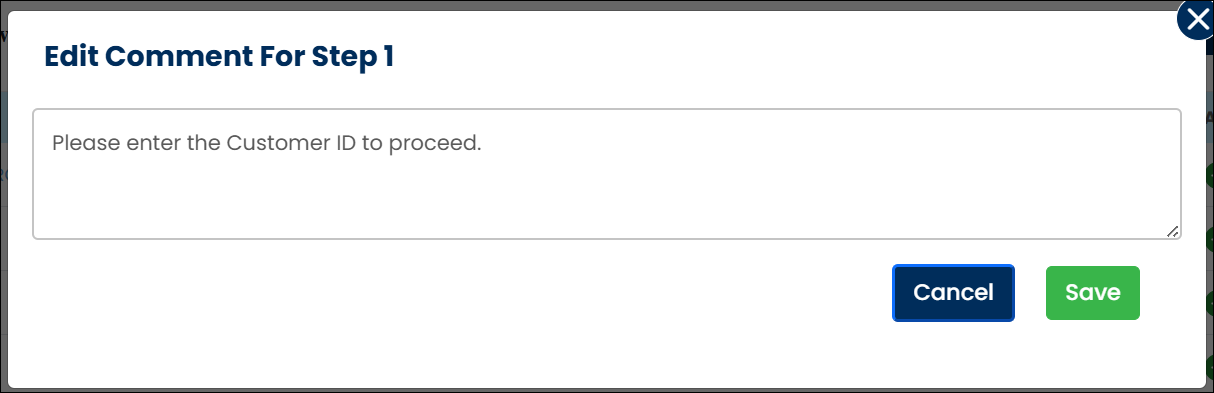
- You’ll see a pop-up where you can enter the comment that will appear as a prompt in the run-time pop-up where the user provides input during execution.
- For example, you can enter: “Please enter the Customer ID to proceed”.
- Click Save.
- Click the Enable Run-Time
 icon beside the step to activate run-time input for that variable.

Usage Example: Suppose you want to use the Run-Time Variable you just defined (CustomerID) to input a value during execution. In this example, we’ll use the Enter Data Action to apply the run-time value in a field on the screen.
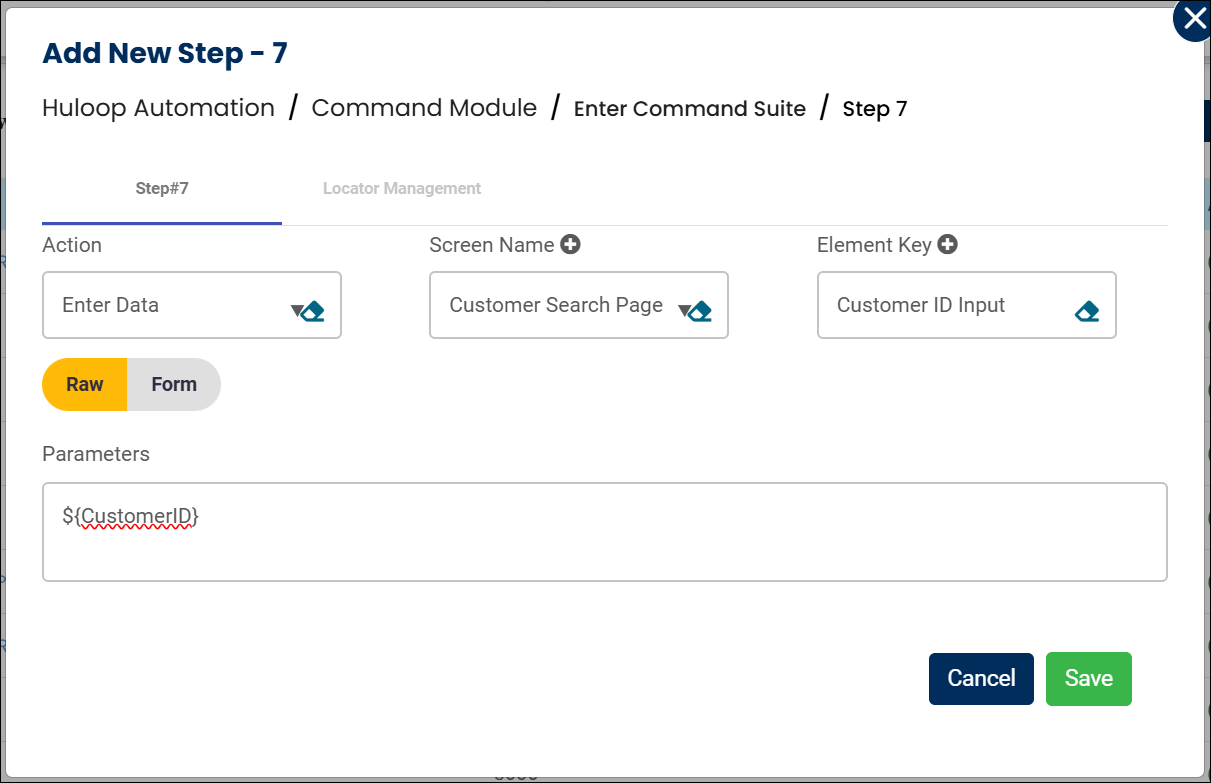
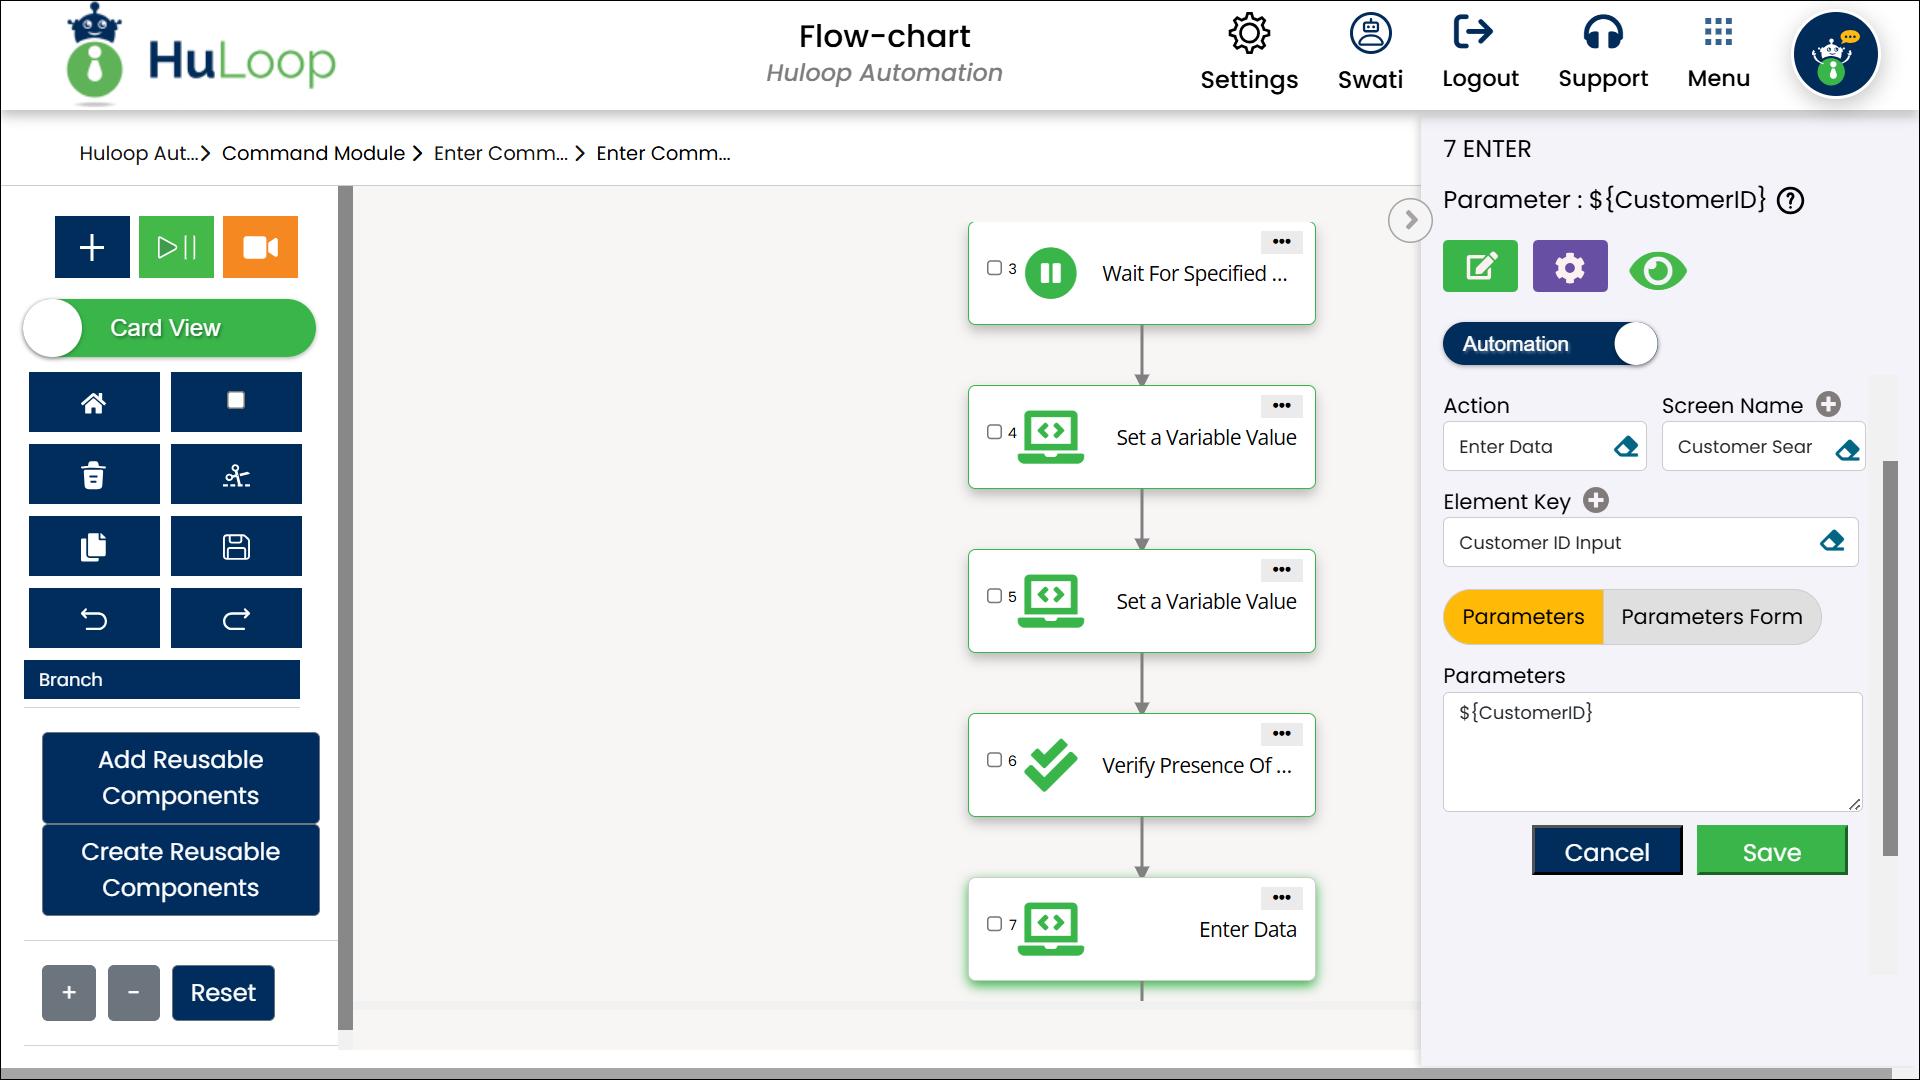
Steps:
- Select Enter Data from the Action dropdown menu.
- Enter the Screen Name where the action is taking place (e.g., “Customer Search Page”).
- Specify the Element Key for the field where the value should be entered (e.g., “Customer ID Input”).
- In the Parameters section, enter the variable name in the following format: ${CustomerID}.
- Click Save.
Expected Output on Execution:
- When you run the case, a pop-up or prompt will appear asking the user to enter the value for CustomerID.
- The automation will then use this value in the specified field during execution.
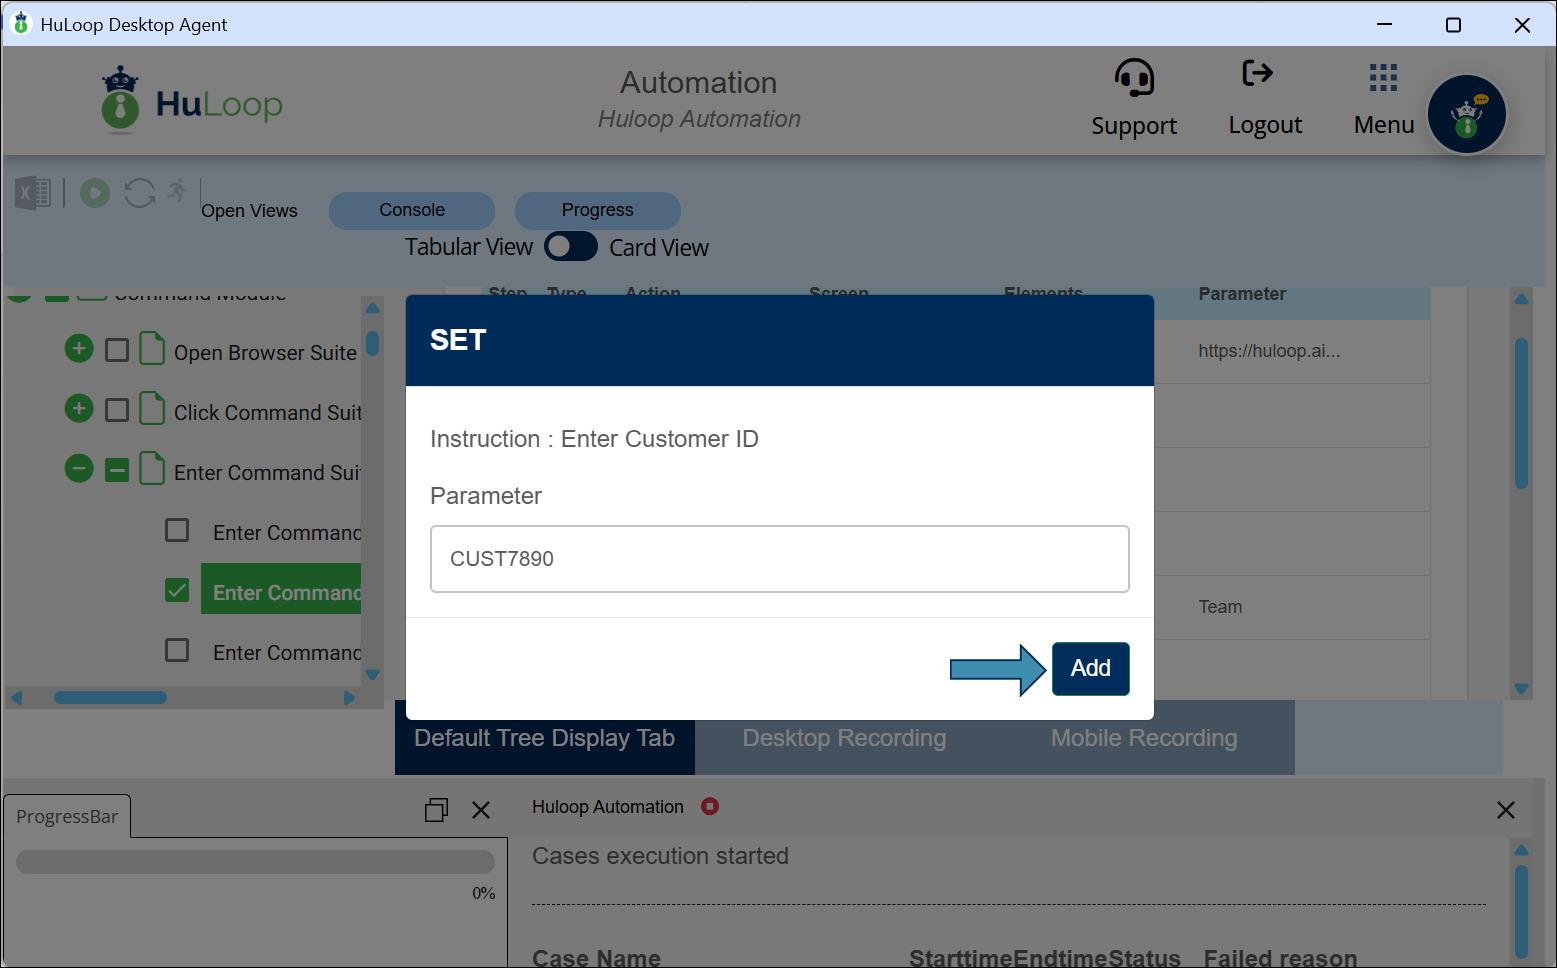
- In this example, if the user enters CUST7890 during execution, the automation will enter CUST7890 in the Customer ID Input field on the Customer Search Page.