Creating a Workflow
Creating a workflow in HuLoop is a simple, step-by-step process. Let’s walk through how to build a basic workflow using the visual designer, from initial setup to task assignment and conditional routing.
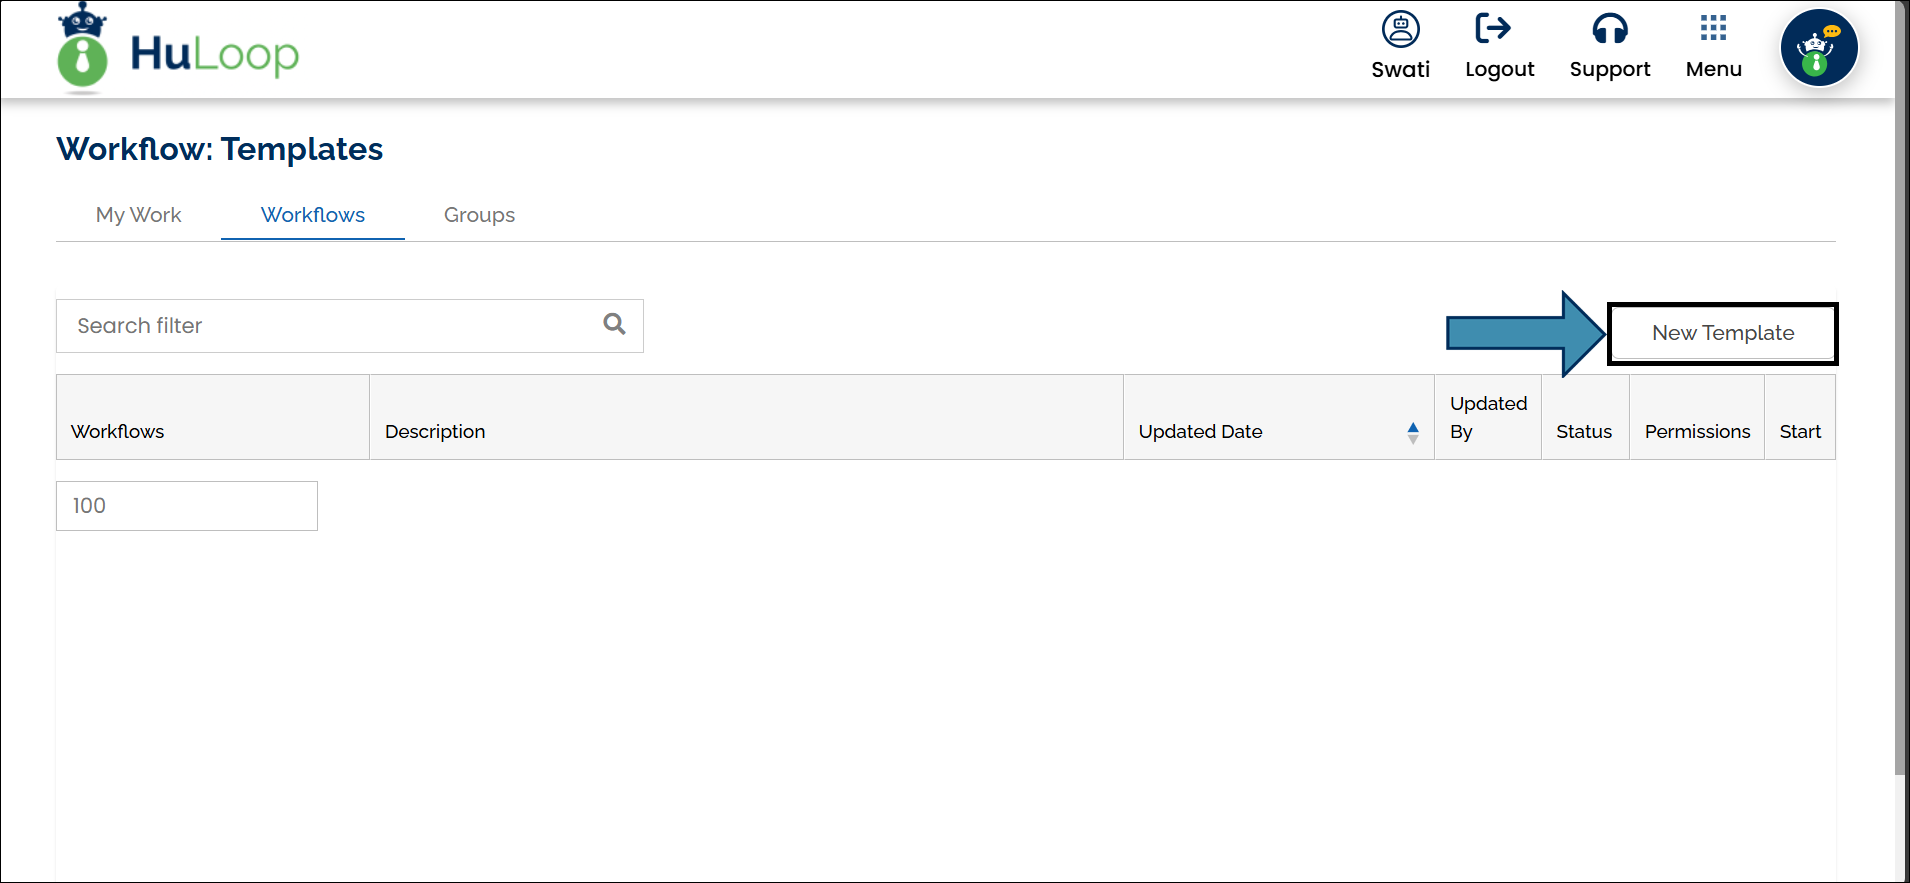
Step 1: Start a New Workflow
- Navigate to the Workflows page
- Click New Template to start creating a new workflow
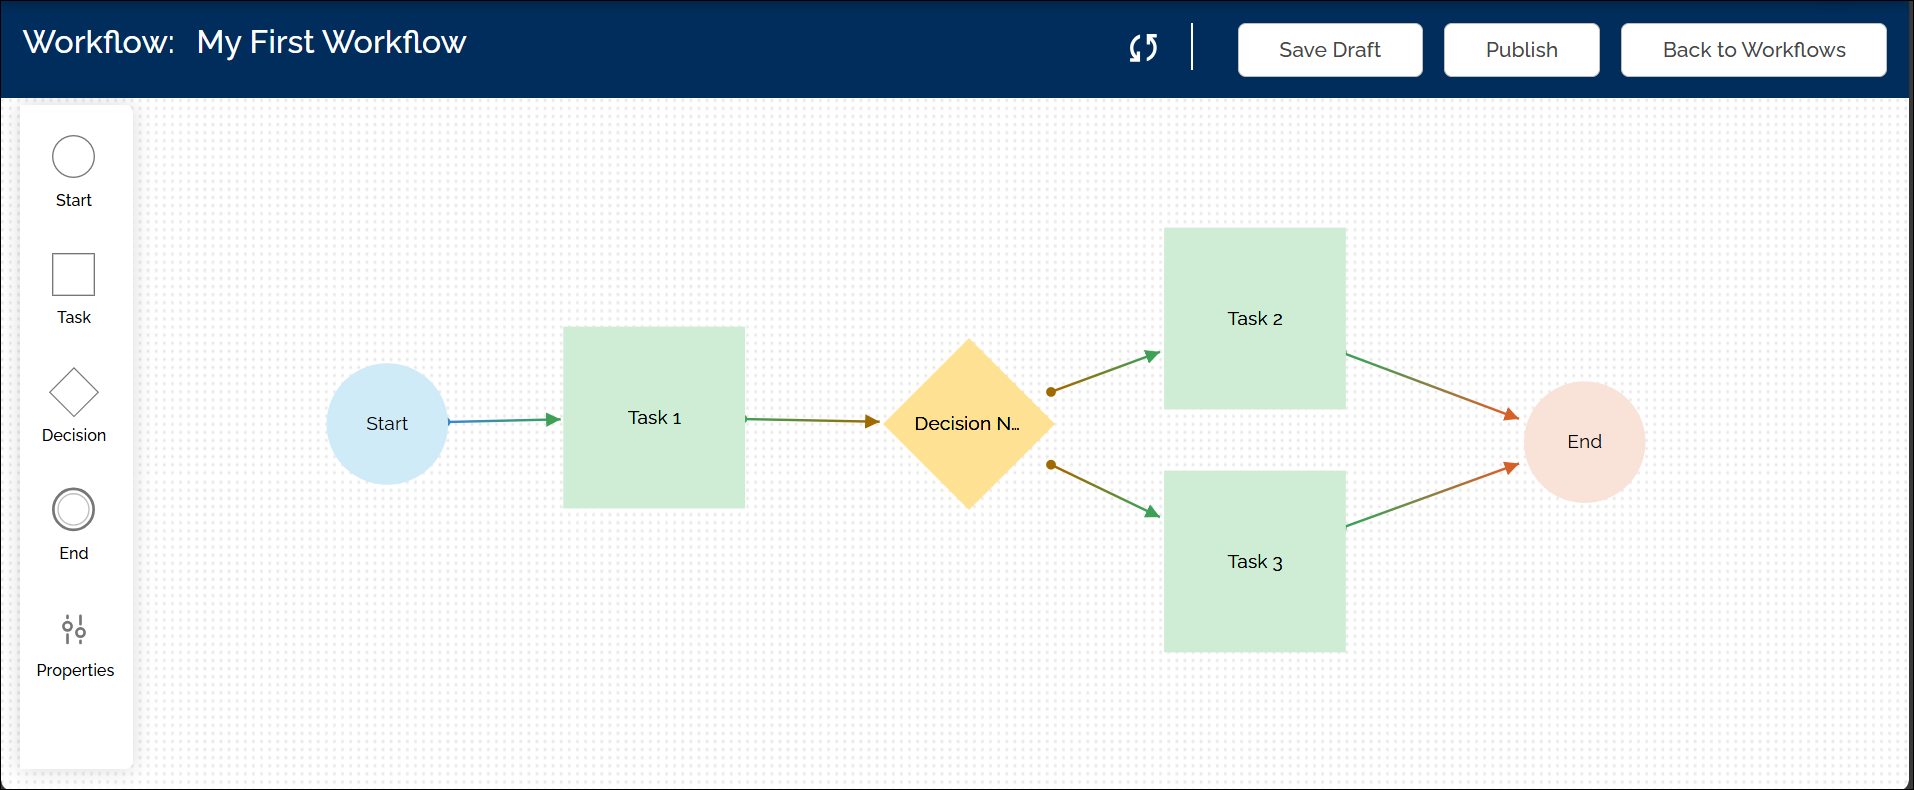
Step 2: Understanding the Workflow Canvas Layout
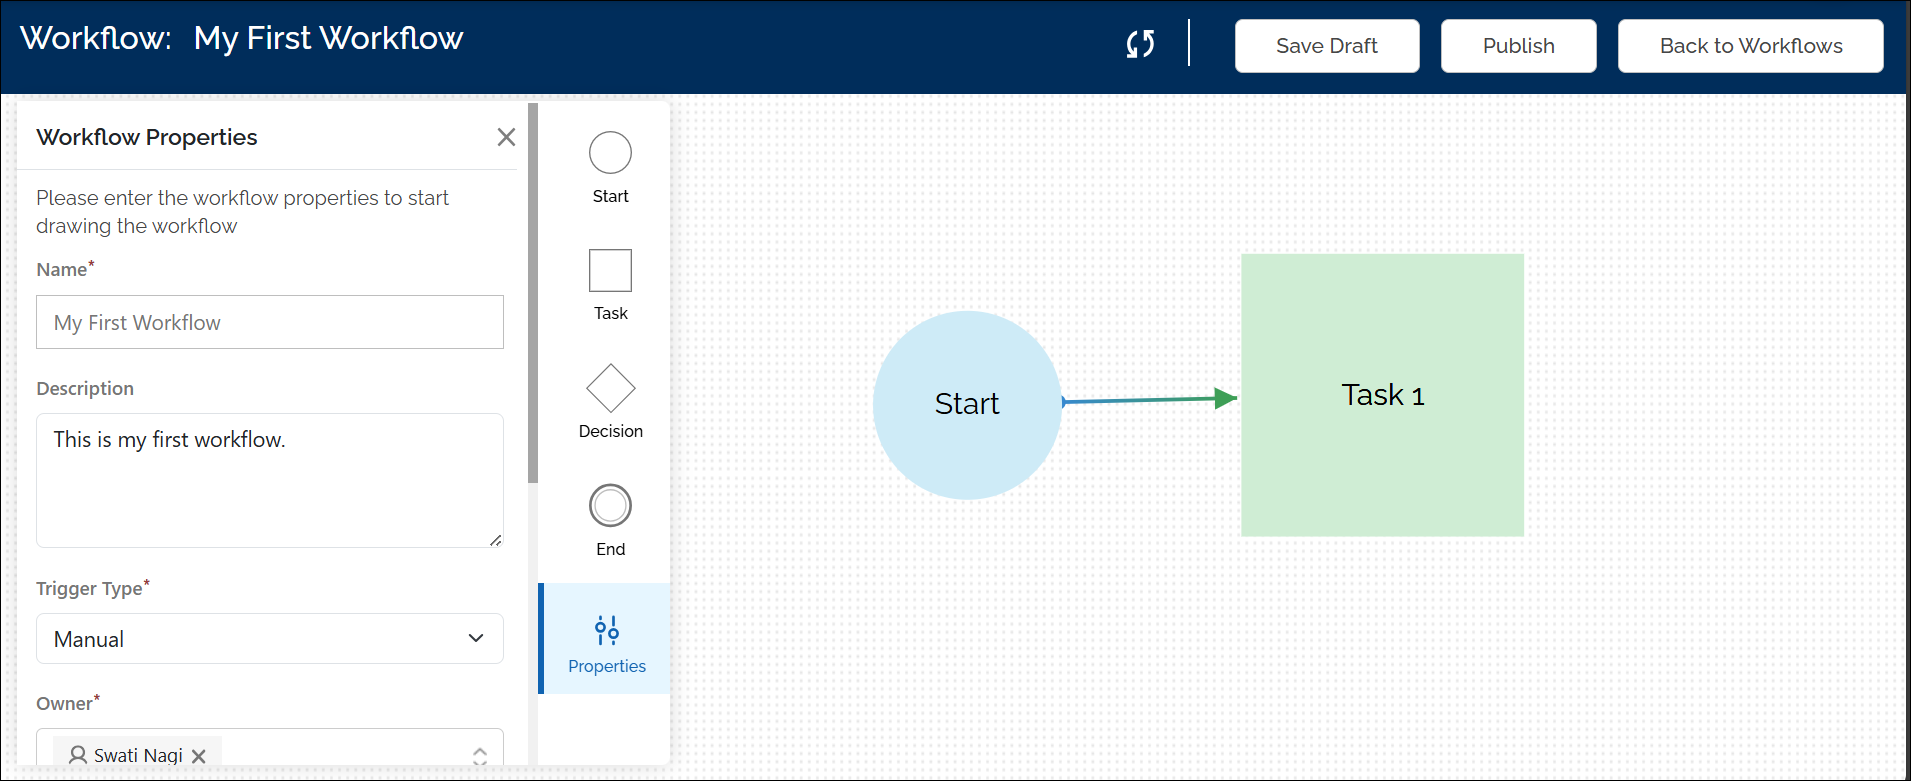
You will be navigated to the New Workflow page, where you’ll see:
- Canvas (center): This is your visual workspace for designing workflows using Start, Task, Decision, and End nodes.
- Workflow Properties panel (left): This panel is used to define foundational details for your workflow.
- Workflow Designer Canvas Controls: The Workflow Designer canvas includes quick-access icons that help you manage the workspace more efficiently.
- Properties icon: Use the Properties icon to expand or collapse the Workflow Properties panel. This allows you to quickly view or hide workflow-level settings while designing the workflow.
- Controls icon: Use the Controls icon to expand or collapse the Workflow Element Nodes panel. This helps you focus on the canvas by hiding the list of available nodes when it is not needed.
These controls make it easier to switch between configuration and design views without navigating away from the workflow canvas.
Note: A Start node appears by default on the canvas but remains inactive (faded) until you save the required workflow properties.
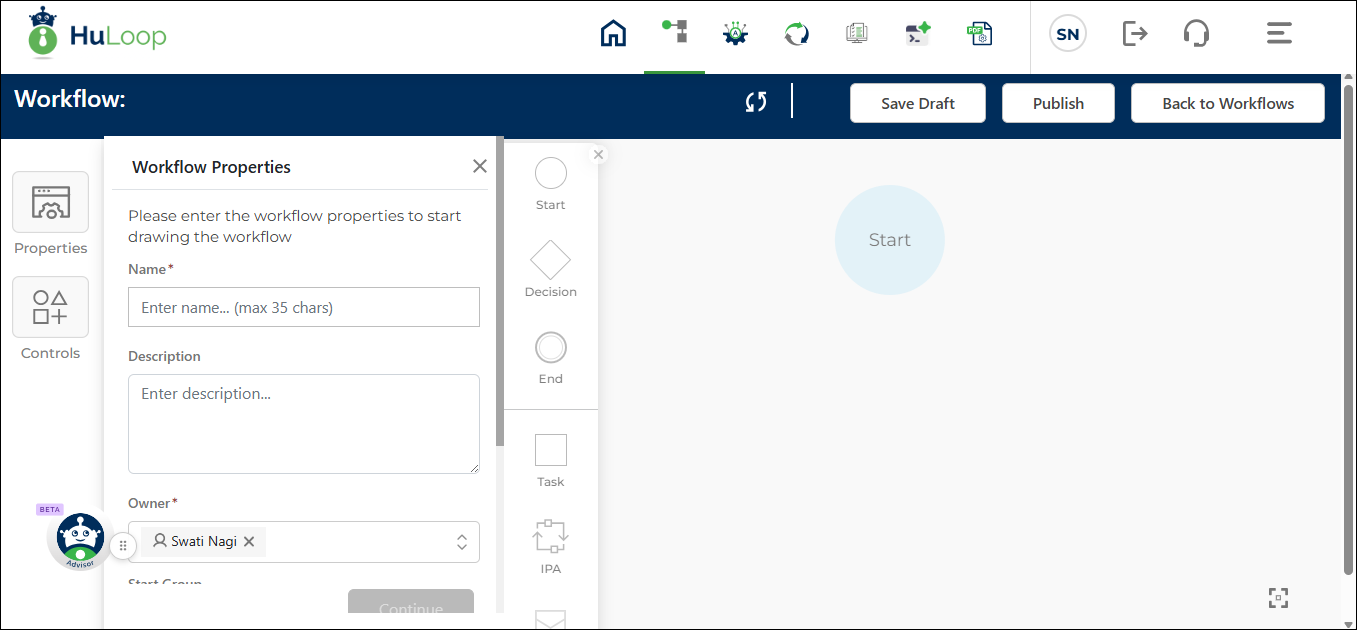
Step 3: Define Workflow Properties
In the Workflow Properties panel, fill in the following:
- Name: Enter a name for your workflow (maximum 35 characters).
- Description (optional): Provide a brief description of what the workflow does.
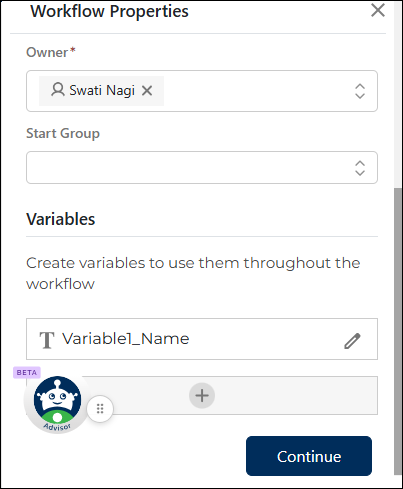
- Owner: This field is automatically populated with the name of the user creating the workflow (the Creator). The Creator can change the Owner by selecting a different user from the dropdown list, if needed.
- Start Group: The Start Group dropdown lets you control who can start a workflow instance. This dropdown displays all groups created in the system. When you select a group:
- Group members can start the workflow but do not have permissions to modify the workflow configuration.
- If no Start Group is selected, any user with permission to execute the workflow can start it.
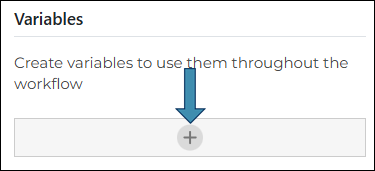
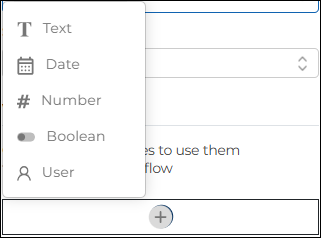
- Variables: You can define global workflow variables here, which are used to pass data between tasks and decisions. If preferred, you can also create global variables later while configuring individual tasks.
In addition to Text, Date, Number, and Boolean variables, workflows also support a User variable type.
A User variable allows you to capture user selection dynamically during workflow execution. This variable type is commonly used when tasks are assigned to a group and you want to control which group members should be excluded from task assignment at runtime.User variables are available:
- In the Workflow Properties panel
- In the Start Form
- In the Form Builder for field mapping
- In task assignment settings for user exclusion
- To add a global variable:
- Click the + icon.
- Choose a Variable Type (Text, Date, Number, Boolean).
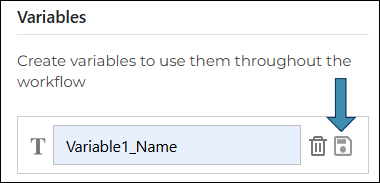
- Enter a Variable Name. You can use letters, numbers, underscores (_) and dashes (-) in variable names (e.g., Variable1_Name).
- Click the Save icon to add it to the list.
- Once all the required fields are filled, the Continue button becomes enabled. Click Continue to proceed to the canvas and begin configuring other workflow elements.
You can open or close the Workflow Properties pane any time by clicking the Properties icon.
Step 4: Configure the Start Node
After you click Continue, the Start node becomes active and its configuration pane opens on the right:
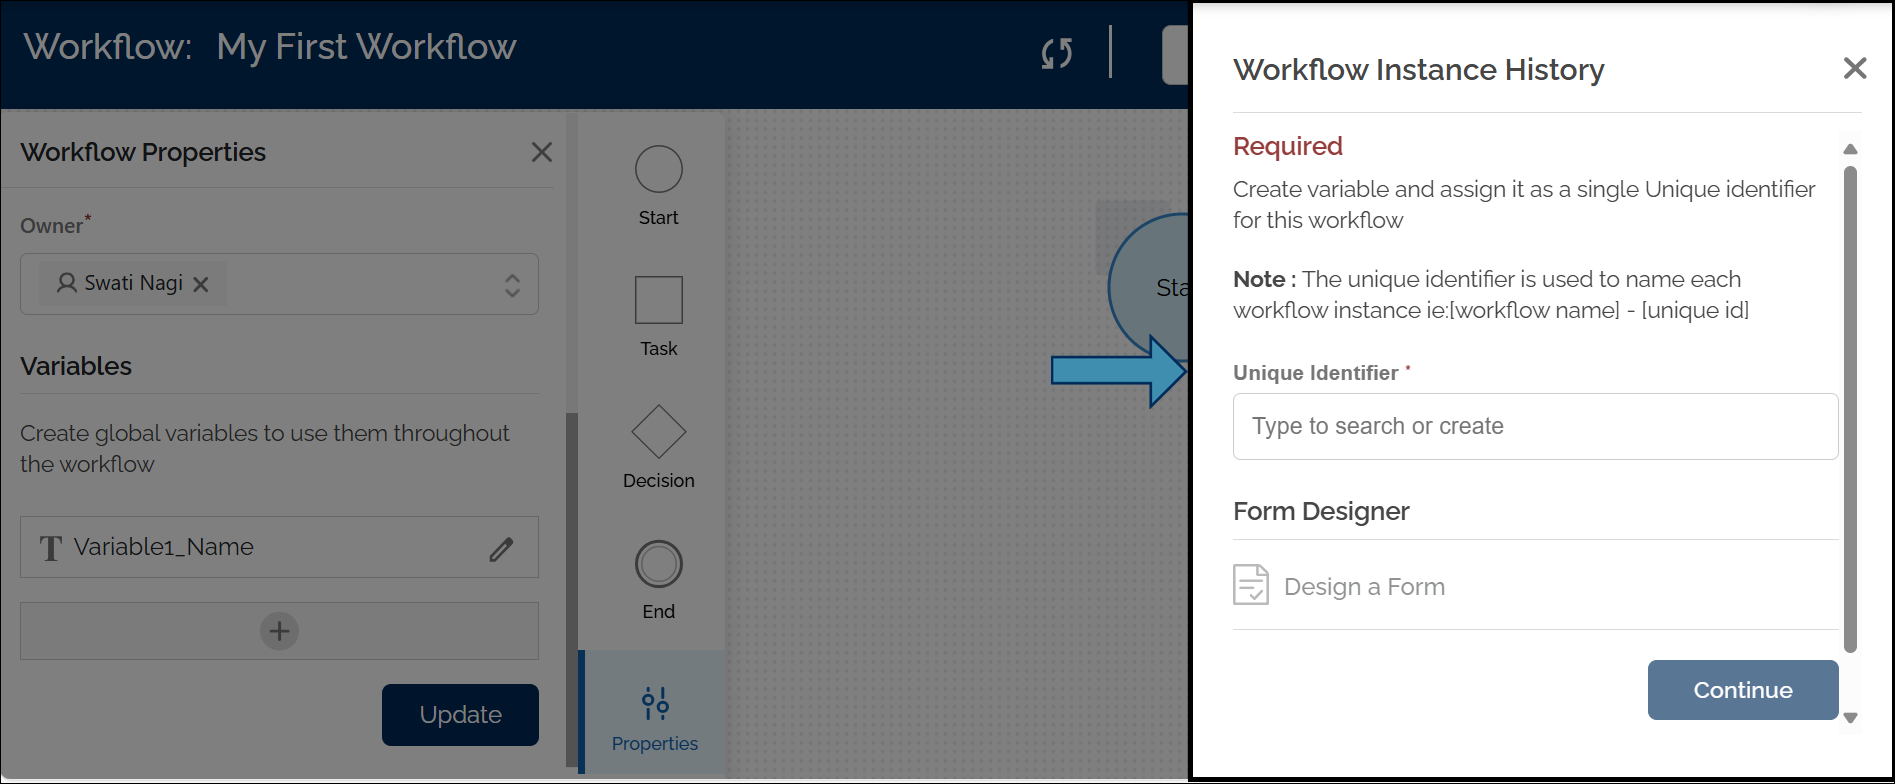
- Define the Start Variable (Unique Identifier). This helps distinguish individual workflow instances.
Note: If you’ve already defined global variables in the Workflow Properties panel, they will appear in the Unique Identifier dropdown once you click it.
You can choose one of these as your unique identifier.
However:
- The unique identifier becomes non-editable after selection
- It cannot be used in tasks, forms, or decision logic
- You can use a global variable as a unique identifier, but you cannot reuse the unique identifier as a general global variable
- This variable is visible throughout the workflow alongside other variables
Designing a Start Form (Optional)
After defining a Start Variable, you can optionally configure a Start Form using the Design a Form option. This form appears at the time of workflow initiation and is completed by the user who starts the workflow.
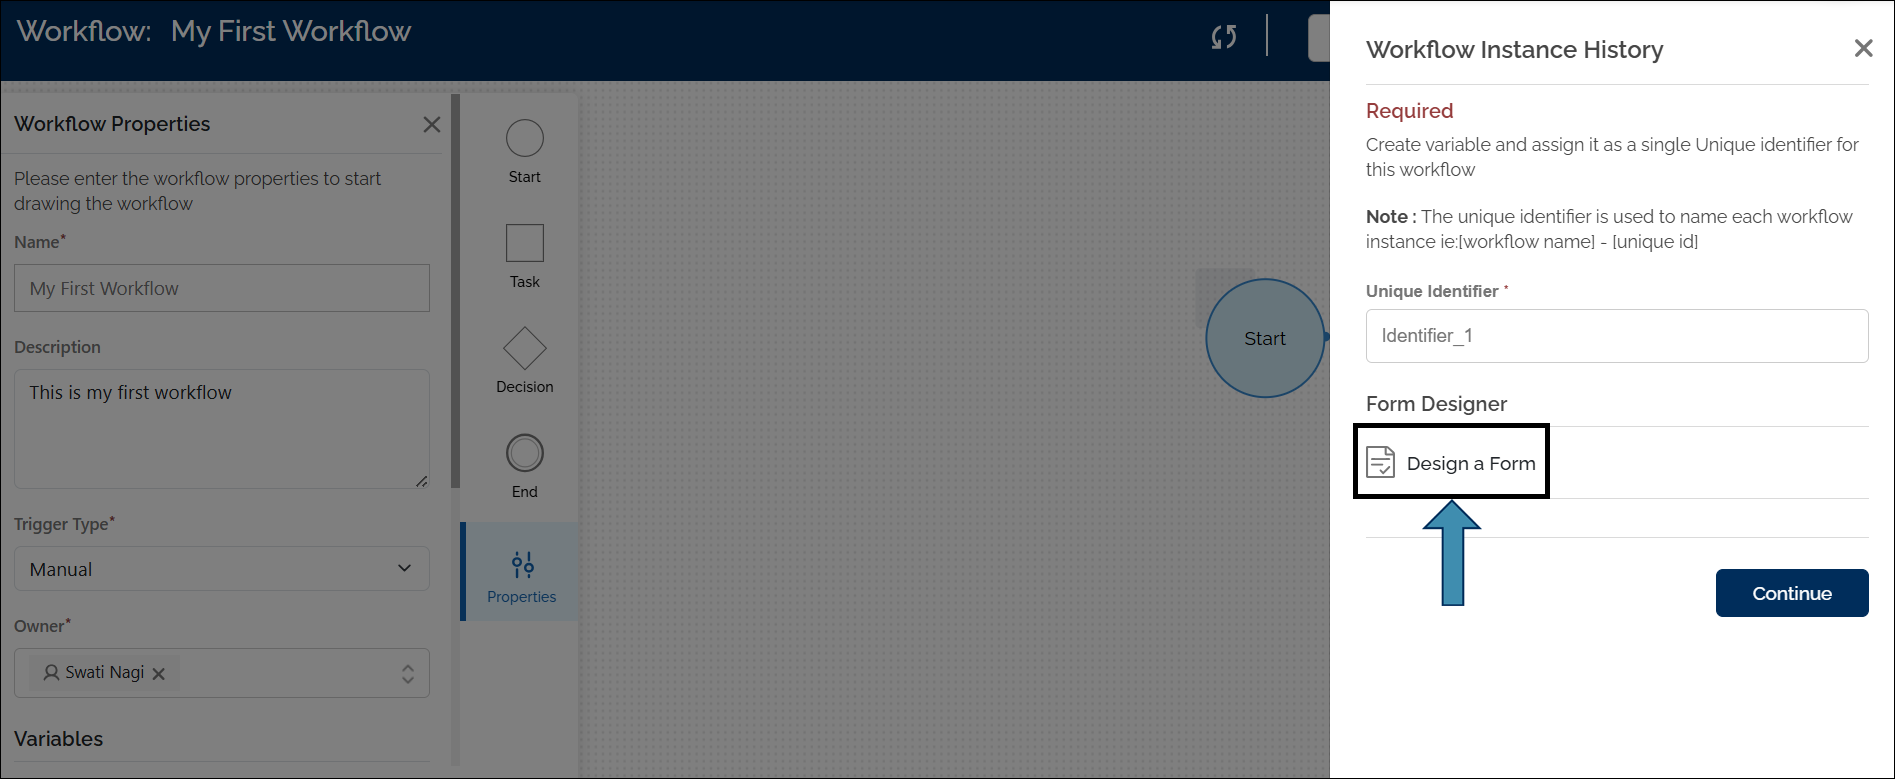
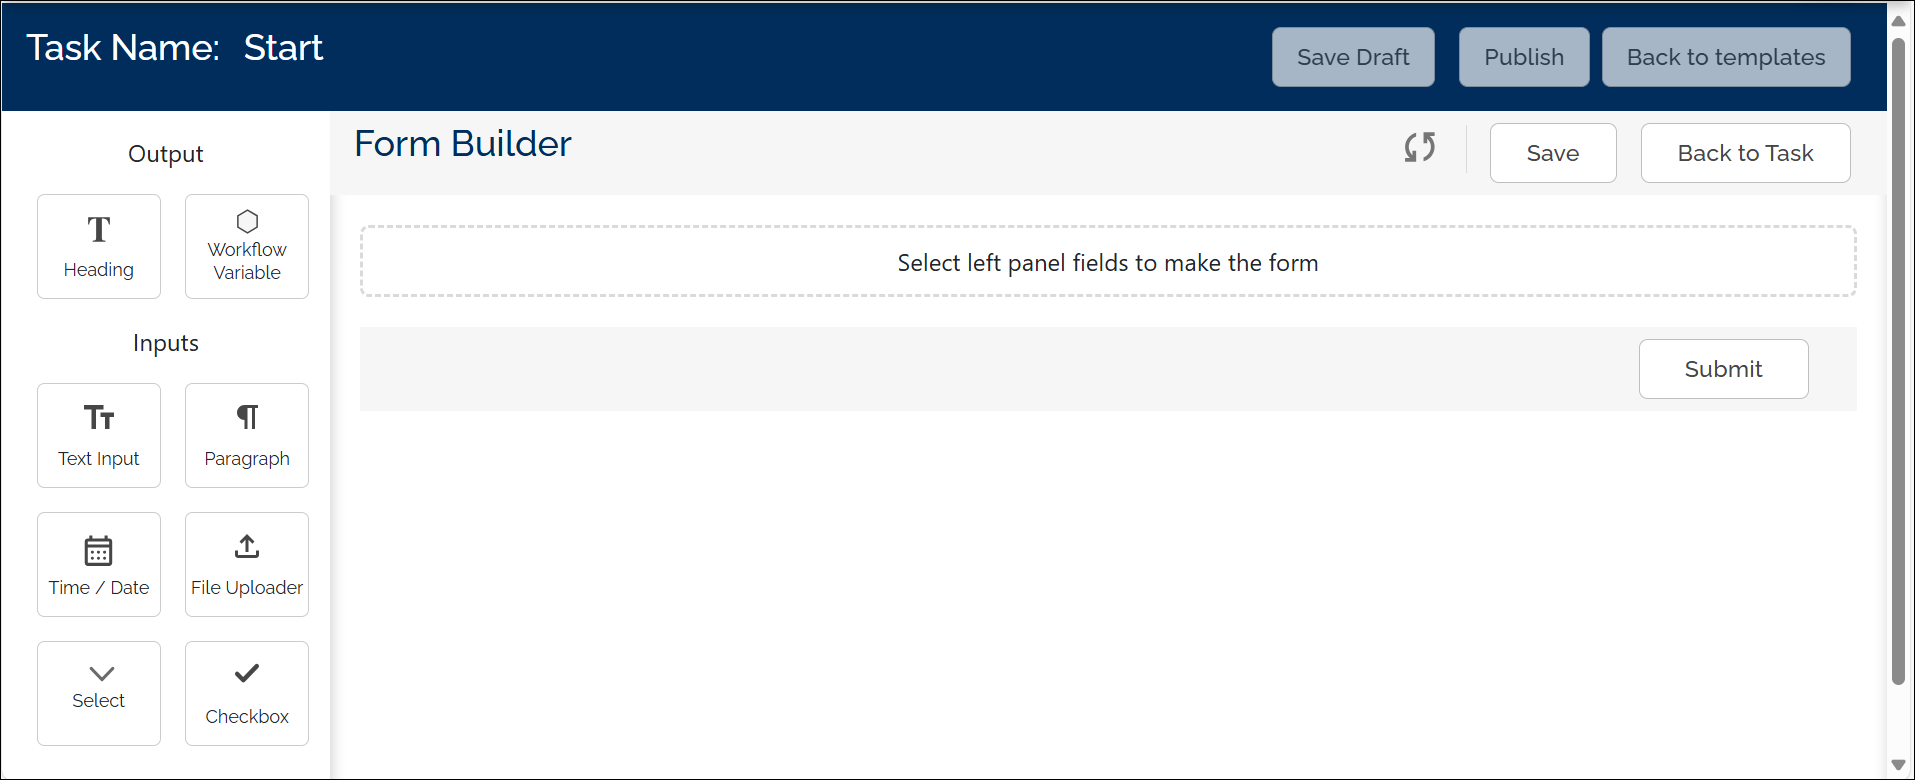
The Start Form uses Form Builder interface as task forms and supports the following input field types:
- Text Input
- Paragraph
- Date/Time Picker
- Select (Dropdown)
- Checkbox
- File Uploader (supports formats like PDF, DOC, and EXL)
- User
To learn more about how to design this form, see the Form Builder section.
- Once the Start Form is designed, click Back to Task to return to the workflow canvas and continue designing the flow.
- After defining the Unique Identifier and configuring the Start Form (optional), click Continue to confirm.
- You can now proceed to design your workflow using different elements on the canvas.
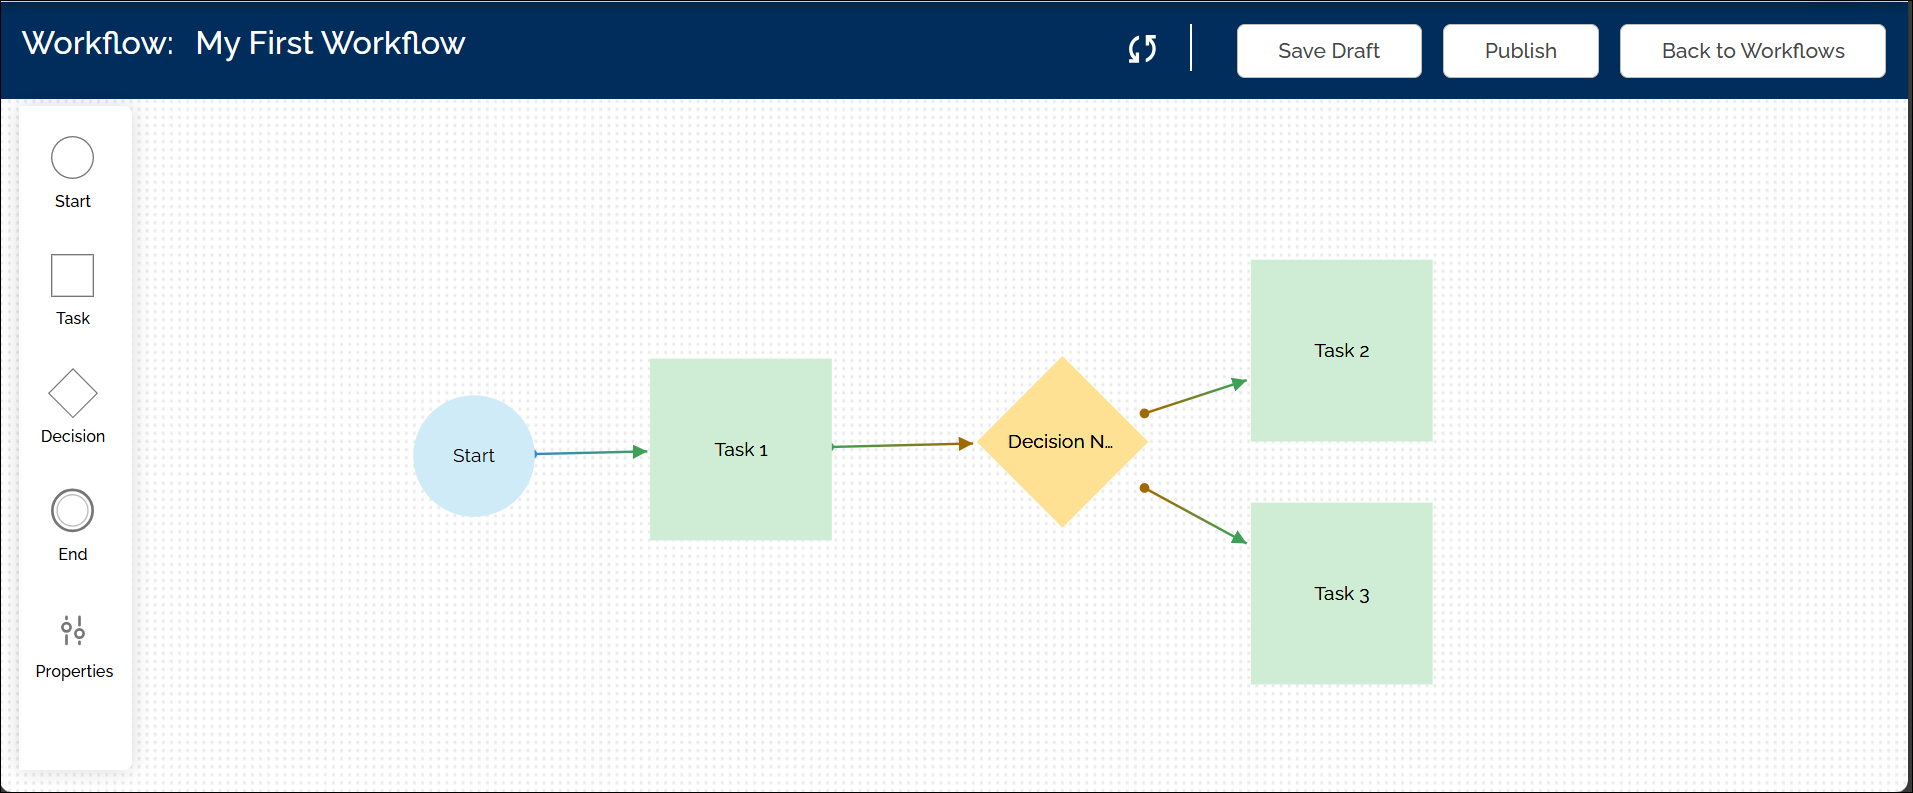
Step 5: Add Tasks and Decision Nodes
Once you have configured the Start node, you can begin designing the logic of your workflow by adding Task and Decision elements to the canvas.
Adding Task Elements
- From the left toolbar on the canvas, drag a Task element onto the canvas.
- When placed, the task configuration pane opens on the right:
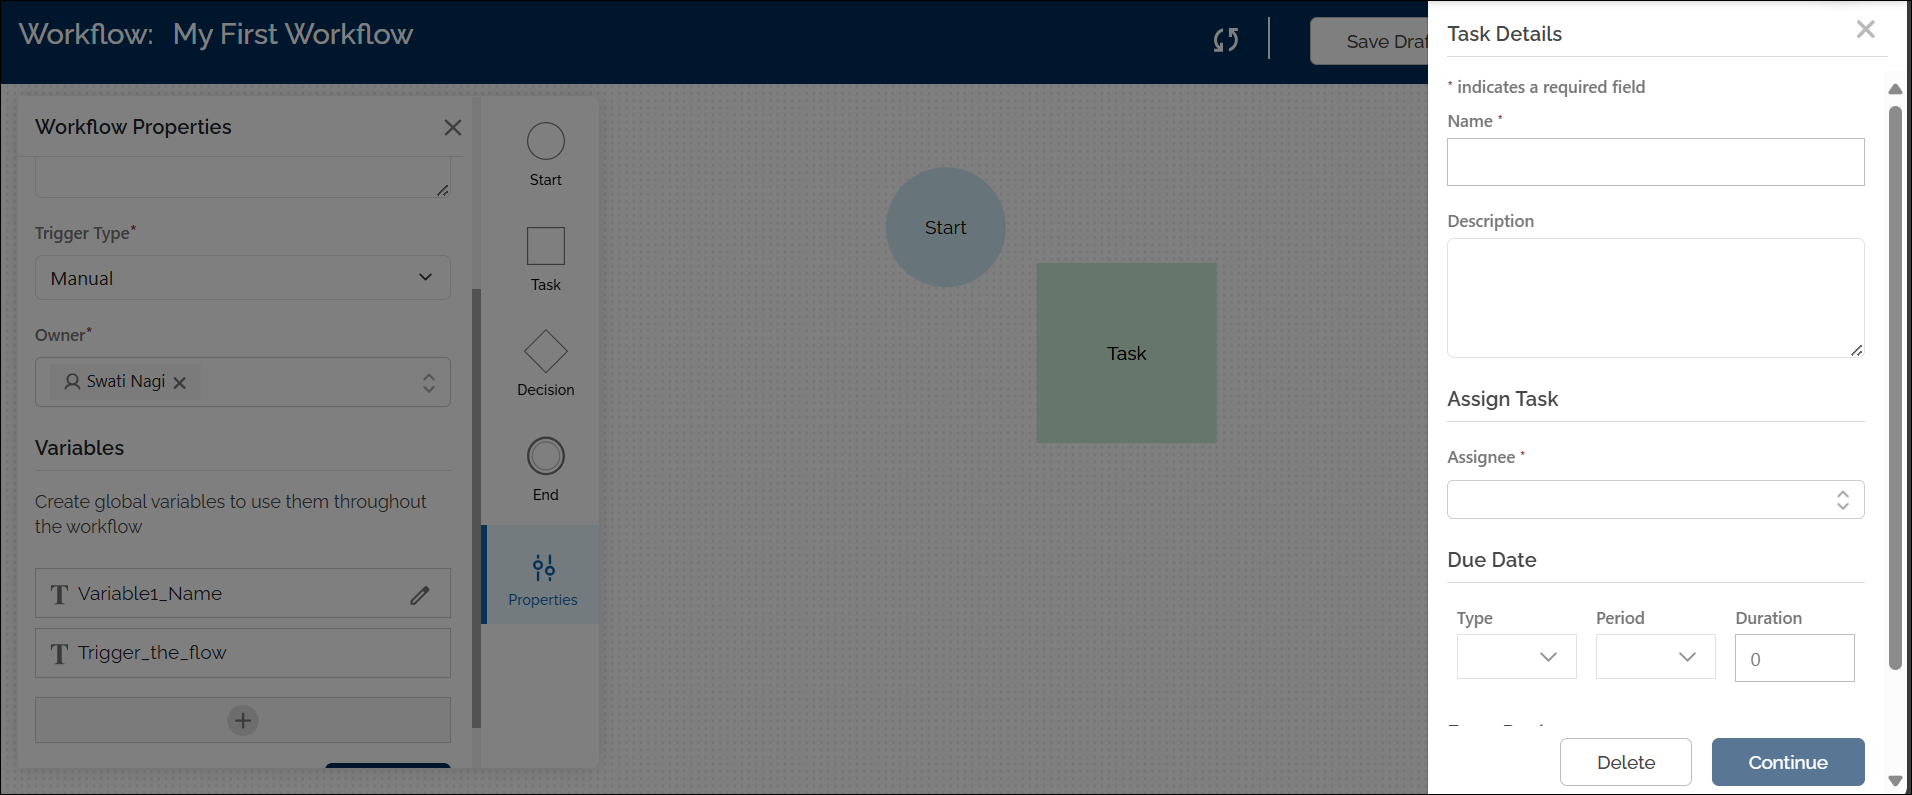
Configure Task Details:
- Name: Enter a name for the task.
- Description (optional): Add a short description of the task.
- Assignee: Select an individual user or group from the dropdown list. Click here to know about groups: Learn more about groups.
Group Exclusion
When a task is assigned to a group, a Group Exclusion section becomes available in the task properties panel. This section allows you to exclude specific users from being assigned the task during workflow execution.
You can choose from the following options:- Previous Assignee: Excludes the user who was assigned the immediately preceding task in the workflow.
- Any Previous Assignee: Excludes any users who have been assigned to earlier tasks in the same workflow.
- User Variable: Excludes users dynamically based on a User variable defined in the workflow.
The users to be excluded are determined by selections made in the Start Form or Form Builder during execution. These exclusions are applied automatically when the workflow runs.
- Due Date (optional):
- Type: Choose Business or Normal
- Period: Choose Days, Weeks, or Hours
- Duration: Enter the number of units for the due date
Click Design a Form to open the Form Builder.
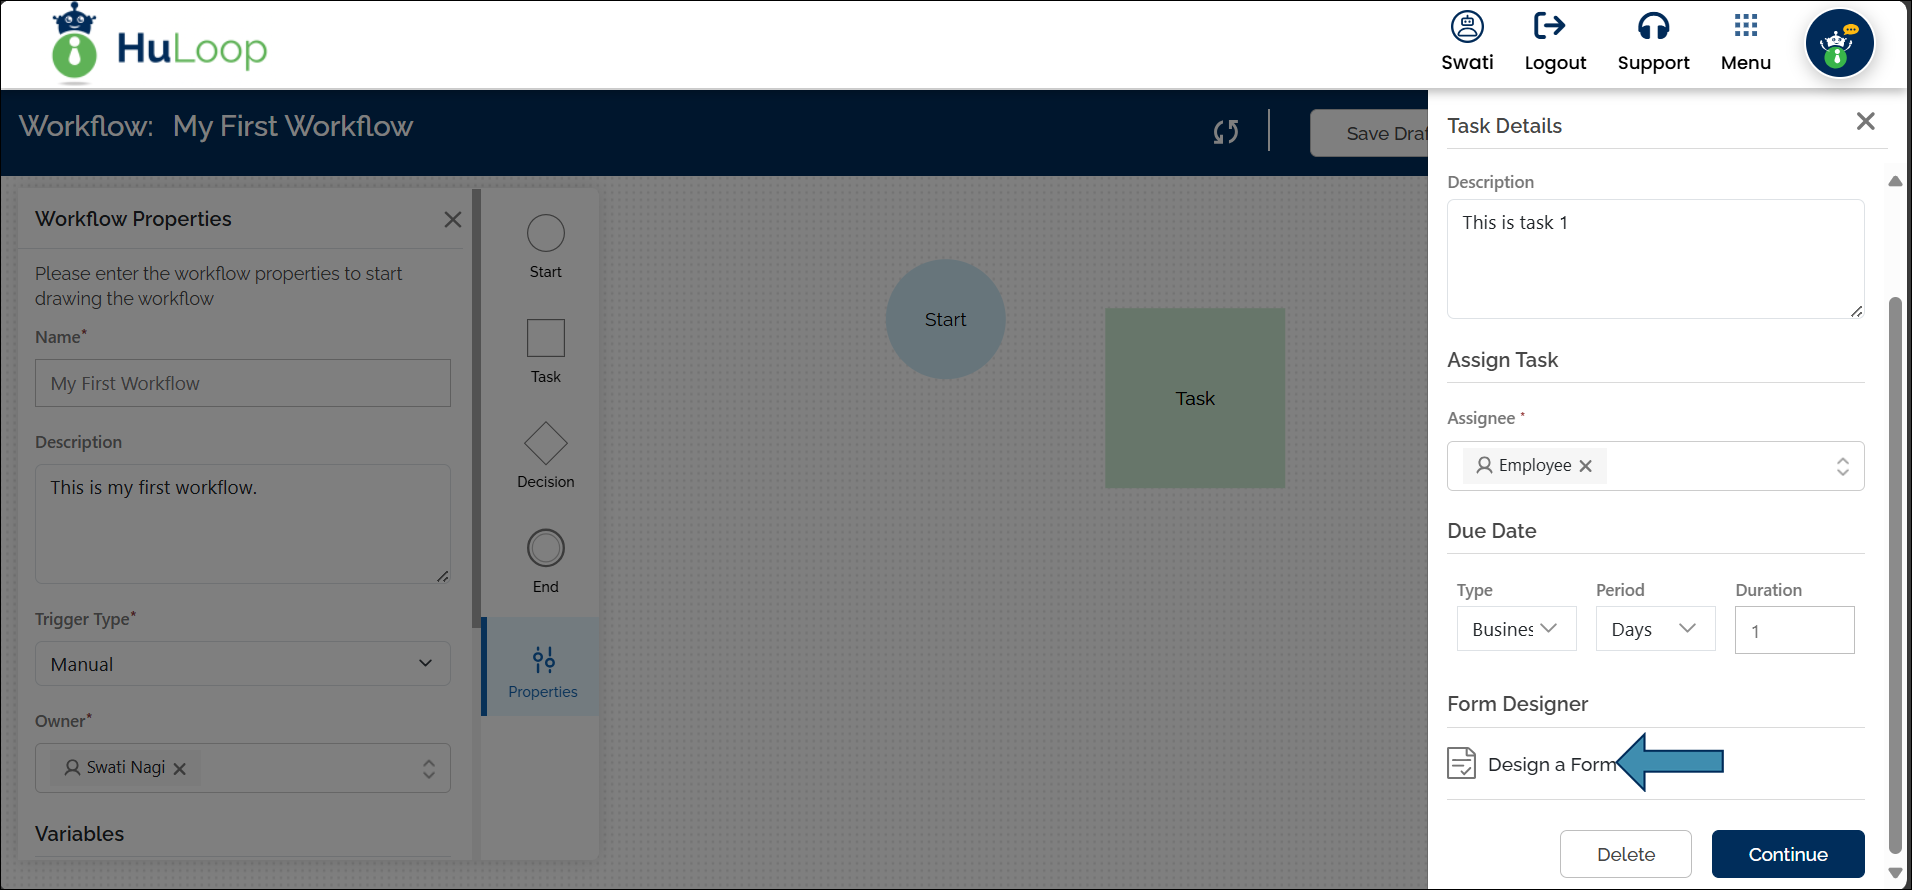
Design a Form for the Task:
You will be redirected to the Form Builder page, where you can design the form that will appear during task execution. Here you configure task fields the assignee will see when completing the task. For detailed steps on form creation, see Form Builder.
You can change the position of the elements by dragging them to your desired location on the workflow canvas.
Adding Decision Nodes
Decision nodes allow you to define conditional logic that controls the path of a workflow based on the value entered by a user in a form field, which is stored in a workflow variable.
To add a Decision Node:
- From the left toolbar on the canvas, drag a Decision element onto the canvas.
- When placed, the Decision Details panel opens on the right.

Configure the Decision Node:
- Name: Enter a name that describes the purpose of this decision point.
- Description (optional): Provide a brief explanation to help users understand the context.
- Decision Variable: Select a variable that will be evaluated to determine the outcome of the decision. This variable must already be defined in the workflow.
- Click Continue.

Define Decision Logic
After adding a Decision node, define the task that should follow based on the decision logic. To configure decision logic:
Connect the Decision Node to the tasks that should follow:
Drag a connector from the Decision node to the tasks that should be performed based on the outcome of the decision.
Open the Decision Panel:
Double-click the title of the Decision node to open the configuration panel.
The Decision panel automatically opens when you first connect the node to a task. However, you can open it anytime by double-clicking the node’s title on the canvas.
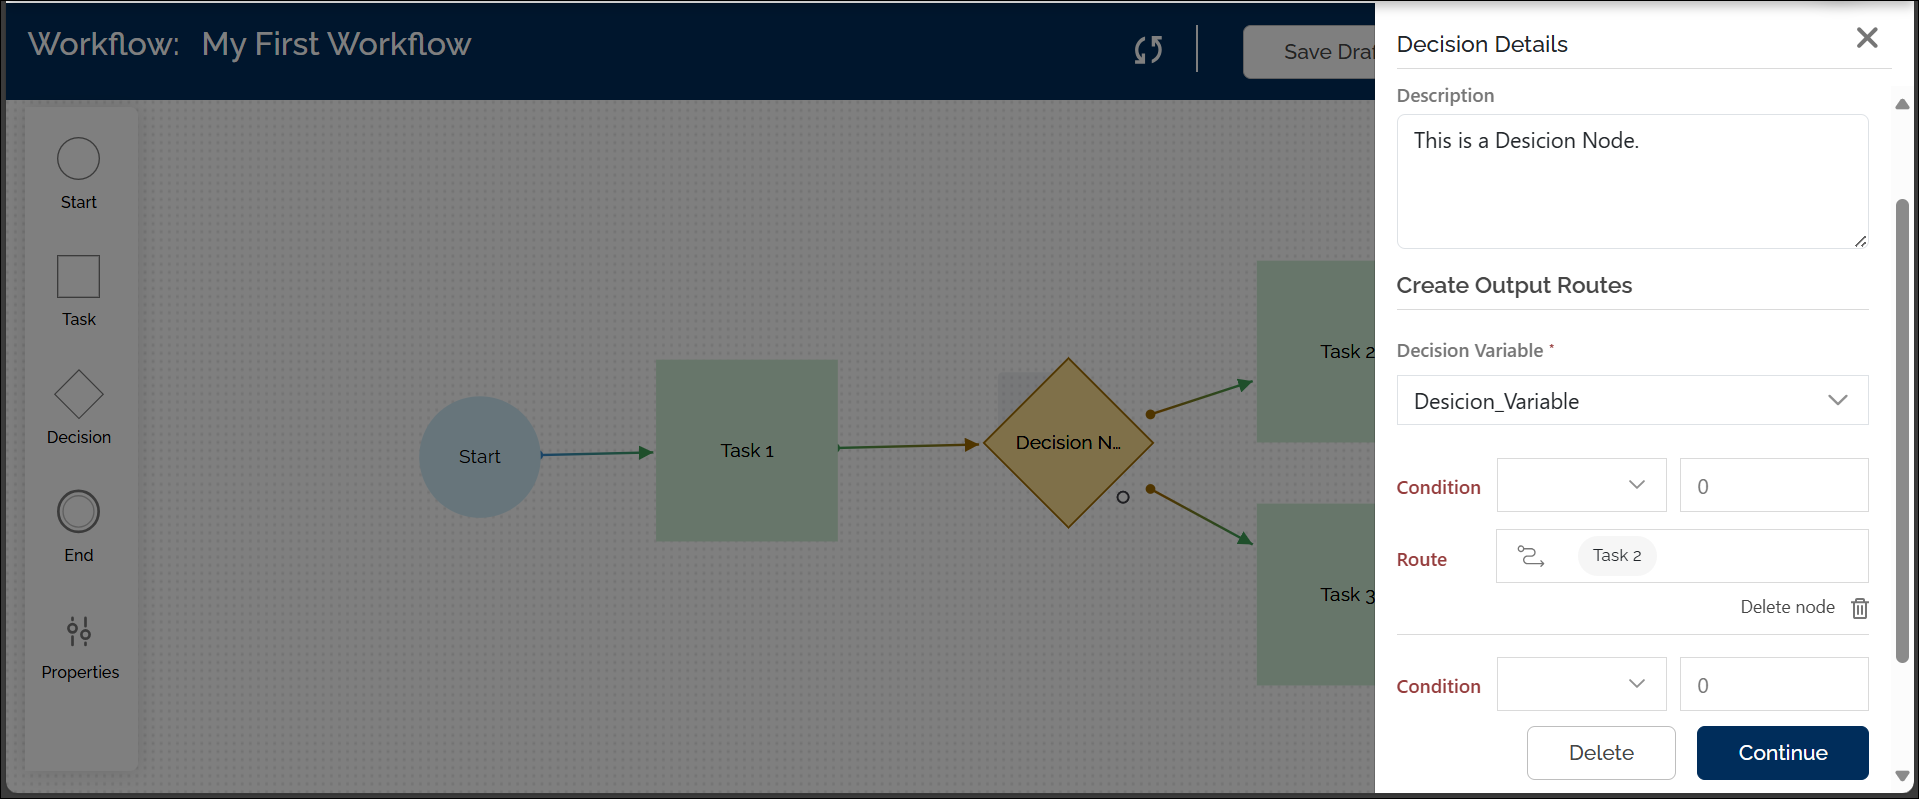
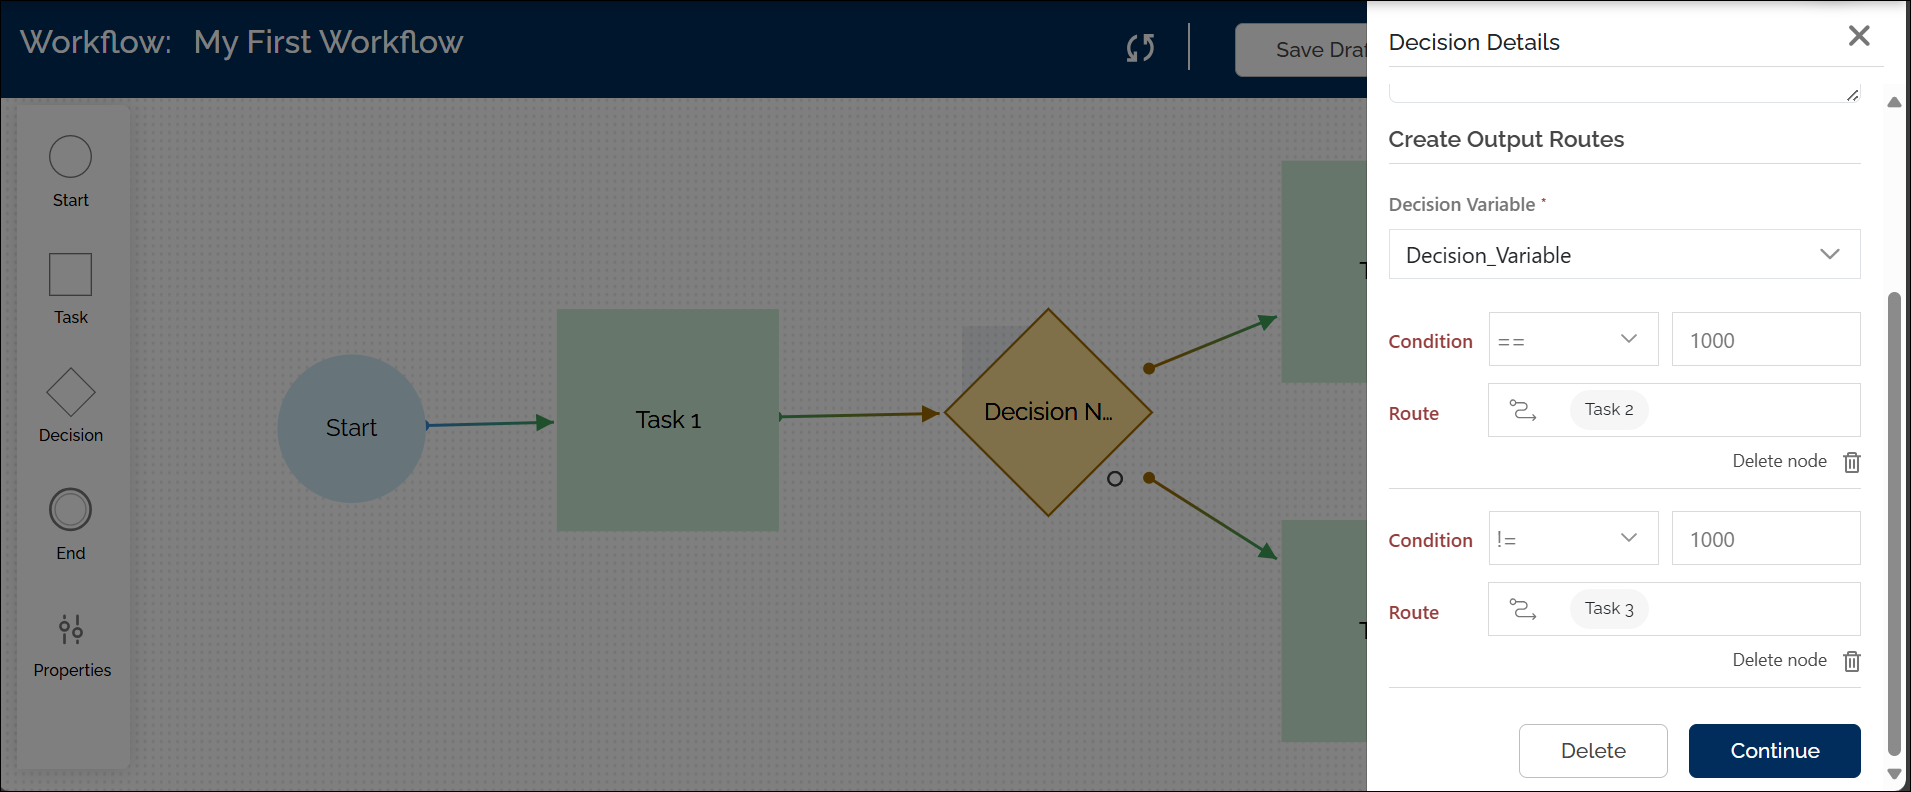
Set the Routing Conditions
In the panel:
- Condition: Set the logic so that the workflow can determine which task it should proceed to based on the value of a specific variable.
For example, if the value of a field is equal to 1000, the workflow will follow one path; otherwise, it will follow the alternative path.- Operand: Select the comparison operator from the drop-down list, such as:
- Greater than
- Less than
- Equal to
- Greater than or equal to
- Not equal to
- Operand: Select the comparison operator from the drop-down list, such as:
The available operands in the Condition dropdown depend on the type of variable you’re using:
- Text: Only shows Equal To and Not Equal To
- Number and Date: Show all comparison options like Greater Than, Less Than, and more
- Boolean: Offers Equal To and Not Equal To for values like True or False
- Value: Enter the value to compare against, such as 1000 in the example above.
- Click Continue to save the routing logic.
Step 6: Add the End Node
The End node marks the point where the workflow stops. Every workflow must include one End node to indicate that all defined tasks and paths have been completed.
To add the End Node:
- From the left panel, drag the End node onto the canvas.
- Connect all final tasks in the workflow to this single End node.