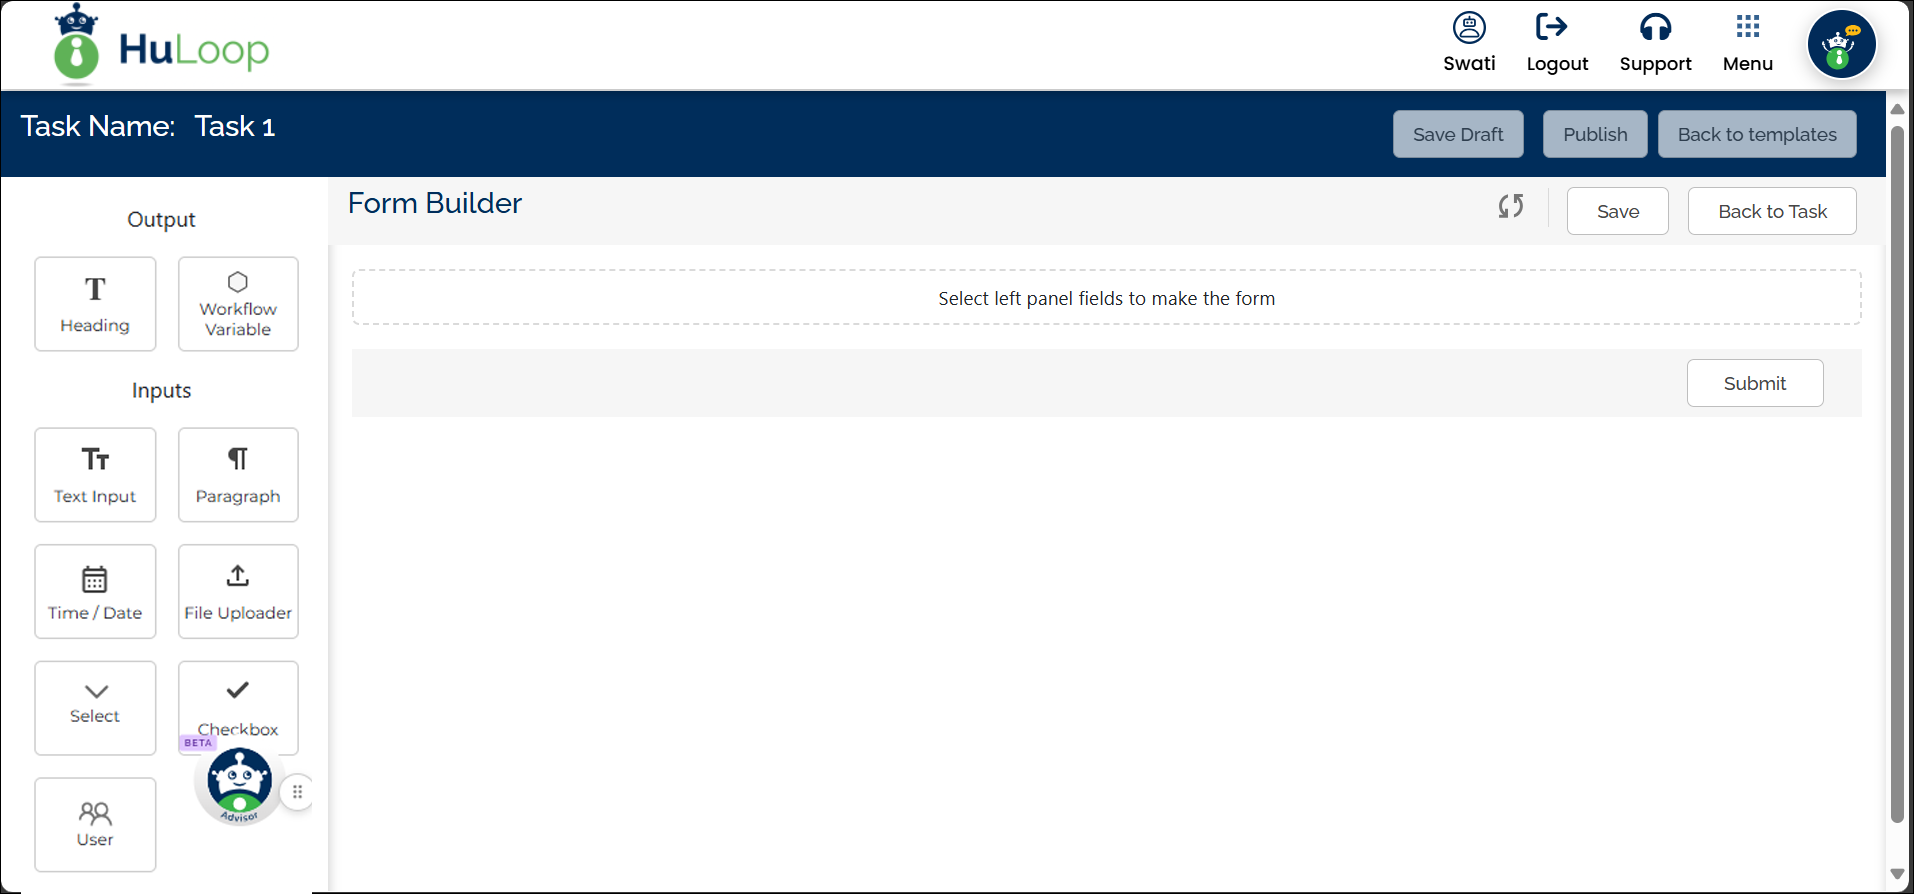
Using Form Builder
The Form Builder in HuLoop helps you create forms that collect information from users during a workflow. These forms are used in the Start Node or in any Task Node, and they enable you to pass data between different parts of your automation.
The form builder is designed for ease of use, with drag-and-drop elements and automatic variable mapping based on the selected field type.
The form creation process involves the following steps:
- Understanding Form Field Types
- Add and Configure Form Fields
- Creating and Mapping Workflow Variables in Form Builder
Understanding Form Field Types
Form fields in HuLoop are grouped into two categories: Output fields (read-only) and Input fields (user-provided).
Output Fields:
- Heading
Adds a section title or label to help structure the form. - Workflow Variable
Displays a read-only value from a global variable already defined in the workflow. This is useful when you want to show data captured earlier in the workflow, such as a name, ID, or status, etc., without allowing it to be changed.
Input Fields:
- Text Input
Used for entering short text, numbers, or email addresses. - Paragraph
Suitable for longer text like comments, notes, or justifications. - Date/Time Picker
Allows users to select a date or time value. - Select (Dropdown)
Suitable for single-choice lists. Lets users choose from predefined options. - Checkbox
Ideal for binary choices like Yes/No or True/False. - File Uploader
Allows attaching files such as PDF, Word, Excel, or image files etc. - User
Allows users to be selected dynamically at runtime. This field is commonly used with User workflow variables, especially for controlling group-based task assignments and exclusions.
How to Add and Configure Form Fields
- To add a field, click on the desired field type from the left panel.
- A configuration pane will open on the right side.
- In the right pane, configure different field types to match the workflow requirements, as explained below:
Output Fields:
- Heading: Enter the heading text.
- Workflow Variable (Optional): Enter a Label (mandatory). Then, use the Maps to Workflow Variable dropdown to select an existing global variable whose value you want to display in the form. When used this way, the field appears as read-only at runtime — the value is shown to the user but cannot be modified.
Input Fields:
- Text Input: Enter a Label name (mandatory), choose an Input Type (Text/Email/Number), specify a Validation Message, and map the field to a workflow variable using the drop-down field.
To make a field mandatory, enable the Required toggle button. This ensures users must enter a value before submitting the form.
- Paragraph: Same fields as a Text Input field.
- Time/Date: Same fields as a Text Input field.
- File Uploader: Same as a Text Input, but lets users upload files. You can specify the types of acceptable files, such as PDF, DOC (Word), and EXL (Excel).
- Select (Drop-down): Same fields as a Text Input Additionally, you can define options by adding multiple values using the plus icon.
- Checkbox: Same fields as a Text Input field.
- Checkbox: Same fields as a Text Input field.
- User: When configuring a Start Form or Task Form, you can map a form field to a User workflow variable. When a User variable is mapped:
- The form field displays a list of users at runtime
- The list is populated based on the group selected as the task assignee
- The selected user or users are stored in the workflow variable
Creating and Mapping Workflow Variables in Form Builder
Every input and output field (except the Heading field) must be mapped to a workflow variable. This ensures that the values entered or displayed in the form are properly stored and used throughout the workflow.
To map a form field to a workflow variable:
- Use the Maps to Workflow Variable dropdown to link a form field to a global variable.
- You can either:
- Select an existing global variable from the “Map to Workflow Variable” dropdown.
- This dropdown displays only the variable types compatible with the selected field type. This helps ensure that the right variable options are available when configuring each form field. For example, if you choose a Date field, only Date-type variables will appear in the dropdown.
- Select an existing global variable from the “Map to Workflow Variable” dropdown.
Table 1. Mapping Form Fields to Workflow Variables
| Field Type | Variable Type |
| Text (Text/Email) | Text |
| Text (Number) | Number |
| Paragraph | Text |
| Time/Date | Date |
| File Uploader | Text |
| Select | Text |
| Checkbox | Boolean |
All variables, both previously defined and newly created, will be visible in the dropdown list, including the Unique Identifier defined earlier in the Start Node. You can, if required, edit the existing global variables using the pen-like icon against the global variable name you want to edit.
- Create a new variable and map it to the field. To create a new variable:
- Click the plus
 icon.
icon. - The available Variable Type will be auto-filtered based on the selected field type. For example, for text fields, only Text-type variables will appear.
- Enter a Variable Name using only letters, numbers, underscores (_), or dashes (-).
- Click the Save icon to add the variable.
- Click the plus
- Create a new variable and map it to the field. To create a new variable:
- After configuring each field, click Continue button.
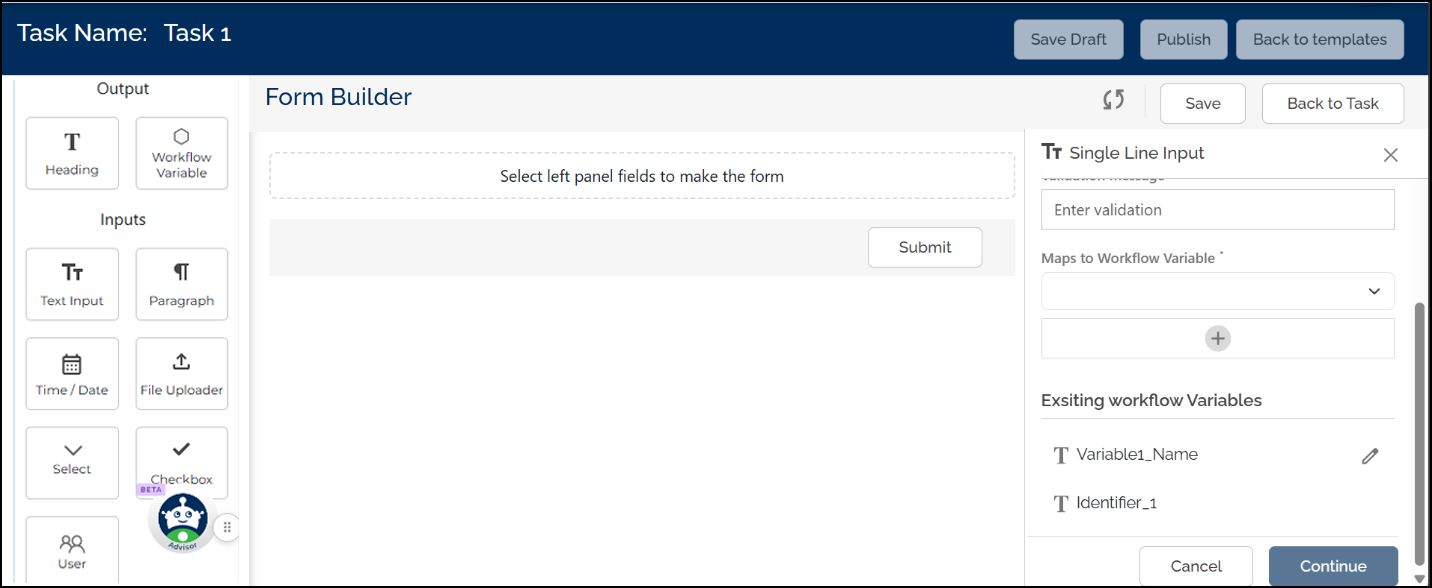
Once a variable is created in the form builder, it appears selected by default in the “Map to Workflow Variable” dropdown. You can modify the selection as needed by choosing a different variable from the list.
- After designing the form, click Back to Task to return to the canvas.